Friday, February 29, 2008

Marbled Butter Cake


The Greeks did it in public places. The Romans did it with their politicians. The Italians… they did it a lot, with everyone, and they were very good at it. Now, we mostly do it in kitchens and bathrooms, and yesterday, I did it for the first time with a cake. I’m talking about marbling, of course – what were you thinking?


Ever since I saw Ivonne's Marbled Cake, I had dreams and visions of this marbled beauty. It nagged and nagged at me until I was forced (forced, I tell you!) to submit to my inner voice and attempt this cake. Even though marbling cakes had me quaking in my boots for years (it's not a reasonable phobia, I know), this cake looked so full of softness and sweetness and luscious curves, I had to see for myself what this marbling thing was all about.


Since this was an adventurous recipe for me to attempt, feeling footloose and fancy-free, I decided to forego my usual procedure of measuring out all the ingredients beforehand. I wanted to be reckless and throw caution to the wind (well, as much as is possible while still standing in your own kitchen, anyway). Hm... I'll spare you the suspense and just tell you right now that this strategy didn't work out so well (note to self: leave spontaneity for -- ehem -- other pursuits). When I had creamed the butter and cracked the eggs into it, and it was time to add flour and milk... I found out that I didn't have milk. Not a single drop. Nor cream, nor sour cream, nor plain yogurt. I only had (*sob*) a little carton of Yoplait vanilla yogurt, which I only buy for my husband, as I think it's kind of icky. I tell you guys, it was with a heavy heart that I emptied the yogurt carton into my future cake.


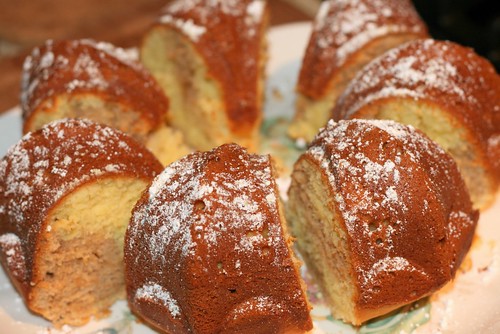
Just as my pulse was coming back to normal, I discovered another disaster lurking in the shadows. I was out of cocoa powder! And... I was out of chocolate. The only thing that was remotely chocolaty in my pantry was a small bag of milk chocolate powder for hot chocolate. How did it get there? It's a mystery. I surrendered to fate and made the cake with it. And you know what? It still turned out so fantastic that a girl at work told me I was first in line to make her wedding cake. I think this is more of a testament to how great the recipe is than to my own technique, but I was flattered. Come on, who wouldn't have been? The recipe (the way I made it) is after the jump, but I think you should use milk instead of the yogurt, as is in the original recipe linked above. And real cocoa powder (this should go without saying - the milk chocolate stuff was weak, like a too-nice boyfriend that would make a good husband for *somebody else*). Oh, and my marbling didn't turn out as terribly as I'd anticipated, so yay. :)


Marbled Butter Cake
(from Cream Puffs in Venice)

3/4 cup (1.5 sticks) unsalted butter, room temperature
1 cup granulated sugar
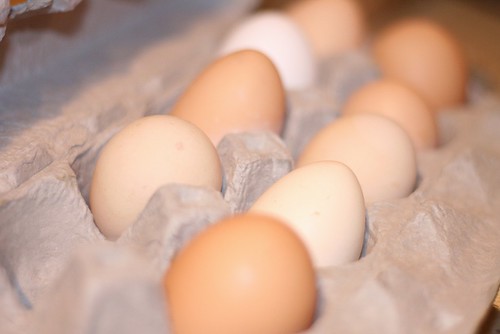
3 large eggs
1 tsp. vanilla extract
1/3 cup yogurt (please use whole milk instead)
2 cups all-purpose flour
1 tsp. baking powder
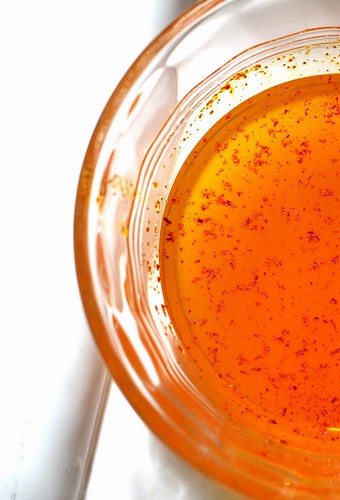
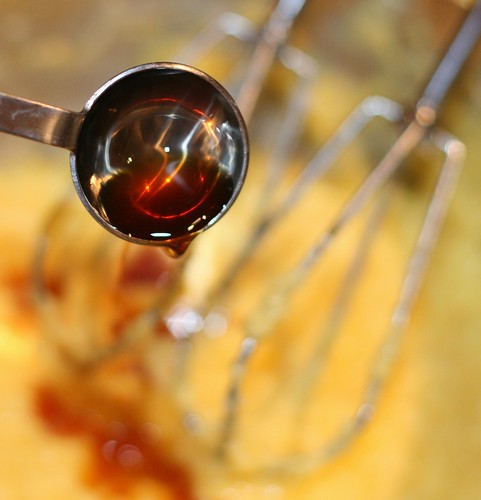
3 tbsp. cocoa powder
confectioner's sugar for decoration

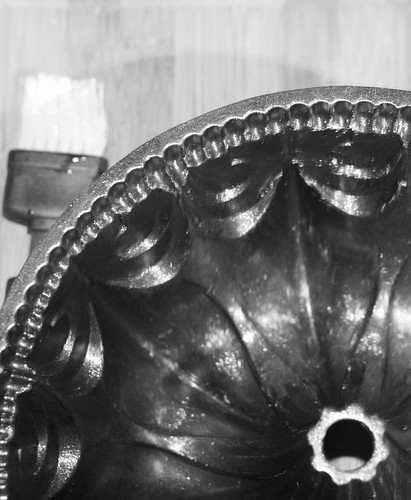
Preheat the oven to 350F. Butter and flour a standard-sized bundt cake pan.

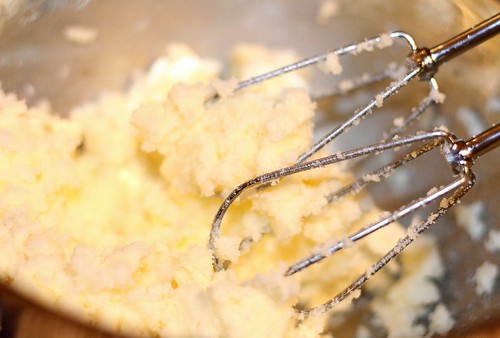
In the bowl of an electric mixer, cream together the butter and the sugar until light and fluffy. Add eggs, one at a time, and beat until each egg is well incorporated. Scrape down the sides of the bowl. Add the vanilla extract and mix well.

In a separate bowl, sift together the flour and baking powder. Add half the flour mixture to the batter; mix well. Add the milk; mix well. Now, add the rest of the flour mixture and mix until the batter is smooth and all the ingredients are well incorporated.

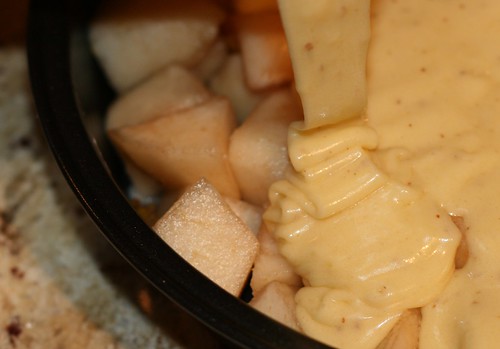
Remove half the batter and place in another bowl. To the batter that’s still in the mixer bowl, add the cocoa powder. Mix until well combined.

Take your prepared cake pan and dollop spoonfuls of the vanilla batter into the bottom of the pan. Then take the chocolate batter and dollop spoonfuls over the vanilla batter. Repeat until all the batter has been used.

Take a knife and dip it into the batter, all the way to the bottom of the pan. Gently begin swirling the batter with the knife, working your way all around the pan.

Bake the cake on the middle rack for 50 minutes, checking to see if it’s done with a cake tester or toothpick. If it’s done, the tester will come out clean after piercing the cake. The cake will also spring back if you touch it lightly. If it’s not done, bake for an additional 5 to 10 minutes.

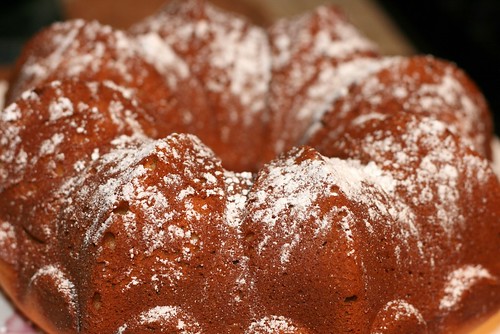
Let the cake cool in the pan before unmolding it. Dust with icing sugar and serve.

Continued after the jump...

Wednesday, February 27, 2008

A Fish Called Wanda, or "Darling, you're what's for dinner"


Ever since the sushi-making party two weeks ago, I've been fascinated with the similarities and differences in languages. It's so boring to be called "sweetheart" or "my love" or "dear" or some other cliché tender little thing, don't you think? Years and years of that would drive me up the wall. I'd much rather be called "ma petite chou" (my little cabbage, French) or "minha batatinha" (my little potato, Portuguese). Of course, I'd draw the line at "ma petite puce" (my little flea, Fr. - no, really). I knew a Persian girl once whose name was Mozhgan - translated as "eyelash." I'm guessing her parents thought it was nice at some point in time (why? oh, why?!) And as I make fun of my mom for calling kids "kurochka," which means little chicken in Russian, I remember that my own husband sometimes calls me "ribka" - a FISH (remind me to have a wee bit of a chat with him about that). Because fish are so -- erm -- cute... and sweet? No, just no. Except that Nemo kid, he was ok, even if the little guy was a bit too excitable.

Because I loved the moment in Shrek where a cutesy little bird explodes and Fiona just shrugs and makes omelette out of the eggs, the "fish" endearment made me think of my darling little tilapia fillets just sitting in my freezer and awaiting their turn on the dinner menu. And if you are already going to call fish "darling," and then promptly eat it, you may as well make the remainder of its existence a little sweeter and pair it with sweet peppers. Ha! Oh, the cruel irony. I'm sure the tilapia hadn't appreciated it, but we certainly did, in more ways than one.

So tell me, and don't be shy -- what are the strangest endearments that you've ever been called?


Tilapia With Sweet Peppers
(Williams & Sonoma recipe)
4 tilapia fillets (boneless)
1/4 cup all purpose flour
1/2 tsp paprika
3 red, orange or yellow bell peppers, seeded and sliced
1 large garlic clove, sliced
1/4 tsp dried oregano
1/4 cup chicken or vegetable stock
2 tbsp olive oil
1 tsp sherry vinegar or balsamic vinegar
salt and pepper to taste


In a deep fry pan over medium heat, warm 1 tbsp of olive oil. Add the bell peppers and cook, stirring frequently, for 2 minutes. Add the garlic and oregano. Sautee for about a minute, until the garlic is fragrant. Add stock, a pinch of salt and a pinch of pepper. Cover and cook until peppers are tender and most of the liquid has evaporated, about 20 minutes.

When the peppers are nearly done, turn to the fish. Season both sides of the tilapia fillets with salt, a dash of pepper and paprika. Lightly dredge each fillet in the flour, shaking off the extra. Heat 1 tbsp of olive oil in a fry pan over medium heat. Add the fillets to the pan and cook until golden brown, about 3 minutes per side.

At this point, the peppers should be done. Turn off the heat, stir in the vinegar and taste to adjust seasoning. Transfer the fillets to individual plates and spoon the peppers over each fillet. As always, a nice arugula salad and a glass of chilled white wine (mmmm... a crisp Sauvignon Blanc) just hits the spot with this dish. I've made this for weeknight meals (it only takes 1/2 hr to make, it's easy, tasty and actually good for you), and I've served it for lunch/brunch to guests, all with equally good results.

Continued after the jump...

Tuesday, February 26, 2008

Leeks and Spinach Tart


Before I go any further with this blogging thing, I feel that I should formally introduce all of you to an integral part of the "Confessions of a Tart" team. This behind the scenes person who keeps the talent happy is my fearless and easy on the eyes test-taster, upper-shelf-reacher, wine-pourer and emergency-fire-extinguisher husband A., who gets to bear the brunt of all my culinary successes and failures. And as what happens in the kitchen is so often synonymous for life in general, well... you get the idea; in other words, he's a trooper.

I am often amazed at how food reflects the innermost depths of a person. Someone who can seem scattered and haphazard on the surface (erm, me) can actually be very organized and all Poirot-order-and-method-and-little-grey-cells underneath all the confusion. Before I cook, I measure my ingredients and set them out in little bowls on the counter. I won't go on to the next step until I've completed the previous one. If the recipe says "chill," I'll chill (and then realize that it probably referred to the dough and not to myself or to my glass of white wine... *sigh* I blame it on the language barrier). A., however, is completely the opposite. At first glance, he looks like a guy who would dot all the i's and cross all the t's. Oy. No, no no no. His process is what is often described as "creative" (that's the diplomatic way of putting it, and since I'm not known for diplomacy, I just call it pandemonium). Which means, in practice, that when I get home and he's cooked something, I can usually tell by the way my kitchen looks like a hurricane swept through it, leaving a trail of chaos and destruction in its wake. The end result is always great (how he manages to turn it out, I don't know), but the method leaves me wishing we'd just ordered out (hey, I'm the one who gets to clean it all up!).


Whatever your own approach to cooking is, though, I am sure you will love the ease of preparation and the sheer yumminess of this Leek and Spinach Tart. It should be no surprise that both A. and I could eat it once a week and be very happy (after all, this is, ehem, confessions of a tart...). The recipe was originally from the Smitten Kitchen and involved Swiss Chard (which, in my complete ignorance, I thought at first was cheese... yeah, laugh it up, people). But because I had some spinach singing a little inviting operetta in my refrigerator, I decided to give it the starring role this time. And boy, did it deliver.


Leek and Spinach Tart
(My adaptation of it)
1 sheet frozen puff pastry, thawed (or your basic pate brisee for an 11" tart)
2 tbsp butter
3 large leeks (white and pale green parts only), sliced
1 tsp dried thyme

2 cups of spinach leaves, coarsely chopped
1 1/4 cup of whole milk
3 large eggs
2 large egg yolks
1 tsp salt
1/4 tsp ground black pepper

Roll out the pastry on a floured work surfac to a 12" square. Transfer to a tart pan or a 9" glass pie dish (this is what I used). Fold overhang under and crimp edges. Chill until ready to use.

Melt the butter in a large skillet over medium-low heat. Add leeks and thyme. Season with salt and pepper and sautee, stirring often, until leeks are very tender but haven't begun to brown yet (7-10 min). Add spinach and saute for a couple of minutes until it's wilted. Remove from heat and set aside until ready to use.

Preheat oven to 425F. In a large bowl, whisk milk, eggs, yolks, salt and pepper. Mix in the cooled leeks and spinach. Pour filling into the crust.

Bake for 15 min on 425F. Reduce heat to 350F and bake for 10-15 min longer until filling is puffed and completely set in the center. I find that it's best at room temperature with a little bit of grated cheese on top (Gruyere, I'm looking at you).


I wish I could tell you that there were leftovers for lunch today. But no, there were not. In fact, seeing the empty dish, A. told me laughingly that I should post the picture of the "remnants of old glory." So here it is. The evidence speaks for itself. :)


Continued after the jump...

Sunday, February 24, 2008

Sunday Night Blues, or Girls With Toys


I don't know about you, but I get this thing on Sunday nights that I call the Sunday Night Blues. It's this strange feeling that the weekend is almost over (but not yet), the start of a new week is almost here (but not yet), and you're meandering listlessly somewhere in between. Stuck in a sort of blah-limbo where everything is grey and undefined and you really don't know what to do with yourself except open a bottle of wine and whittle the hours away (oh, wait, is that just me?).


What's even worse is that sometimes, when the weather outside is gloomy and very un-California-like (Um, rain? I really don't think so), my Sunday Night Blues start somewhere around lunch-time, and the sense of anticipation is often worse than the event itself. Even watching a shirtless David Beckham (!) train in Hawaii (!!) didn't do anything for me. Yeah, that's how bad it was. Fortunately, I have friend, Shushana, who is almost telepathically connected to me -- which I'm sure has been a great source of annoyance to her over the years -- and she decided to be a trooper and undertake the Herculian task of cheering me up.


After years and years of wanting to, Shushana, that brave soul, is finally indulging her passion by opening her own online home and kitchenware business. When she heard my gloom-and-doom voice over the phone, she knew that drastic measures were needed. She invited me to play with her toys. Squee! Oh my... Can you imagine rows and rows of neatly packaged pots and pans, spatulas and colanders, dinner plates and teacups? I mean, if that doesn't alleviate the Sunday Night Blues, I really don't know what would!


After walking around her stockroom for half an hour and touching all the samples (I didn't even break anything, that's how pretty it all was), I finally picked out a gleaming pot and pan set. Then, to celebrate, we fired up the stove and decided to send my new toys on their maiden voyage. We cracked her beautiful yet sadly neglected Persian cookbook and an hour later, we had a dish that was so tasty, tender, colorful and full of flavor, that my bad mood disappeared along with the last traces of the chicken (which we didn't fight over because we are both too ladylike, of course... *cough*).

Peach Khoresh (Persian stew with chicken and peaches)
(Adapted from "New Food of Life" by Najmieh Batmanglij)
1 large onion, sliced thinly
4 chicken breasts
3 tbsp olive oil
2 tsp Persian spice mix (see below)*
3/4 cup water
1/4 cup fresh lemon or lime juice
1 tbsp sugar
1/4 tsp ground saffron dissolved in 1 tbsp hot water
3 firm peaches
salt and pepper to taste

In a Dutch oven (or a medium, heavy pot) heat 2 tbsp of oil. Brown the onions and the chicken together, about 3 min per each side of the chicken. Add salt, pepper and the Persian spice mix. Pour in 3/4 cup of water. Cover and simmer on low heat for 30 minutes.

Mix together the lemon or lime juice, sugar and saffron water and stir the mixture into the chicken. Cover and simmer for 5 minutes.

While simmering, heat 1 tbsp oil in a medium fry pan on moderate heat. Remove pits and cut the peaches into 1/2 inch wedges. Brown the peaches until golden, about 4/5 minutes. Add to the chicken, cover, and simmer for 30 minutes longer.

Serve right away with white Basmati rice. Oh yeah.

*Persian spice mix
These spices add a lot of tenderness and flavor to any chicken or meat dish. You can find them in any Persian market or buy them online.
2 tbsp ground dried rose petals (I couldn't find these anywhere, so I was forced to skip this beautiful sounding ingredient)
1 1/2 tbsp cinnamon
1 tbsp dried Persian lime powder
1 tsp ground cardamom
1/2 tsp ground black pepper
2 tsp ground angelica
1 tsp ground nutmeg
1/2 tsp ground coriander seeds
1 tsp ground cumin

Throw it all together and give it a good shake. Store in a dry place with other spices.

By the way, I was asked recently if I get paid for anything that I talk about in my blog. The answer is: no. If I use a product and I like it, I write about it. I don't make any money and I don't get freebies (sad, but true, though I wouldn't say no to a Kitchenaid stand mixer - Cobalt Blue, please, if anyone is listening).

Continued after the jump...

Wednesday, February 20, 2008

Lemon Meringue Tart


Lessons Learned From Baking Today's Lemon Meringue Tart (a.k.a. A Comedy Of Errors):

1. There comes a time in every baker's life when the thought of using TWO sticks of butter in one recipe for tart dough won't send you into a dark corner to cry in a fetal position. Sometimes, you need to recognize that such a time has not yet arrived and stop fighting mental battles with yourself that make you seem like the crazy lady on the corner because you mutter butter measurements under your breath half the day.

2. Never, ever say snottily that your pate sucree never shrinks. First off, half the people won't understand what the heck "pate sucree" is, and secondly, you will have offended some sort of baking gods because the very next time you try to make a tart, your pate sucree will indeed slide down the sides of your tart pan and smirk at you from those lows, just to spite you.

3. Lemons are tart. Very tart. Also, they tend to squirt straight at you if you aren't paying attention while hand-squeezing the juice.

4. While whipped egg-whites aren't tart, they too tend to squirt all over the place if you carelessly spoon them into a pastry bag and squeeze without making sure all the air has gone out of the bag first.

5. Don't overload your tart with the lemon curd and then give it a good shove into the oven so that the lemon curd spills and drips into the most hard to clean places (are we seeing a pattern here?)

6. Clean up is a b***h, especially when it involves lemon juice, lemon curd and sticky meringue in big dollops all over your kitchen.

7. If you can't make your egg whites stand up hard and tall, it's the fault of your technique and not of the egg whites (*snicker*).

8. Even after everything goes incredibly wrong almost every step of the way, it is still possible that in the end, it will turn out oh, so right (at least this time).

I'm not going to tell you how delicious this tart was (and I say was because I have a feeling its life-span is going to be shorter than a fruit fly's). No, I'm not even going to mention what the subtle crunch of the almonds in the crust and the silky smooth tartness of the lemon curd did for our taste buds. I won't describe the clouds and clouds of light, sweet meringue. You simply have to make it and see for yourself because some things in life just defy description.

Lemon Meringue Tart*

For the pate sucree:
1 cup all-purpose flour
1/4 cup finely ground almonds
4 1/2 tsp granulated sugar
1/4 tsp salt
1 stick (8 tbsp) cold butter, cut into small pieces
1 large egg yolk
2 tbsp ice water

For the lemon curd:
3/4 cup granulated sugar (less if you like more tartness)
2 tbs all-purpose flour
pinch of salt
3 eggs, at room temperature
1/2 cup fresh lemon juice
3 tbsp heavy cream

For the meringue:
4 egg whites, at room temperature
1/2 tsp cream of tartar
pinch of salt
1/2 tsp vanilla extract
1/2 cup granulated sugar

First make the crust. It's important here that all ingredients are kept as cold as possible so that the crust is nice and flaky, so if you aren't using something, put it in the refrigerator until you need it. Whisk flour, sugar and salt until combined. Cut the butter into the flour mixture with a pastry cutter until mixture resembles coarse meal.

Lightly beat the yolk with ice water, and add this in a steady stream to the dough, incorporating with a fork until dough just holds together. If the dough is too dry, add one teaspoon at a time more of iced water, sprinkling it in until the dough just holds together. Turn out onto a work surface, shape into a disk, wrap in plastic and refrigerate for at least an hour (or up to 2 days). After an hour, take the dough out and roll it on a floured surface to the desired shape, making it a little larger than your tart pan(s). This recipe yields 1 standard sized crust or 4 smaller crusts.


Butter the tart pan(s) and gently press the crust into them, sealing the cracks. If you are afraid of shrinkage (*snicker*), make sure the dough ends a little higher than your tart pan's edge. Bake at 350F for 20-22 min or until the crust is golden. Cool completely.

Make the lemon curd. In a bowl, whisk together the sugar, flour and salt. Add the eggs, lemon juice and cream and whisk until just blended. Carefully pour the mixture over the baked crust.


Make the meringue. In a very dry and clean bowl, beat the egg whites with the cream of tartar, salt and vanilla extract until soft peaks form. Add the sugar a little at a time, beating until it forms stiff, glossy peaks. Put big dollops over the tart making sure it covers the edge of the crust (so the crust doesn't burn, and also so you can cover up any shrinking that has gone on despite you very best efforts to prevent it, gah). Bake for about 20-25 minutes or until meringue is golden. The filling won't be completely set at this point - you will need to bring the tart to room temperature and then let it chill in the refrigerator for a couple of hours.


*For this tart, I adapted several different recipes from all over the place (Martha Stewart, Williams-Sonoma, my own imagination, etc.). The only thing I would do differently next time is to completely pre-bake the crust (I only partially baked it) and also to make the meringue a wee bit less sweet. The lemon curd here is tart and sweet (if you like you can reduce the amount of sugar in the lemon curd also), so I would have wanted the meringue to be more about softness and texture than sweetness. I wrote the instructions according to how I would do it next time, but if you like, you can add an extra 1/4 cup of sugar to the meringue to make it sweeter.

Continued after the jump...

Tuesday, February 19, 2008

Arroz Con Pollo


On Saturday night, I went to a sushi-making party at a friend's house. It was one of those international evenings, where almost everyone is from a different country and you can hear at least four languages that you don't understand (five, counting English, which I also stop understanding after the third shot of sake...). Two of the girls were Chinese and they were telling us that Cantonese has nine different intonations - that's right, NINE. So potentially, one word can have nine different meanings. They gave a couple of examples, and really, I'm not sure I should ever learn Cantonese because, especially after a few drinks, we would have big problems of the YOU IDIOT!-oh...-I mean,-please-pass-the-pepper variety.

I had a similar reaction when I initially began researching recipes for arroz con pollo, which a friend asked me to make (how did you guys like that transition? Smooth, huh!). Arroz con pollo is practically the national dish in many Latin American countries, and when I saw the variations with which it is made, my eyes rolled back into my head and I felt like chucking the whole undertaking there and then because, how can I compete with the cooks in Latin America, creators of all things dulce de leche, ceviche, asado, empanadas, tamales and a million other delicacies with such mouth-watering names as "Churrasco," "Mariscada," and "Pamplona de pollo"?

After a tolerably brief (and mostly successful) wrestle with panic, however, your intrepid heroine then took a long, deep breath and defrosted the chicken. Because, as everyone knows, after you defrost the chicken, there is just no going back.

I decided to go back to the basics and use just the ingredients that most people have in their pantry. Because delicious doesn't always have to mean a trip to the market, right? Keep in mind that there are countless variations. I saw a three page debate about the use of bell peppers alone, and don't even get me started on the saffron mafia (they are very, very scary). Some people use chorizo, which they fry right before the onions are added, and some people throw in a handful of cooked peas at the end. Whatever you do, it's easy to add your own choice of spices and veggies based on what you have on hand or on how fancy you want to make the dish. At its base, however, arroz con pollo is a hearty, colorful, satisfying one-pot dish that earned me a really loud "MMMMMMMMMMMMMMMMMM...." from my family, and that is really the only thing that matters. I used this recipe from Simply Recipes as my base.

Arroz con pollo
For the chicken:
4 chicken thighs (or 2 thighs and 2 breasts, or whatever pieces of chicken you happen to have at the moment that would serve 4 people)
Paprika
2 tbsp olive oil
Flour for dredging
For the rice:
1 cup of rice (I usually use jasmine or basmati rice, but short grain is more traditional)
2 cups of chicken stock* OR 1 cup chicken stock and 1 cup saffron water**
1 cup diced tomatoes (canned or fresh; liquid drained if canned)
1 tbsp tomato paste
1/2 yellow onion, diced
1 clove garlic, minced
1 tsp oregano
1 tsp dried thyme
1/2 tsp cumin
salt & pepper to taste

Heat 1 1/2 tbsp olive oil in a large skillet that has a cover on medium heat. In a bowl, combine flour, paprika, salt and pepper. Dredge the chicken in the mixture, shaking off the excess flour. Brown the chicken for a couple of minutes on either side until nicely golden, sprinkling some more paprika on top. Remove chicken from the pan and set aside.


Add the rice to the pan to brown. Stir it first to coat in olive oil and then leave for about a minute. Then stir again, not too often, to continue until the rice is also a golden color, about 2 more minutes. Be careful not to burn the rice (like I did). Add the chopped onions, garlic and chopped bell peppers, if using. Sprinkle a little salt on it and sautee, stirring often, until the onions are soft, about 4/5 minutes (add the additional 1/2 tbsp of olive oil if you feel that it's going to burn).


Place the chicken skin side up on top of the rice. In a bowl, mix the chicken stock (and saffron water, if using) with the chopped tomatoes and tomato paste. Pour over the chicken and rice. Sprinkle with a little more salt and pepper, oregano, thyme, cumin and any other spice you want to use (hello, chili powder and smoked paprika!). Bring to a simmer, reduce heat to low, cover tightly and simmer for 20-25 minutes (depending on the instructions on the rice package) until the chicken and the rice are done. At this point, you can sprinkle in the peas if you want. Fluff the rice with a fork and enjoy. I'd tell you to wait until it cools, but it looked and smelled so good that we totally didn't, so why should you?


*Please follow the directions on the box for the rice when you do the proportions of liquid to rice -- mine was 1:2, but I've seen 1:1.5 sometimes, so you have to be careful.

**If you want to use saffron in the dish (I didn't), dissolve 1/4 tsp saffron in 1 cup of boiling water.

Continued after the jump...

Sunday, February 17, 2008

A wind's in the heart of me, a fire's in my heels


A wind's in the heart of me, a fire's in my heels,
I am tired of brick and stone and rumbling wagon-wheels;
I hunger for the sea's edge, the limit of the land,
Where the wild old Atlantic is shouting on the sand.

Oh, I'll be going, leaving the noises of the street,
To where a lifting foresail-foot is yanking at the sheet;
To a windy, tossing anchorage where yawls and ketches ride,
Oh, I'll be going, going, until I meet the tide.

Excerpt from A Wanderer's Song by John Masefield

Anyone who's ever had the wander-lust knows the irresistible pull of an open stretch of road, the seductive bend of the mountain, the lure of infinite possibilities. It's not about where you go, it's about how you get there and where you stop along the way. People whose souls aren't filled with it can never, ever understand. When I was a little girl walking with my parents, I would always ask them to go "just until after the road curves." My mom would laugh and say, "What do you think is there, a circus?" But it isn't about that at all, is it? It's about the act of going, of doing, of giving in to that excitement that tells you - well, maybe there is! It's the satisfaction of knowing that you've climbed to the top and the view is that much sweeter.

Which is why when faced with a prospect of a three-day weekend, beautiful weather and nothing to do, I felt the "old familiar glamour" (and if anyone knows where that's from, would you marry me?) and I knew that I had to just go. Unfortunately, with all his perfections, A.'s wander-lust gene got lost somewhere along the way and there followed a conversation that will be familiar in its form (if not in content) to many a married person:

Me [with a "Sound of Music" stretch of the arms and a twirl]: Oh, the weather is beautiful! Let's take the car and just drive somewhere!

A: Why?

Me [mental sound of screeching tires]: Um, what do you mean, 'why?' Weather = good, time = free, etc...

A: Still don't get it.

Me [Sigh]: Well, all right. I suppose you don't have to go with me; I would never force you to do something you don't want to do. [Brightly] I'll just take the car myself and drive along the coast to, oh, I don't know, Santa Barbara, maybe? Not such a long drive, but so pretty. I'll stay for the day, maybe do some wine tasting, meet some of the wine-makers...

A [Meditative silence]: .................. Can we rent a convertible?

Me: YES!

And so, a compromise was born.

We drove leisurely down the shimmering coast, the water dotted with surfers like the top of a bread pudding with raisins, past the giant RVs and the noisy seagulls, past the parents watching with lazy satisfaction as their kids build sand-castles, past the beach houses sparkling like little brightly-colored jewels in the sun. We drove until there was nothing left but us and the road and a stretch of sprawling countryside, and only then did we feel at peace.

Predictably (for a three-day weekend), the wineries were crowded and there were limos and tour-vans parked in every parking lot. We were lucky enough to find a quiet table in the sun and enjoyed our wine with a side of people-watching.


The wine was good and the company was better. Next to us, a family opened a giant cooler and, in the blink of an eye, had the picnic table covered with a checkered table-cloth and spread with the most enviable variety of meats and cheeses and fruit, which put the two little plastic containers I packed at home completely to shame. A. looked over and said: "Next time, I'm packing the food!" :)

We even splurged on the "Reserve" tasting at Sunstone and got to go into a cave filled with rows and rows of wine bottles, dark and dusty and waiting to be tapped.


And as we were driving back in the dusk and A.'s hands held the steering wheel in a firm grip and I was dozing off to the strains of Miles Davis, the words of an old, half-forgotten poem I had read years and years ago came back to me; and I knew that the next time someone asks me "why," I will just shrug and tell them: "a wind's in the heart of me, a fire's in my heels."

Continued after the jump...

Friday, February 15, 2008

Gâteau de Mamy à la Poire


As you can tell, I've been a little, tiny, teensy bit obsessed with pears lately. Something about their light, delicate sweetness makes the bolder, brighter fruit seem slightly garish and somehow overdressed in comparison. There is a time for loud and bright - summer, for example, and the middle of winter to chase away the blahs - but now, when everything around me is just waking up and growing and changing in preparation for spring, I crave the subtlety and the reserved nature of the pear. And they have such beautiful names, also - Bartlett, D'Anjou, Harrow Sweet, Luscious, Rosemarie and Summer Beauty - that it's hard to pass them by at the market without buying at least a few. Especially when they reminded me of this delectable recipe from Chocolate and Zucchini that I came across a while ago. How could I resist?!

This is one of those cakes that is as humble as its ingredients (a classic flour/eggs/butter/sugar combination), but the taste is lovely and delicate. It doesn't demand attention, but gives all of your senses a simple and lingering pleasure. You could dress it up with confectioner's sugar or with vanilla ice cream, but you could also just serve it by itself with steaming cups of freshly brewed tea.

Gâteau de Mamy à la Poire (reprinted with many thanks and great respect)
1 stick plus 1 Tbsp unsalted butter
4 large pears or 6 small ones
3/4 cup sugar
2 eggs
1/2 cup all-purpose flour
2 tablespoons ground almonds
1 1/2 tsp baking powder

Preheat the oven to 350°F. Melt the butter in a small bowl and set aside to cool. Butter a non-stick 9-inch cake pan.

Wash, peel and cut up the pears. Lay the pieces of fruit at the bottom of the pan.


In a medium mixing-bowl, whisk the sugar with the eggs until the mixture whitens slightly. Add in the flour, almond powder and baking powder, and whisk well. Pour in the butter, and blend again. Pour the batter evenly over the fruit, and put into the oven to bake for 40 to 50 minutes.


Let the cake settle on a cooling rack for a few minutes. Invert it on a plate (the fruit side will be on top). If any bit of fruit has stuck to the bottom of the pan, simply scrape them and place them back where they belong on the cake. Use a second plate to invert the cake again (the fruit side will then be at the bottom). Let cool and serve slightly warm or at room temperature.


Continued after the jump...