Showing posts with label Breakfast and Brunch. Show all posts

Sunday, May 23, 2010

The Perfect Breakfast Muffin

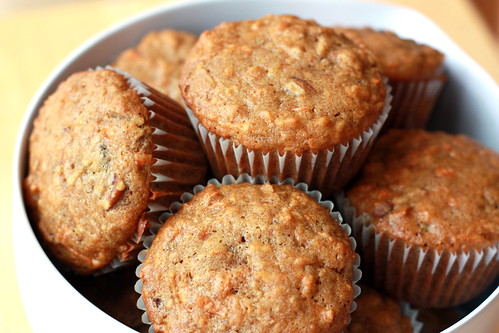
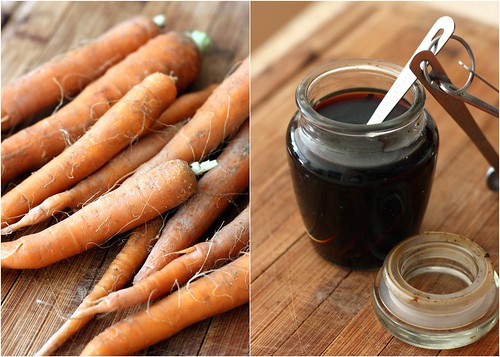
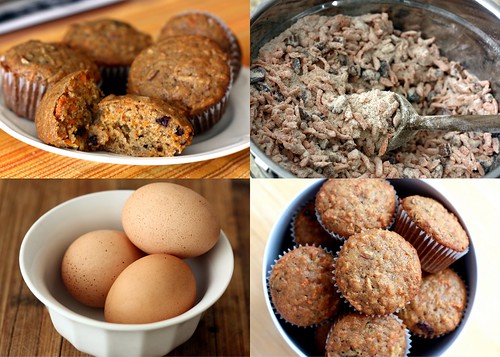
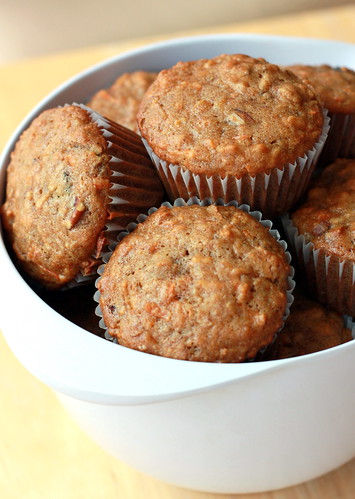
Breakfast carrot muffins

For some time now, I've been on a quest to discover the perfect breakfast muffin. Though I love the rich, buttery taste of a good cafe muffin as much as the next girl, and much more so with a good sprinkling of streusel and sparkly sugar on top, I don't want to eat this every day. Maybe I've grown up (oh, these dreaded words) and maybe I've just become more picky about what I put in my body and when, but for breakfast, I want something that's not only good, but also that's good for me.

Breakfast carrot muffins

People, oh, people. These are the proverbial IT. When I took the first hot muffin out of the oven, soft and sweet-smelling, deeply golden and flecked with dark, jewel-like nuggets of cranberries, and when I took that first bite, chasing it with a cool gulp of fresh milk, I had to sit down for a moment because I was a little overwhelmed by how much I loved these.

Breakfast carrot muffins

It's the whole package, the earthiness of whole-wheat flour, the complex not-too-sweet sweetness of brown sugar, and that smell - the homey, vanilla-y, spicy smell of a freshly baked muffin. It got to me. I'm sold. Bring it on. (In the interest of full disclosure, I have to tell you that I immediately ate three. These are addictive, especially when warm.)

Breakfast carrot muffins

The Perfect Breakfast Muffin
Hacked quite a bit from Gourmet, May 1998
Makes 18 muffins

1 cup all-purpose flour
1 cup whole-wheat flour
2 teaspoons baking soda
1 teaspoon cinnamon
1/2 teaspoon nutmeg
1/4 teaspoon salt
2/3 cups sugar (1/3 brown, 1/3 white)
1/4 pound carrots (about 2/2.5 cups, coarsely shredded)
1/2 cup pecans, roughly chopped
1/2 cup raisins, dried cranberries, dried cherries or chopped dried apricots
3 large eggs
1/4 cup vegetable oil
3/4 cup plain yogurt
2 teaspoons vanilla extract
1 large apple (coarsely shredded) [I used Gala]

Preheat oven to 350°F. and butter or line eighteen muffin cups.

In a large bowl, whisk together the flours, baking soda, cinnamon, nutmeg and salt, and then whisk in the sugars.

Coarsely shred the carrots and chop the pecans. Add the carrots, pecans and dried fruit to the flour mixture and toss well.

In another bowl, whisk together the eggs, oil, yogurt and vanilla extract. Peel and core the apple and coarsely shred. Stir the shredded apple into the egg mixture and then add to the flour mixture, stirring until batter is just combined well and there aren't any large dry spots.

Divide batter among muffin cups and bake until puffed and golden and the tester comes out clean, 15-20 minutes (I had to bake for 25).

Cool muffins in cups on racks 5 minutes before turning out onto racks to cool completely. Muffins keep in an airtight container at room temperature 5 days [I also flash freeze mine in a tray and then drop into a large freezer bag so I can take one out for breakfast every day].

Continued after the jump...

Tuesday, May 11, 2010

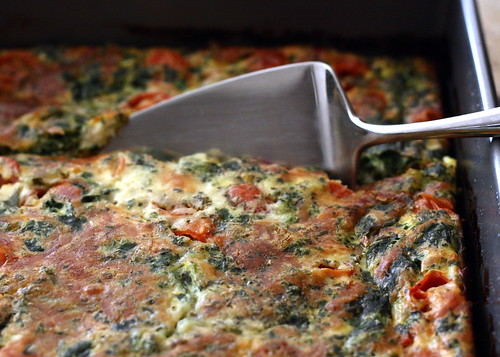
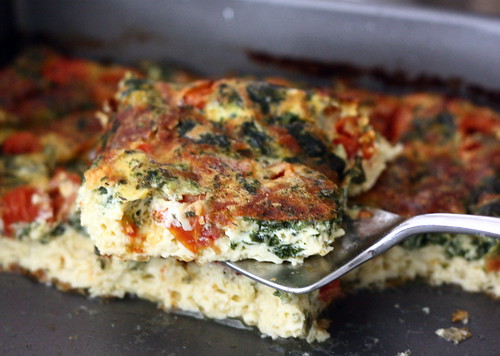
Baked Frittata

Baked frittata

I feel guilty that I haven't told you about this frittata yet, not just because I make it all the time, but because it's so easy, so delicious and so infinitely adaptable, that everyone should have something like it in their bag of tricks. I pull this particular one out when I have eight ten twelve guests for brunch (even if one of them is a small itty bitty person) and I don't want to spend the whole day in the kitchen in preparation for the event. Don't get me wrong, I love my guests... but this weather - this warm, lovely, springy weather that brings hints of honeysuckle and strawberries in the air - is tempting me to spend time outside, and so something has to give. Fortunately, in the case of this frittata, it's definitely not taste.

Baked frittata

There's really nothing to it - you break 12 eggs into a big bowl, add in some whole milk and a pinch of salt, pepper and whatever herbs you have lying around, and pour the whole thing over fresh-from-the-market vegetables (or not, I won't tell), sprinkle a handful of cheese on top, stick the whole thing in the oven and forget about it for an hour or so until the guests arrive. It bakes up tender and golden, warm and a little crusty on top and around the edges. It's also especially irresistible during a Sunday brunch, when the sun is pouring into the windows and Louis Armstrong is playing on the radio. Mimosas help too, but don't tell my mom I'm advising it.

Baked Frittata (with spinach, cheddar and cherry tomatoes)
serves 10-12

Needless to say, you can throw whatever herbs, vegetables and cheeses into the mix. Sundried tomatoes, asparagus and goat cheese might be nice, as would sauteed leeks and gruyere. A handful of chopped green onions would be really great too. I like to throw in a bit of chopped parseley and dill or sprinkle in some herbes de Provence for an added fragrance and freshness, but the whole point of this dish is that you should follow your own imagination and make it any way you want.

12 eggs
1 1/2 - 2 cups whole milk
1 lb spinach, stems removed (or use organic frozen chopped spinach, defrosted)
1 clove garlic, minced
1 cup cherry tomatoes, halved
a large handful of grated cheese (cheddar, gruyere, mozarella, etc)
handful of chopped parseley and dill
1 teaspoon salt
pepper

Turn the oven to 400F. Butter a 9"x13" pan.

If using fresh spinach: melt a tablespoon of butter in a skillet, chop the spinach and sautee it with garlic for several minutes until wilted and soft. Squeeze out excess liquid. If using frozen: defrost and squeeze out excess liquid, then mix in the garlic.

Spread spinach in the bottom of the 9x13 pan. Halve the cherry tomatoes and scatter them on top of the spinach. Scatter the parseley and dill on top as well.

Break 12 eggs into a large bowl and whisk with the milk, the salt and the pepper until fully combined.

Pour over the vegetables. Some will float - that's ok - in fact, it's good. Grab a large handful of grated cheddar (or other cheese of your preference) and scatter on top of the eggs.

Set into the oven and bake until golden and completely set in the middle, about 60-70 minutes (jiggle to make sure - an extra 5-10 minutes in the oven won't kill it).

Continued after the jump...

Friday, July 3, 2009

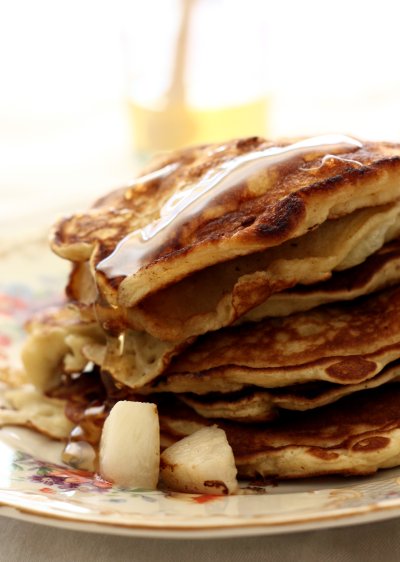
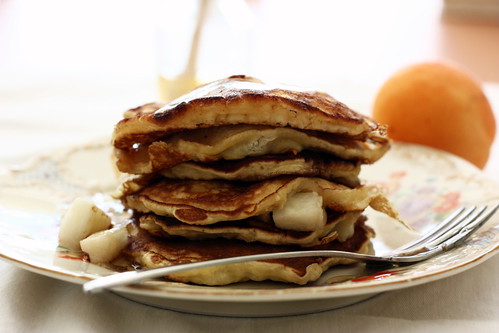
Honey Nectarine Pancakes

IMG_1149_01

As all Russian men, my dad is a disaster in the kitchen. And yet -- and yet! -- he can turn out a perfect breakfast on any given Sunday. No one knows what mysteries of the universe allow him to handle kitchen equipment with such agility on this particular day, when on the other six days of the week he can barely operate the toaster oven, but breakfasts are "his thing" on Sundays and growing up, I have to confess it was my favorite meal of the week.

Food Photos1-23

My dad's pancakes are soft, fluffy and tender, but not as thick as the ones usually made here, and they always include a surprise - sauteed apples, diced peaches, maybe even strawberries with a bit of sugar. I haven't had dad's pancakes for a while and this morning, when I picked up some gorgeous nectarines at the market, I got nostalgic for them and had to make them for myself. After all, I'm a big girl now and I can't run to my daddy for every little thing, can I? (I can and I do, but at least I can give him a break on the pancakes once in a while). :)

IMG_1095

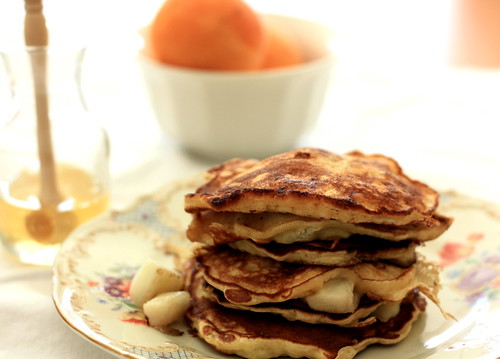
Nectarines and honey are a combination made in heaven and they work beautifully together in these pancakes. I replaced a teaspoon of sugar in the recipe with a tablespoon of honey and I also drizzled a little honey over the top. The softened nectarines and the mild taste of the honey complement each other perfectly, but of course, feel free to replace the nectarines with apples, blueberries, bananas or whatever else is in season.

Happy Independence Day to all my American readers! (and happy "Day We Finally Got Rid Of Those Pesky Colonists" to the Brits!) Have a happy and safe weekend, everyone!

IMG_1166
IMG_1105

Honey Nectarine Pancakes
(makes about 12 medium sized cakes)

Dry Ingredients
1 1/4 cup all purpose flour
2 tsp sugar
1 tsp salt
1 1/2 tsp baking powder
1 tsp baking soda

Wet Ingredients
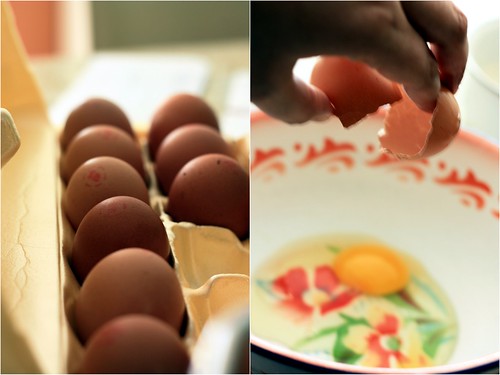
2 eggs
1 1/5 cup buttermilk (or milk, in a pinch)
1 tbsp honey

2 ripe nectarines

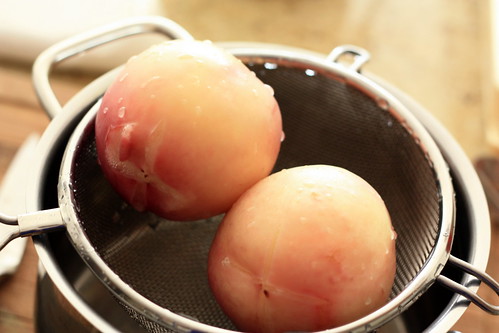
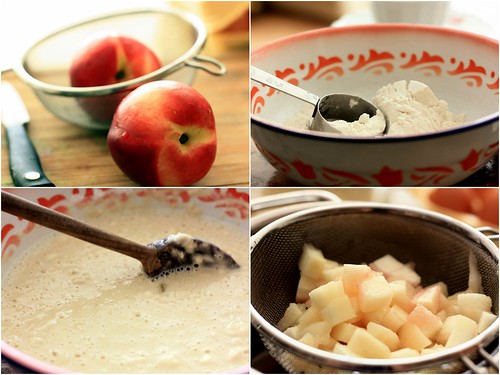
First, bring a pot of water to a rollicking boil. With a small paring knife, score the nectarines on the bottom (cut a little cross in the skin), and then drop the fruit into the boiling water for 2 minutes. Fish them out and rinse under cold water. Peel the skin off starting with the place where you scored the nectarines. If the nectarines are ripe, the skin should come off pretty easily. This also works with peaches. Core and dice the nectarines into bite sized squares.

Now, heat a little butter in a frying pan on medium heat. Whisk all the dry ingredients together. In a different, largish bowl, whisk all the wet ingredients together. Add the dry ingredients to the wet ingredients and mix with a wooden spoon or spatula until you can't see the flour anymore. Make sure to get to the bottom of the bowl because flour is tricky and likes to hide down there. The batter will be pretty lumpy, but that's ok.

With a small ladle, drop a little bit of batter onto the frying pan to make cakes about 3 inches in diameter (or whatever diameter you like them, really). Drop a few nectarine pieces on top of each pancake. When you see bubbles forming on top of the pancakes, flip them over for another 30 seconds to 1 minute. Continue until you're out of batter (if you'll be making lots of pancakes, heat the oven to 100F and store the finished pancakes on a cookie sheet in the oven to keep them warm). Serve drizzled with honey.

Food Photos1-24

Food Photos1-21

IMG_1125

Continued after the jump...

Sunday, May 17, 2009

Baked French Toast

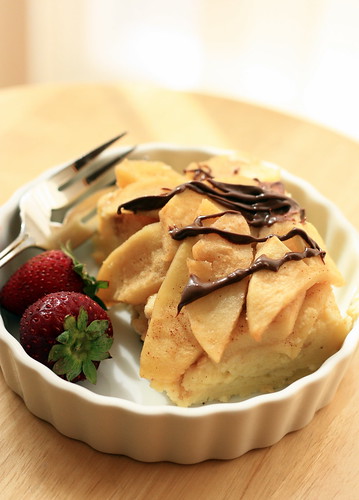
Baked French Toast

Here's something you've probably figured out about me: I like to throw parties. I love to see my friends and family all dressed up and ready to relax, tell jokes and eat some good food. I love seeing my dad tease my sister, my mom dashing around the kitchen with a glass of champagne, and all the other familiar patterns that always emerge when we all get together.

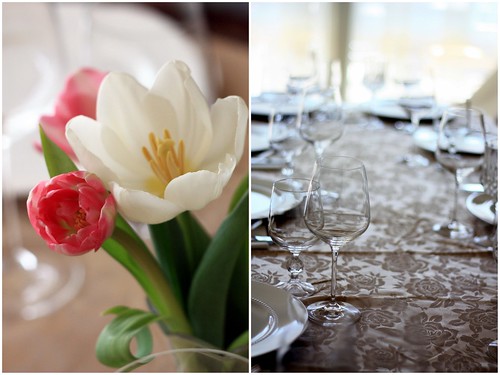
Mother's Day Brunch

I'll tell you something else - I have a hostess apron. A real, cute, frilled hostess apron that makes me feel like I want to twirl my skirt (and sometimes, I really do, kind of like a 5 yr old). Generally, I cook in an old ratty t-shirt that I'm not afraid to splatter with flour and butter, but a half hour before the guests are supposed to come over, I'll leave the kitchen and pretty myself, and then I will put on my hostess apron and make everyone believe that I've been standing in the kitchen for hours (when in fact, 90% of the work was done the night before and the day of, I pretty much frosted the cake and mixed up a green salad. I might have put things on platters, too, but I was eating scraps of cake so my brain is a little hazy on that point).

Baked French Toast w/Apples

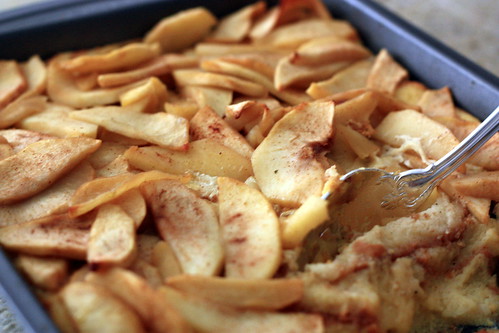
This baked french toast (ok, it's more like a bread pudding) lets me get out of the kitchen that precious half an hour earlier. You do all the prep work the night before (there isn't much of it) and then about an hour before the guests arrive, you pop this baby into the oven and voila, out comes a perfect, fluffy, sweet treat that everyone will love. Minimal effort + maximum taste = pretty darn awesome. Oh, and just in the interest of full disclosure, I drizzled Nutella over my portion. I'd tell you how good it was, but it's a little x-rated, so you'll just have to use your imagination.


Baked French Toast

Baked French Toast
adopted from Gail Gand's Brunch

I love this little book. So far, the crepes were stellar and this bread pudding/french toast disappeared faster than I could stick a spoon in it. The book is sunny, homey and inviting with delicious photographs, and I love the way it has simple things - cheese and tomato galette, almond french toast, pear and almond tartlets, just to name a few - that I conceptually knew existed, but now cannot imagine living without.

10 slices of thick white bread (I use either challah or Hawaiian sweet bread)
7 large eggs
1/2 cup sugar
3 1/2 cups whole milk
1 tbsp vanilla extract

Topping:
6 medium apples (I use Gala or Golden Delicious)
2 tbsp unsalted butter and more for buttering the dish
1/2 cup sugar (I usually use less - about 5 tbsp - if the apples are sweet)
3/4 tsp ground cinnamon (more if you like cinnamon, up to 1 1/2 tsp)
sprinkle of ground nutmeg

The night before:

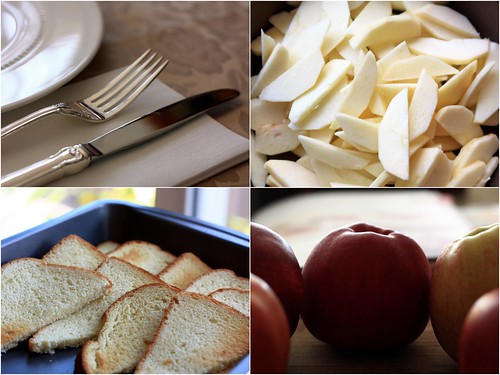
Make the topping: peel, core and cut the apples into 1/4-inch thick slices. Heat the butter over medium heat until melted, then add the apples and cook, stirring a few times to coat in butter, until the apples are tender (about 10 minutes). Turn off the heat and stir in sugar and spices. Set aside.

Butter a 9x13-inch baking dish. Cut the bread in half to make triangles and either toast it lightly or leave it out on the counter for a few hours. Arrange the bread in the dish in two rows, so the slices overlap.

In a medium bowl, beat the eggs with the sugar, milk and vanilla until smooth. Pour the custard over the bread, pressing the bread down a bit if it's poking up above the milk. Spoon the apples over the top. Cover and refrigerate overnight.

The next day:

Heat the oven to 350F. Uncover the baking dish and bake 50-60 minutes, until the custard is set and doesn't shimmy when you shake the pan. It will puff up and brown slightly. Remove from the oven and let it rest for 10 minutes before serving.

Continued after the jump...

Friday, April 17, 2009

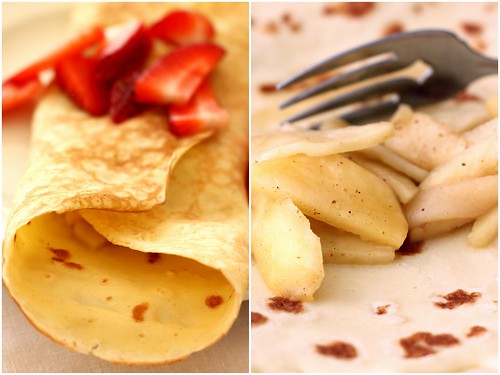
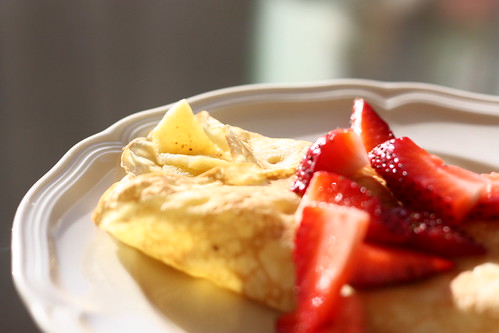
Apple Cinnamon Crepes

I've always been convinced that life is made up of simple pleasures. A smile, a look. A sunny day. Flowers when you least expect them. And brunch. In fact, forget the flowers, just give me some Eggs Benedict, chocolate waffles, bread pudding and a mimosa or two, and you will have yourself a completely happy girl, willing to follow your every whim and fancy. What can I say, I'm easy to please!

Brunch is my favorite and happiest meal of the week. It's the only meal when there's no stress about what to make and almost no food is off limits because, hey, it's breakfast... and lunch... all in one! COOL. So, knowing this, you can imagine my reaction when I got an email from Cath of A Blithe Palate and Stephanie of Dispensing Happiness about testing out Gale Gand's new book, which is incidentally called -- you guessed it -- BRUNCH. I mean, I think I set a record for how quickly I hit the reply button!

For anyone who loves brunch, this book is a must have. This slim volume -- beautifully photographed, homey and pleasant to the touch -- has one hundred recipes, which is, well, a lot of Sundays (and Saturdays too, and who says I can't have brunch on Mondays?). I had the whole week of Passover to drool over the book and decide what to make first. I changed my mind about ten times. Do I go for the poached eggs over asparagus and Parmesan? Do I dare the Apple-Cinnamon Baked French Toast? Can I really stay away from the Beet & Artichoke Salad? It was hard, you guys, it really was, and in the end, I just let the book fall open on a random page, and the page said in big letters: CREPES. Sometimes, it's best to just let fate decide.

They were the easiest crepes I've ever made and also the tastiest (as confirmed by my mom, who is always an honest critic -- the woman told me I didn't pour her enough limoncello at 9am this morning, for goodness' sakes! ...but more on that later). Thank you to Cath and Stephanie for letting me participate in their amazing event and a great big thanks to Gale Gand for writing the book of my dreams -- the book about the simple and yet so complex pleasure of gathering around the table for brunch.

To find a recipe for these crepes, you will just have to check out Gale Gand's book at your local library or book store (or go here for a great basic recipe), but so as not to leave you completely high and dry, let me tell you about the amazing apple cinnamon filling I made to go with the crepes. The quantity of cinnamon and other spices is pretty much up to you, but be sure to use apples that don't break easily (like Gala or Golden Delicious) because you want to slice them fairly thinly but don't want them to break during cooking.

For about 4 people, you will need:

4 small baking apples (I use Gala or Golden Delicious)
2 tablespoons of unsalted butter
1-2 tablespoons of sugar (depending on how sweet or tart the apples are)
1/2 tsp of cinnamon
a dash of nutmeg

Peel and core the apples. Slice them thinly, but not so thinly that the pieces will break easily - about 1/4 inch thickness.

Melt the butter in a skillet on medium heat until it starts to foam and then saute the apples, turning them over a few times to coat with the butter, until the apples are soft and tender - about 10 minutes.

Stir in the sugar and the spices and take off the heat. Divide between four warm crepes and serve immediately with a scoop of ice cream and/or some sliced strawberries.

Basic crepes
Gourmet, January 2006
(makes 8-10)

1 cup plus 2 tablespoons whole milk
2 large eggs
1 cup all-purpose flour
2 tablespoons granulated sugar
3 tablespoons plus 1 teaspoon unsalted butter, melted and cooled slightly
1/4 teaspoon salt

Whisk milk, eggs, flour, granulated sugar, 2 tablespoons butter, and salt in a large mixing bowl until batter is mostly smooth but still has some lumps in it, about 1 minute. Let batter stand in the refrigerator for at least 1/2 hr or up to overnight (this prevents tough crêpes). Stir the batter before you are ready to cook the crêpes.

Preheat oven to 250°F.

Add 1/2 teaspoon butter to a crêpe pan (or a non-stick skillet) and brush to coat bottom. Heat over moderate heat until hot, then pour 1/4 cup batter into skillet, tilting to coat bottom evenly. Cook until underside is pale golden, 1 1/2 to 2 minutes, then jerk skillet to loosen crêpe and flip crêpe with a spatula. Cook until underside is pale golden, 30 seconds to 1 minute. Transfer crêpe with spatula to a work surface, turning over so that side cooked first is facedown. Transfer to a heatproof platter and keep warm in oven. Make the rest of the crêpes in same manner, transferring to oven. Fill with desired filling (Nutella & bananas, sauteed apples, strawberries, etc). You can also dust with confectioner's sugar before serving or serve with a scoop of ice cream or a dollop of whipped cream for extra indulgence.

Continued after the jump...

Sunday, March 22, 2009

Strawberry Scones

Do you know what I love about scones?

1. One bowl, one spoon, your hands. Yep, I love anything that requires less than three utensils. What can I say, I'm a wuss when it comes to washing the dishes!
2. Anyone can do it. Scones were probably my first ever baking project (that turned out successfully - we won't talk about what came before that, it ain't pretty). Maybe that's why I have a soft spot for them.
3. Quick and freezable. Can I tell you, it takes me about 3 minutes to put scones together, and I can make a big batch and freeze half for unexpected company. Now that's what I call a totally awesome recipe!
4. Hello, delicious! Strawberry, blueberry, raisin, buttermilk, cheddar, herb, and just plain, they are all winners to me. My name is Irene and I'm a scone-aholic.

Because you guys are really important to me, I suffered on your behalf and tried out about six different scone recipes. There were cream scones from Dorie Greenspan's Baking and buttermilk currant scones from Tartine. There were non-traditional scones with eggs and scones so dry I had to practically drown them in Devonshire cream and lemon curd (it was terrible, I'm still scarred). However, one emerged victorious, and it was, strangely, not from a cookbook or an award-winning chef, but one that was hidden in a dark corner of my recipe binder, given to me years ago by a friend. The paper, bent into quarters from being tucked into the pocket of my jeans, just said: "Strawberry scones," followed by a few lines of instruction. I was intrigued. I was curious. And after I made them, I was sold. This is hands down the best scone I have ever tasted, anywhere.

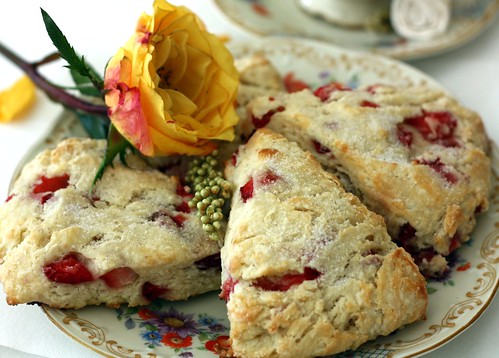
Tender, moist (even on the second day!) and delicately sweet, studded with ruby red strawberries and sparkling with a simple topping of vanilla sugar, oh, these made me so happy! I used buttermilk, which gave them a nice tang to contrast with the sweetness of the strawberries, but I would love a re-match with blueberries and cream or cherries with a sprinkling of cornmeal. There are six left in the freezer now. Do you think I can count myself as "unexpected company"?


Strawberry Scones
(makes 6 large scones or 12 minis)

1 cup strawberries (or other fruit)
3 tablespoons sugar (granulated)
2 cups all-purpose flour
2 teaspoons baking powder
1/4 teaspoon salt
6 tablespoons butter, in cubes, slightly softened
2/3 cup half-and-half or cream or cold buttermilk

Topping:
1 tablespoon sugar

Preheat oven to 400 degrees. Lightly grease a cookie sheet.

If using larger fruit, cut into bite-sized pieces. Sprinkle fruit with 1/2 tablespoon sugar; set aside. Be sure to make the pieces small, or they tend to fall out of the dough. They'll still be plenty prominent in your finished scones.

Combine remaining sugar with flour, baking powder and salt. Add butter, using a pastry cutter or 2 knives to cut in butter (you may want to use your fingers to be sure butter is evenly mixed into flour). Stir in fruit; then add cream/half-and-half/buttermilk all at once. Use spatula to gently stir dough until it holds together.

Turn onto a lightly floured surface and knead a few times to incorporate dry ingredients. Be gentle so you don't break up the berries and don't overwork the dough. Sprinkle dough with flour if it gets sticky.

Press (pat) the dough into a circle 3/4 inch thick. If any berries peek out, push them into dough. Cut circle into 6-8 wedges, then transfer wedges to the cookie sheet, leaving at least 1/2 inch of space between them. Bake 15 minutes.

Sprinkle with sugar and bake 5-10 more minutes or until the tops are beginning to brown and spring back when you push them (this took another 15-20 minutes in my oven, but keep a careful watch and check every 5 minutes - you do not want dry scones!). (The sprinkling of sugar over the top for the last few minutes of baking creates a simple, sparkly topping.)

Continued after the jump...

Saturday, February 28, 2009

Buckwheat Galettes

My second time in Paris was for myself alone. I had always dreamt of traveling by myself, but first my parents and then A. would hear none of it, and somehow, it wasn't worth it to make them worry quite so much. Fortunately for me, life had a way of figuring things out, and here I was, presented with an opportunity to run around Paris practically by myself for two whole days. It was brilliant.

I had already covered all the major sights and museums my first time there, so this time around, I just scribbled some markings on a map, took the subway to the Marais, and began walking. I think everyone should have a day like that, when they can just start walking, without regard to time, direction or destination, without being tethered to the cell phone or the blackberry (and also free to stop off at Gérard Mulot in St. Germain and get two, that's right, two pastries, thereby shocking the good sales-women of GM with my gluttony).

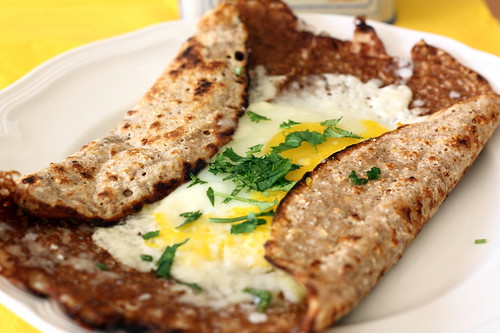
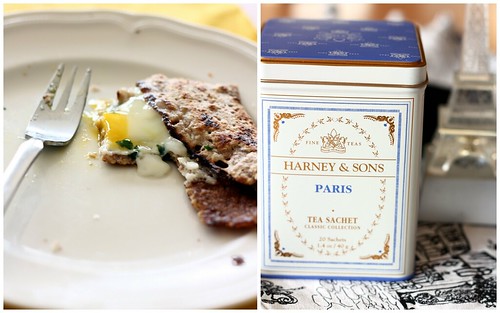
I had lunch in a small place on Ile Saint-Louis. The walls were painted red and the predominant language was French, and maybe it was the sunny day, but the waitress even smiled at me a few times and it seemed sincere. When I opened the menu and ordered a 3 course lunch for 10 Euro, I could hardly believe my eyes. I mean, 10 Euro, in Paris. I think my cafe creme and croissant in the morning were more than that. I was prepared to be disappointed. But you know where this story is heading, right? Disappointed I was not -- after all, it was Paris, the city of lights, magic and 10 Euro lunches. I can't say it was the best lunch I've ever had, but it was very decent, and even almost a year later, I can not stop thinking about the buckwheat galette that was my main course. With a runny egg and a sprinkling of cheese and herbs folded into a neat, square envelope, it was just light enough and substantial enough to carry me through until that fateful stop at Gérard Mulot.

It took me a year to replicate the galette, mostly because I couldn't justify buying a bunch of buckwheat flour just for one indulgence. What finally tipped the scales was that I found a small bag of buckwheat hiding in my pantry, ground it up in my food processor, and I was ready to go. Well. Let's just say that I won't make the mistake of waiting another year to do this again! Compared to a regular crepe, the galette is heartier and nubby with delicious little bits of ground buckwheat, and is the perfect sturdy bed on which to rest your egg, ham, spinach, and of course, a sprinkling of cheese and herbs. And, it reminds me of Paris.

Buckwheat galettes
This recipe comes from Clotilde at Chocolate and Zucchini, on of my favorite blogs from Paris. Being French, Clotilde automatically gets the monopoly on crepe and galette making, so I didn't mess with the proportions too much (except to convert to American measurements and decrease the amount of water by a little bit to make it easier to flip) or with any of her instructions (linked above and copied below). This makes quite a large quantity, so I halved the recipe when I was making it for myself. The quantities below are from Clotilde's original recipe. Please visit her website (chances are that you have already), as she is totally, totally awesome.

For the dough :
- 200 g (1.5 cups) buckwheat flour
- 50 g (1/3 cup) all-purpose flour
- 2 eggs
- 50 cl (2 cups) milk
- 25 cl (1 cup) water

For the galettes :
- salted butter
- the fillings of your choice

(Makes 12 medium galettes.)

Step 1 : Prepare the dough.

If you have a food processor , break the eggs in the bowl of the food processor. Add the flours, and mix until well blended. Add as much of the milk as your food processor allows and mix again. Transfer to a large mixing bowl, and add the remaining milk and the water. Whisk until thoroughly blended.

If you don't have a food processor, put the flour in a large mixing bowl and dig a little well in the center. Break the eggs in the well, and whisk them progressively into the flour in a circular motion. Pour the milk in slowly, whisking all the while. Add the water, still whisking.

In both cases, cover the mixing bowl with plastic wrap, and store in the fridge for at least two hours, overnight is best (Irene's note: *cough* I totally didn't, and they were still awesome).

Step 2 : Make the galettes.

Take the bowl of dough out of the fridge and prepare all the fillings beforehand. Whisk the galette dough again, as some of the flour will have settled at the bottom of the bowl.

If you're making several galettes in a row, preheat the oven to 180°C (360°F). This is where you'll keep the galettes warm while you make the others.

Heat up a large non-stick skillet over high heat. When it is very hot, put in a sliver of salted butter. When it is melted, but before it browns, use a paper towel to (cautiously) spread the butter evenly on the surface of the skillet. Pour a ladleful of dough (Irene's note: about 1/2 - 3/4 cup per galette) in the skillet, and swoop the skillet around so that the dough spreads out in a nice even circle. Let cook on medium-high heat for a few minutes, peeking underneath with a spatula from time to time to check on the cooking.

Flip the galette when it's nicely golden underneath, cautiously or brazenly depending on your self-assurance. Put the fillings of your choice in the center of the galette. If using an egg, break it cautiously and gently maintain the yolk in the center with the eggshell or your spatula until the white has set enough to hold it in place. When the other side of the galette is nice and golden too, fold it as best you can : the traditional way is to fold the four sides in and make a square galette, but when there's a lot of filling and the galette isn't very big that's a little difficult, so just fold two sides in.

Put the galette in a large baking dish or on a cookie sheet and into the oven to keep warm while you make the others. Serve with a green salad and liberal amounts of Cidre Brut, an alcoholic apple cider from Brittany.

Continued after the jump...

Saturday, February 14, 2009

Poppyseed Bagels

I've always had dual feelings about Valentine's Day. On one hand, it's a totally made-up holiday that's been Hallmark-ed out of all reason and proportion, with bad chocolates and roses at $10/stem (last night, we saw a man buying a ginormous red heart balloon with TINKERBELL on it... oh, honey, no, just no). Also, I hate people telling me what to do, so the idea of a "mandated romance" day revolts all of my higher sensibilities.
On the other hand, I LOVE VALENTINE'S DAY! I've always loved it and always will. What can I say, I'm a sucker for hugs, kisses and "I love you"s. If you stop and think about it, it's actually pretty awesome to have a day dedicated to telling your family, friends and significant other that you love them -- just because. Sure, you should tell them this the other 364 days of the year too, but I really enjoy the extra reminder. I always have a smile on my face on this day.

Once upon a time, long before I met A., I was scared of falling in love. It seemed like such a strange, alien experience to put so much of yourself into someone else's not so gentle hands. It sounded kind of wacky and I didn't think I was ever going to take the plunge. Then... well, I met A., and like a second later, I was jumping off the cliff without the safety harness. Geez. What was that saying about "the harder they fall"?
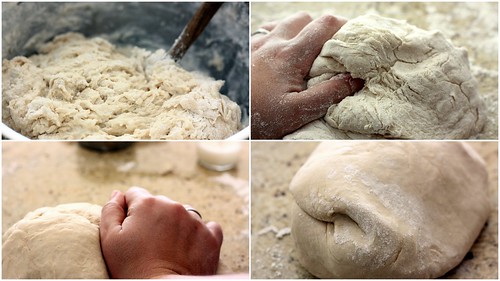
That's kind of how I felt about yeast (smooth transition, eh?). Like love, the whole process sounded kind of wacky, and in my almost 30 years, I've avoided yeast and yeast breads like the plague. I decided that for Valentine's Day, it was time to change all that, to break through my inhibitions, to boldly go, etc etc, you get the idea. Guess what? IT WAS TOTALLY AWESOME.

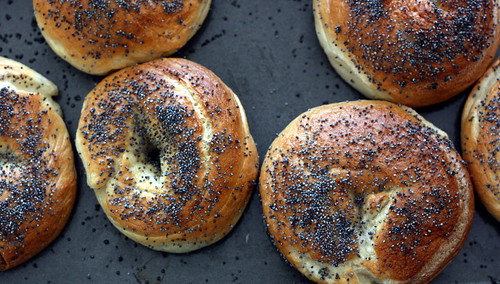
I made bagels because I've had a lot of bad bread, but I've almost never had a bad bagel, so with warped logic, I figured it was something even I couldn't mess up. Plus, I'm Jewish, bagels are (sort of) Jewish... Ok, there was a lot of prayer involved. After I made them, I was mystified about my (now previous) fear of yeast - it was so easy! And so delicious! Why haven't I done this before? And more importantly, when can I do this again? The bagels were exactly how I wanted them to be - plump with soft, pillowy insides and a bit of a crunch on the crust. I sprinkled them with poppy seeds, but next time... oh, next time... I see sun-dried tomatoes and onions, and maybe even my personal dream - cinnamon raisin. The recipe comes from Ari's blog Baking and Books, so head over there and read all her wonderful tips for complete bagel mastery.

Poppy Seed Bagels
Reprinted with permission from Secrets of a Jewish Baker: Recipes for 125 Breads from Around the World, by George Greenstein.
(makes 12 bagels)

2 cups warm water
1 heaping teaspoon active dry yeast
3 tablespoons malt syrup or sugar (I used sugar)
1 tablespoon vegetable oil
6 to 8 cups bread flour (all-purpose worked for me)
1 tablespoon salt
Poppy seeds for topping

In a large bowl, sprinkle the yeast over the warm water and allow a few minutes to soften. Add 2 tablespoons of the malt syrup or sugar, the oil, 6 cups of the flour, and the salt. Mix thoroughly until the dough forms up and comes away from the sides of the bowl.

Turn out onto a floured work surface and knead, adding small amounts of flour 1/4 cup at a time as necessary. Bagel dough should be stiff. Work in as much extra flour as you can comfortably knead. The dough will soften slightly as the gluten develops. Knead until smooth and elastic (12 to 15 minutes).

Rising: Roll the dough into a ball, place in a large oiled bowl (grease the bowl with 1 tsp of oil), and turn to coat. Cover loosely with saran wrap and let rise fully in a warm, dark place (I put mine in a 100F oven to proof because it was freezing in my house), until an impression made with your finger remains and does not sink into the dough. About 1 hour. (Mine rose for 1 1/2 hours).

Shaping: Punch down, cut into thirds, and roll each piece into a rope between your palms. Cut each rope into 4 equal pieces. Roll each piece into a rope 2 inches longer than the width of your hand. Flip the rope around your fingers to form a ring, with the ends overlapping about 1/2 inch. Seal the ends by rolling your palms on the work surface. If the dough slides and resists rolling, dab on a drop of water with your fingers. Evenly space the bagels on 2 nonstick baking pans or very lightly oiled baking sheets (Greenstein applies a thin film of oil with his fingers, I used parchment paper instead). Cover and let stand until puffy, 10 to 20 minutes.

Boiling: Bagels are boiled before they are baked. While they are proofing, fill a 4-quart pan two-thirds full with water, add the 1 remaining tablespoon of malt syrup or sugar, and bring to a boil. Ready your toppings.

Carefully lower 2 or 3 bagels at a time into the boiling water and wait until they rise to the top. If they float, cook for about 1 minute on each side, turning once. If they have proofed too long, they will float instead of sinking, but this won’t affect the final product.

Carefully lift out each bagel with a slotted spoon or skimmer. Drain momentarily, then evenly space 6 bagels on each baking sheet and sprinkle with toppings. You may prefer to leave some plain. Save about 3 cups of the boiling water, see below.

Baking: Preheat the oven to 500 degrees F. Bake with steam by placing an oven safe dish half-filled with the reserved water on the bottom rack of the oven. Place the baking sheets on the middle or top rack, then bake, turning once when the tops begin to brown, until well browned on both sides. About 15 to 20 minutes.

To make these bagels with a stand mixer: In the mixing bowl, dissolve the yeast in the warm water and allow a few minutes to soften. add 2 tablespoons of the malt syrup or sugar, the oil, 6 cups of the flour, and the salt. Using the flat attachment pulse with the on/off switch until the flour is incorporated enough that it won’t be thrown out of the bowl, then mix at first speed until the dough comes away from the sides of the bowl. More flour can be added 1/4 cup at a time.

Remove the flat attachment, scrape down the sides of the bowl and attach the dough hook. Run at first speed until the dough is smooth and elastic, about 12 to 15 minutes. Bagel dough should be stiff. Add flour cautiously, and do not exceed the capacity of the machine. Because the dough is so stiff, it is especially important not to leave the mixer running while unattended. The dough will soften slightly as the gluten develops. Proceed as instructed in the rising, shaping, boiling and baking sections above.

Continued after the jump...
Saturday, November 22, 2008

Best Crab Salad Ever

If you come to a Thanksgiving dinner at a Russian's house, you will be certain to find much more than turkey, mashed potatoes, stuffing and pumpkin pie there. Sure, those things will be present on the menu -- don't let anyone say that we did not faithfully adopt the customs of this holiday -- but any holiday for a Russian is a blank canvas upon which he or she can paint the feast of their desires. As a result, the cold and hot appetizer spread ("zakuski") is probably a full dinner in itself, after which you may or may not want a bit of turkey and stuffing (the men in the family usually end up on the "may" side of that equation).

There are many things you will almost always find at a zakuski table -- pirozhki (meat or cabbage pies), salad Olivier (the Russian version of potato salad), cold cuts and pickled vegetables, and also crab salad. Russians love crab salad. I don't know why, I don't know how, but it's one of those things that invariably finds its way onto the menu, and I am invariably disappointed in its taste. There are many different ways to make it, but usually it involves chunks of crab and cucumbers swimming in a mayo or buttermilk-based dressing. Um. Not my idea of a good time, I can tell you.

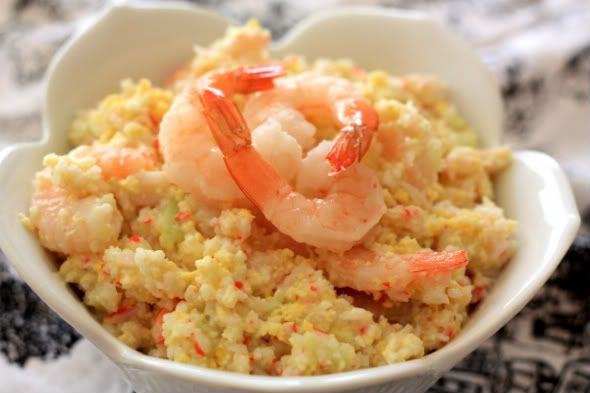
Once I tasted my mother in law's crab salad, however, all my crab salad dreams were answered. People, this is the best crab salad ever, and I am not prone to hyperbole here. Her secret is to use the food processor to do the chopping, which produces the tenderest little flakes of crab and egg, mixed with a little fresh, crunchy cucumber and larger, succulent shrimp.... as my dad says, it's a song. There is maybe 1 tablespoon of mayo in the whole thing because the cucumbers give off enough moisture to hold it together, and my MIL sprinkles the salad with a little masago (smelt fish roe) for crunch, and it's just... so, so good. No more chunks, no more dull flavors. Every ingredient shines. And best of all (besides the taste) is that it's the quickest dish in the world to make. If you have your ingredients ready, give yourself 5-10 minutes with the food processor and it's done. Bring a little Russian flavor to your holiday table this Thanksgiving!

Best Crab Salad Ever
(via my MIL)
makes a large bowl


1 lb crab meat, cooked
1 lb medium shrimp, cooked, peeled and tails off
6 eggs, hardboiled
6 small cucumbers (or one of the huge English cucumbers)
1-2 T mayonnaise
2-3 T masago (optional)

Put all your ingredients in prep bowls and make a large salad bowl ready.

Put the crab meat in the food processor and give it a few pulses until the crab is reduced to tiny flakes and no large pieces remain. Turn the crab out into the salad bowl.

Cut the hardboiled eggs in half and put into the bowl of the food processor, processing for a few seconds until the eggs too are reduced to small pieces and no large pieces remain. Turn out into a bowl next to the crab. I usually do this in two additions (so 3 eggs at a time), but if you have a larger food processor, you might be able to put all the eggs in there at once.

Chop the cucumbers very roughly and do the same thing with the food processor (a fwe pulses of 2/3 seconds each usually suffice). Watch out not to process too much so that the cucumbers don't become slush. Turn out into the salad bowl.

Remove the tails from the shrimp and turn them out into the bowl as well (reserving a few for decoration). Mix the lot with about a tablespoon of mayo. Add more mayo, salt and pepper to taste, making sure all the ingredients are distributed evenly. If you are using masago, mix in about 2 tablespoons with the rest of the ingredients. Arrange the left over shrimp on top decoratively (and if using masago, sprinkle with the left-over tablespoon of masago).

Continued after the jump...
Sunday, October 19, 2008

Brunch for Eight

When I was in college, we used to have dinner parties, like all the time. In fact, we had dinner parties even when all we could use to cook was a 40 year old oven which barely baked chocolate chip cookies. It seemed easy back then -- all you needed was one big dish that everyone could eat, a lot of wine and maybe a cheesecake from Trader Joe's. These days, I find that fewer and fewer people have parties at home. I think it's because women feel like they have to be domestic goddesses, like they have to wow everyone with something amazing, like they have to be Nigella Lawson and like paper plates for dessert are suddenly not cool anymore. They think about the hassle of preparing a 5-star-chef meal to satisfy critical guests' expectations and then they just say screw it and go to a restaurant with a real 5-star-chef.

Well, guess what, I am NOT okay with that. There is so much charm in hosting people at your house, in seeing them eat food that you prepared and choosing your own music and dimming the lights just so. Today, I made a brunch for 8 people in under two hours*, and I can tell you, it was dead easy and it was awesome. I used simple ingredients and I was not above having bagels (and I bought them, too, ha!). Seriously, though -- we should get together at home more often; we should cook for our loved ones; we should eat off of our best china, drink our best wine, dance to Ella Fitzgerald and sit as long as we want to without a waiter giving us the stink eye. And now, I'm just going to stop and give you the menu already, because I'm beginning to feel like I need a short skirt and pom-poms and it's too early for Halloween.

*Except for the crème brûlée, I made that the night before and it took me maybe 15 minutes.

(PS Sorry for the lack of pictures, but my clock was inexplicably 1/2 hr late and I panicked and broke things and burned myself and chaos and pandemonium ensued and I didn't have time to take pictures. But the food turned out great. I kept the blood out of the frittata -- just kidding, mom!).

Full-Proof Brunch Menu For Eight

Starters:
Two wedges of cheese (e.g. Brie and Cheddar or, as I prefer, Brie and Blue Costello)
Pepper crackers, 1 box
1 cold, crisp apple, sliced
A bottle of Prosecco or champagne, cold

Main course:
Frittata with whatever you have on hand (mine was with cheddar, onions, tomatoes and sausage, but you could easily go with asparagus and sun-dried tomatoes or eggplant, cherry tomatoes and gruyere)
Orzo with herbs and goat cheese
Bagels, halved and toasted
Cream cheese
Lox
2 tomatoes, 1 red onion and 2 avocados, thinly sliced
Arugula salad with persimmons, almonds, pomegranate seeds and goat cheese

Dessert:
Crème brûlée
Fruit

Drinks:
White wine
Mineral water with sliced limes and lemons
Orange Juice
Tea

Today's recipe: Frittata!

You should make a frittata because it is the easiest and most versatile dish in the world. And also because saying "frittata" is so much more fun than "omelet." First, you should decide on your ingredients. Asparagus, mushrooms and sun-dried tomatoes? Chorizo and caramelized onions? Fresh mozzarella, basil and tomatoes? What kind of cheese are you going to use? Should you throw in herbs like thyme and/or spices like smoked paprika? Here is how I made mine. The procedure is basically the same, just switch up the ingredients.

In a 10 inch skillet that you can put into the oven, heat up a few tablespoons of olive oil on medium heat. While the oil is heating, chop your ingredients. In my case, it was 1 chorizo (vegetarians, omit this), 1 medium beefsteak tomato and 1/2 of a large red onion. Toss the ingredients into the skillet and saute for a few minutes until they start looking and smelling good (until the chorizo browns and the onion/eggplant/mushrooms/whatever is softening). Note that for asparagus, you should saute all the ingredients first and then throw it into the skillet for a minute at the end right before you pour in the eggs.

While everything is sauteing, put your oven on the broiler setting. For eight people, I used 6 eggs and 6 egg whites (for health and fluffiness reasons) and 1/2 cup of milk. Whisk the eggs, egg whites, milk, a few shakes of salt and pepper together and then when the ingredients have sauteed enough, pour the eggs into the skillet. Throw in a handful of grated cheese. Cover. Go put on your makeup and pour champagne for everyone. Heh heh. Ok, leave it on the heat, covered, for about 10 minutes (or until the eggs are just starting to set but are still a bit wobbly) and then put the skillet under the broiler (I put the rack in the middle of the oven) for another 5-10 minutes or until the frittata is completely set in the middle. Watch it carefully so it doesn't burn. Cut into 8 pieces and transfer to a serving platter. Please be very careful taking it out of the oven because the skillet is going to be HOT (can you tell I am speaking from painful experience here???).

Stay tuned for the other recipes, especially the salad and the crème brûlée. They were really, really, really good.

Continued after the jump...
Saturday, September 13, 2008

Afternoon Tea, Part I - Fruit Tartlets


I am an unabashed Anglophile. This will come as no surprise to many, I'm sure, as I don't even pretend to hide it. I have to confess to loving England, London especially, British literature and history, TV shows and humor, cozy mysteries set in small English villages, all the lads on the Liverpool football team, and I even have a soft spot for London fog and rain because I once saw it from a floor-to-ceiling window overlooking Hyde Park, and it was an unforgettable experience. I love that one Londoner, in an irreverent and yet sweetly possessive manner, once described the Queen Mother to me as "an old biddy" who "likes her gin." I also love the fact that you can now get from London to Paris in under three hours, but that's a whole other story.


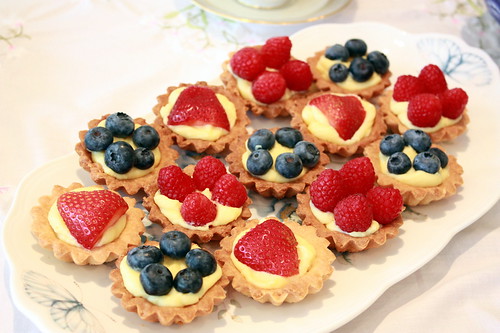
Most of all, I love afternoon tea. There is something magical about taking a break around 4 or 5 in the afternoon to drink fragrant tea and eat little bits of delicious things. It's fortifying, for the body as well as for the soul. Of course, working full time puts somewhat of a damper on the regular exercise of this charming habit, but when I do get to have afternoon tea, I like to make it a little special. Like, special with Mimosas. I'm pretty sure Mimosas are not authentic to afternoon tea, but ... what can I say? I had lemon bars, and oranges were feeling under-represented, so I had to allow them in, and then vodka just naturally followed. But, I digress. The star(s) of the show (besides the Mimosas) were these little tiny tartlets, inspired by tartlet molds I couldn't stop myself from buying at Sur La Table. So simple to make, and yet so delicious, their colorful presence at the table was much appreciated by everyone. If I hadn't hidden one or two for A. in advance, he wouldn't have gotten any. Speaking of A., an hour before the tea party, I overheard him on the phone with his friend: "My wife is having EIGHT WOMEN over for lunch and I HAVE TO GET OUT." He's lucky I'm the kind of wife who saves him food. Anyway! My point was that these babies are awesome and you will not regret making them for your next party, or just for yourself to enjoy on a quiet afternoon with a cup of tea.
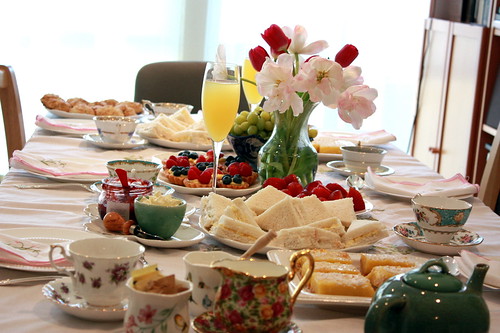


The different components of these tarts can be made a day in advance and kept in an airtight container, to be put together at your leisure. I used raspberries, strawberries and blueberries, but pretty much any fruit will do. I also did not glaze them, but you can by melting a little apricot jelly in the microwave and brushing over the top of the fruit.

Sweet Tart Dough

(Dorie Greenspan)

1 1/2 cups all-purpose flour
1/2 cup confectioner's sugar
1/4 teaspoon salt
1 stick plus 1 tablespoon (9 tablespoons; 4 1/2 ounces) very cold (or frozen) unsalted butter, cut into small pieces
1 large egg yolk

1. Put the flour, sugar and salt in the bowl of a food processor and pulse a few times to combine. Scatter the pieces of butter over the dry ingredients and pulse until the butter is coarsely cut in—you should have pieces the size of oatmeal flakes and some the size of peas. Stir the yolk, just to break it up, and add it a little at a time, pulsing after each addition. When the egg is in, process in long pulses—about 10 seconds each—until the dough, which will look granular soon after the egg is added, forms clumps and curds. Just before you reach this stage, the sound of the machine working the dough will change—heads up. (Alternatively, put the ingredients into a large bowl and cut the butter into the flour with a pastry cutter and then mix in the egg with a fork). Turn the dough out onto a work surface and, very lightly and sparingly, knead the dough just to incorporate any dry ingredients that might have escaped mixing.

2. To roll or press the dough into the pan: Butter a 9-inch fluted tart pan with a removable bottom.

* If you want to roll the dough, chill it for about 2 hours before rolling (unless you've used frozen butter and the dough comes out of the processor firm and cold, in which case you can roll it immediately). I find it easiest to roll this dough out between two sheets of plastic film – make sure to peel away the film frequently, so it doesn't get rolled into the dough.
* If you want to use the press-in method, you can work with the dough as soon as it's processed. Just press the dough evenly over the bottom and up the sides of the pan. Don't be too heavy-handed – press the crust in so that the edges of the pieces cling to one another, but don't press so hard that the crust loses its crumbly texture.

3. Freeze the crust for at least 30 minutes, preferably longer, before baking.

4. To fully bake the crust: Center a rack in the oven and preheat the oven to 375°F.

5. Butter the shiny side of a piece of aluminum foil (or use nonstick foil) and fit the foil, buttered side down, tightly against the crust. (Since you froze the crust, you can bake it without weights.) Put the tart pan on a baking sheet and bake the crust for 25 minutes. Carefully remove the foil. If the crust has puffed, press it down gently with the back of a spoon (or prick it with the tip of a small knife). Bake the crust for another 8 minutes or so, or until it is firm and golden brown, brown being the important word: a pale crust doesn't have a lot of flavor. Transfer the pan to a rack and cool the crust to room temperature.

Pastry Cream

(adapted from Dorie Greenspan)

2 cups whole milk
1 tsp vanilla extract
6 large egg yolks
1/2 cup sugar
1/3 cup cornstarch, sifted
3 1/2 tablespoons (1 3/4 ounces) unsalted butter, softened and cut into 3 pats

1. Bring the milk a boil in a small saucepan over medium heat.

2. Whisk the yolks, sugar, and cornstarch together in a heavy-bottomed medium saucepan. Whisking constantly, drizzle one-quarter of the hot milk over the yolks. When the yolks are warm, whisk the remainder of the milk into the yolks in a steadier stream.

3. Put the pan over medium heat and, whisking vigorously, bring the mixture to the boil. Keep at the boil—still whisking energetically—for 1 to 2 minutes before pulling the pan from the heat and pressing the cream through a sieve into the small bowl. Stir in vanilla extract. Let the cream sit for 5 minutes, then whisk in the butter. Cover the cream with a piece of plastic wrap—press the wrap against the cream—and refrigerate until thoroughly chilled. You can speed up the chill by putting the bowl in a larger bowl filled with ice cubes and cold water. (Keeping: Covered tightly with plastic wrap, pastry cream can be refrigerated for 2 days. To smooth the chilled cream, whisk it for a few seconds.)

Continued after the jump...