Saturday, February 28, 2009

Buckwheat Galettes

My second time in Paris was for myself alone. I had always dreamt of traveling by myself, but first my parents and then A. would hear none of it, and somehow, it wasn't worth it to make them worry quite so much. Fortunately for me, life had a way of figuring things out, and here I was, presented with an opportunity to run around Paris practically by myself for two whole days. It was brilliant.

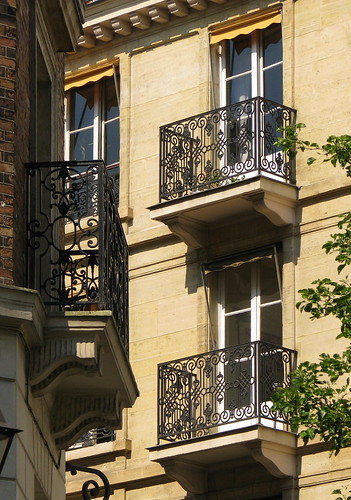
I had already covered all the major sights and museums my first time there, so this time around, I just scribbled some markings on a map, took the subway to the Marais, and began walking. I think everyone should have a day like that, when they can just start walking, without regard to time, direction or destination, without being tethered to the cell phone or the blackberry (and also free to stop off at Gérard Mulot in St. Germain and get two, that's right, two pastries, thereby shocking the good sales-women of GM with my gluttony).

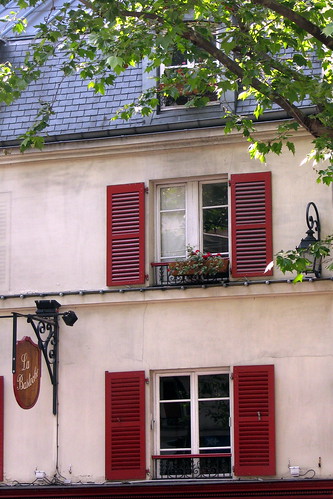
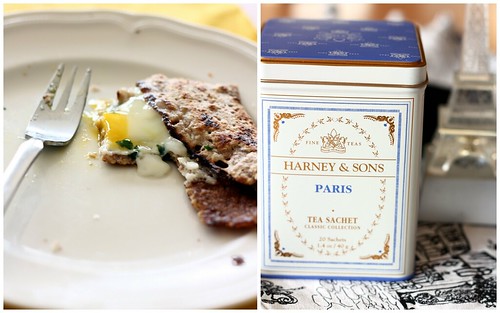
I had lunch in a small place on Ile Saint-Louis. The walls were painted red and the predominant language was French, and maybe it was the sunny day, but the waitress even smiled at me a few times and it seemed sincere. When I opened the menu and ordered a 3 course lunch for 10 Euro, I could hardly believe my eyes. I mean, 10 Euro, in Paris. I think my cafe creme and croissant in the morning were more than that. I was prepared to be disappointed. But you know where this story is heading, right? Disappointed I was not -- after all, it was Paris, the city of lights, magic and 10 Euro lunches. I can't say it was the best lunch I've ever had, but it was very decent, and even almost a year later, I can not stop thinking about the buckwheat galette that was my main course. With a runny egg and a sprinkling of cheese and herbs folded into a neat, square envelope, it was just light enough and substantial enough to carry me through until that fateful stop at Gérard Mulot.

It took me a year to replicate the galette, mostly because I couldn't justify buying a bunch of buckwheat flour just for one indulgence. What finally tipped the scales was that I found a small bag of buckwheat hiding in my pantry, ground it up in my food processor, and I was ready to go. Well. Let's just say that I won't make the mistake of waiting another year to do this again! Compared to a regular crepe, the galette is heartier and nubby with delicious little bits of ground buckwheat, and is the perfect sturdy bed on which to rest your egg, ham, spinach, and of course, a sprinkling of cheese and herbs. And, it reminds me of Paris.

Buckwheat galettes
This recipe comes from Clotilde at Chocolate and Zucchini, on of my favorite blogs from Paris. Being French, Clotilde automatically gets the monopoly on crepe and galette making, so I didn't mess with the proportions too much (except to convert to American measurements and decrease the amount of water by a little bit to make it easier to flip) or with any of her instructions (linked above and copied below). This makes quite a large quantity, so I halved the recipe when I was making it for myself. The quantities below are from Clotilde's original recipe. Please visit her website (chances are that you have already), as she is totally, totally awesome.

For the dough :
- 200 g (1.5 cups) buckwheat flour
- 50 g (1/3 cup) all-purpose flour
- 2 eggs
- 50 cl (2 cups) milk
- 25 cl (1 cup) water

For the galettes :
- salted butter
- the fillings of your choice

(Makes 12 medium galettes.)

Step 1 : Prepare the dough.

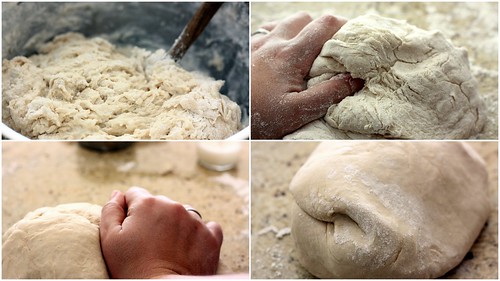
If you have a food processor , break the eggs in the bowl of the food processor. Add the flours, and mix until well blended. Add as much of the milk as your food processor allows and mix again. Transfer to a large mixing bowl, and add the remaining milk and the water. Whisk until thoroughly blended.

If you don't have a food processor, put the flour in a large mixing bowl and dig a little well in the center. Break the eggs in the well, and whisk them progressively into the flour in a circular motion. Pour the milk in slowly, whisking all the while. Add the water, still whisking.

In both cases, cover the mixing bowl with plastic wrap, and store in the fridge for at least two hours, overnight is best (Irene's note: *cough* I totally didn't, and they were still awesome).

Step 2 : Make the galettes.

Take the bowl of dough out of the fridge and prepare all the fillings beforehand. Whisk the galette dough again, as some of the flour will have settled at the bottom of the bowl.

If you're making several galettes in a row, preheat the oven to 180°C (360°F). This is where you'll keep the galettes warm while you make the others.

Heat up a large non-stick skillet over high heat. When it is very hot, put in a sliver of salted butter. When it is melted, but before it browns, use a paper towel to (cautiously) spread the butter evenly on the surface of the skillet. Pour a ladleful of dough (Irene's note: about 1/2 - 3/4 cup per galette) in the skillet, and swoop the skillet around so that the dough spreads out in a nice even circle. Let cook on medium-high heat for a few minutes, peeking underneath with a spatula from time to time to check on the cooking.

Flip the galette when it's nicely golden underneath, cautiously or brazenly depending on your self-assurance. Put the fillings of your choice in the center of the galette. If using an egg, break it cautiously and gently maintain the yolk in the center with the eggshell or your spatula until the white has set enough to hold it in place. When the other side of the galette is nice and golden too, fold it as best you can : the traditional way is to fold the four sides in and make a square galette, but when there's a lot of filling and the galette isn't very big that's a little difficult, so just fold two sides in.

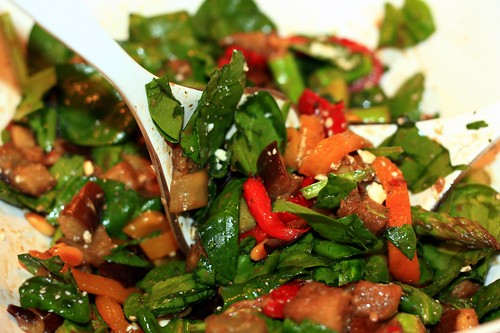
Put the galette in a large baking dish or on a cookie sheet and into the oven to keep warm while you make the others. Serve with a green salad and liberal amounts of Cidre Brut, an alcoholic apple cider from Brittany.

Continued after the jump...

Tuesday, February 24, 2009

Chez Panisse Pasta with Roasted Eggplant

One of my big resolutions for this year was that I would make either lunch or dinner a vegetarian meal. Not that I have anything against meat - hey, if you're on top of the food chain for the moment, might as well enjoy it, right? - but I find that in life, one of the most important things is balance, and this past year, and especially during the holidays, we haven't done a very good job with that when it comes to food.

And while we are on the subject of confessions and resolutions, I have to tell you another thing. I'm afraid you're going to laugh, but because I'm brave and you are a captive audience, I'll tell you anyway. Ever since I saw Weston's famous photographs, I've had a thing for vegetables. I think eggplant has sexy curves. I lust after the little curls of sweet peas. A really good tomato can make me do all sorts of bad, bad things. So I guess it just makes sense that sooner or later, I was going to run across Alice Waters' Chez Panisse Vegetables and also fall in love with it.

I'll warn you straight off the bat that there's nothing revolutionary about this pasta - you take some some spaghetti and throw it together with roasted eggplant, mushrooms and onions, and whoa, let's be really adventurous here and add some chopped tomatoes, feta cheese and cilantro. But I tell you, and please trust me on this, that you will not be able to stop eating it. Once you've put it all together, and you take that first bite of perfectly al dente wheat pasta that's slicked with a little good olive oil and sherry vinegar, and bite into the succulent, slightly salty chunks of mushrooms and eggplant, and the onions will crunch and the feta will obligingly melt on your tongue and the earthy smell of cilantro will top it all off... What I'm trying to say here is that you will really want some alone time with this pasta because it's good... like, "should I really be doing this? (yes)" good. Or so this prim and proper blogger has heard, of course.


Chez Panisse Pasta with Roasted Eggplant
(Alice Waters Chez Panisse Vegetables, my adaptation)

1/2 pound wheat pasta
1 large eggplant, or two smaller Japanese eggplants
1/2 lb white button mushrooms, quartered
1/2 red onion, finely diced (or 3/4 shallots, finely diced) (if using regular pasta, not wheat, use yellow onion)
2 cloves garlic, finely chopped
1/2 cup fresh cilantro, chopped (or can also use parsley)
A dash of sherry vinegar
1 cup diced tomatoes
2 tablespoons good olive oil
1/3 cup crumbled feta cheese (I find that less is more here - also, if you are using regular pasta, not wheat, I would probably go with goat or ricotta cheese)
Salt and pepper

Preheat the oven to 400 degrees. Cut the eggplant into 1/2 inch cubes and quarter the mushrooms. Toss this with 1 tablespoon of the olive oil in a large bowl until coated (or just spray with an olive oil spray). Place the veggies on a roasting pan in a single layer, sprinkle all over with kosher salt, and roast for 25-30 or until they are soft.

Meanwhile, bring a large pot of water to boil. Cook the pasta according to instructions on the box. Drain, but retain a few tablespoons of the water.

Heat a large skillet to medium. Pour in the other 1 tablespoon of the olive oil. Add the onion and saute until it's soft and starting to color. Add the garlic, cook for about a minute until fragrant, and then deglaze the pan with a splash of sherry vinegar.

Add the eggplant and mushrooms to the skillet along with the diced tomatoes and the pasta water. Add the pasta (and if it's too dry, splash a little more olive oil on it) and season with salt and pepper. Stir in half the feta cheese and half the cilantro (or parsley). Divide between bowls and garnish with the rest of the feta and cilantro.


Continued after the jump...

Sunday, February 22, 2009

Chocolate biscotti

On days like this, when the clouds are thick, dark and saturated with rain, when the plants look droopy and the streets are almost empty and silent, I forget that it's sunny somewhere else in the world. I forget that soon, the seasons will change again and I won't need that extra shot of espresso to feel good because the air will carry the smells of spring. On days like this, I embrace my mood and I bake chocolate biscotti.

Since I've previously had success with Dorie Greenspan's almond cornmeal biscotti, I decided to give her chocolate biscotti recipe a try. The flavor was great - dark, dense, chocolaty with smoky notes of espresso and a crunch of almonds (although I think hazelnuts would have worked better, but I didn't have them around). Alas, they were crumbly - very very crumbly. What did I do wrong? The recipe said that the tops will crack a bit, and not only did the tops crack quite a lot, but I had such trouble slicing them after the first bake AND after the second bake, that at least a few had to be sent to that great biscotti gig in the sky (aka, A.'s afternoon tea). Also, and this is a minor complaint since they did taste great, these biscotti weren't very pretty. Does anyone have a chocolate biscotti recipe that works better than this one? Help!


Chocolate Biscotti
(Dorie Greenspan, Baking)

Ingredients

2 cups all-purpose flour
1/2 cup unsweetened cocoa powder
2 tbsp instant coffee or instant espresso powder
3/4 tsp baking soda
1/2 tsp baking powder
1 tsp salt
6 tbsp unsalted butter, room temperature
1 cup sugar (I always use a bit less, more like 3/4)
2 large eggs, lightly beaten
1 tsp vanilla extract
1/2 cup chopped almonds (or hazelnuts - next time)
4 oz bittersweet chocolate, coarsely chopped

Directions

Preheat oven to 350 degrees. Line a baking sheet with parchment or a silicone baking mat.

Sift together the flour, cocoa, coffee powder, baking soda, baking powder, and salt.

With a mixer, cream the butter and sugar on medium speed for about 2 minutes until light. Scrape down the sides of the bowl and add the eggs and vanilla; beat for another 2 minutes. Decrease the speed to low and mix in the dry ingredients in 3 additions, mixing only until a dough forms. Scrape down the sides of the bowl and mix in the chopped nuts and chocolate.

Turn the dough out onto a work surface and knead a few times just to incorporate any dry ingredients that didn't get mixed in before. Divide into two portions; on the baking sheet, shape each portion into a 12 x 2 inch log. Dust the tops with a little sugar (to make them look pretty, I'm assuming). Bake for 25 minutes.

Remove the sheet from the oven and let it cool on a rack for 20 minutes. Then, with a very sharp, serrated knife, slice the logs into about 3/4 - 1 inch slices and leave the slices standing up on the baking sheet (some people lay them down, but I like both sides to get crispy). Return to the oven for another 10-15 minutes of baking.

Transfer biscotti to a rack to cool.

Continued after the jump...

Tuesday, February 17, 2009

Strawberry Frangelico Tart

One of my favorite places in the world is Italy. When I was nine and my parents were making the staggering move from Russia to the United States, with two children and elderly parents in tow, we had to stay in Italy for six months to wait for our visa. At first, with the help of an American Jewish organization, we were housed in an old gray villa, where the paths crunched with gravel and the tall windows let in the cold spring wind. Eventually, though, we found a little house all of our own, in a town called Nettuno - a little seaside retreat an hour south of Rome. Nettuno was heaven for us kids. While our parents worked, we ran around the neighborhood, peering (discreetly, of course) into windows of strange shops, smelling the wonderful ciabatta bread which had a hard, crackly crust and soft insides. We watched the procession of colorful characters on the boardwalk and there always seemed to be something going on, music playing just around the corner and red, green, blue confetti flying through the air. That's how I remember Italy during that time, a whirl of confetti and the feel of warm bread breaking beneath my fingers.

Our neighbors - an Italian family - had a house which seemed to us (coming from a tiny apartment) the height of luxury. There were two little girls, too - Valentina and Federica. Valentina was the oldest - nine, just like me, and despite me not speaking any Italian and her not speaking any Russian, and neither of us really speaking more than four words of English, we got on swimmingly, and not a few months passed before we were tyrannizing our younger sisters and deciding matters of national importance, like who would play with which doll. Their parents made us our first ever pizza - a rectangular one, of course, with fresh tomatoes, mozzarella and basil layered on the thin crust, and my grandmother made them a cake that said 'grazie.' Their house was always full of people - friends, cousins, neighbors - and I think they didn't mind the addition of two timid girls who probably did unspeakable horrors to the beautiful Italian language. Whenever I get sad or lonely, I think about them and those beautiful months playing in the sunshine in Nettuno and drawing pictures that said 'ciao' when we only meant to say 'until we meet again.'

This strawberry tart with Frangelico somehow makes me feel closer to that time and I wanted to share it with you. It's also full of color and fragrance and uses two of my favorite Italian ingredients, mascarpone cheese and Frangelico (and, well, Nutella isn't so bad either). At a time when rain beats against my window, I want to wrap myself in my memories like in a warm blanket and bring back the smells of Italy.


Strawberry Frangelico Tart

One fully baked sweet tart shell

Filling:
3/4 cups heavy whipping cream, very cold
1/2 cup mascarpone cheese, softened and at room temperature
2 tablespoons sugar (for lightly sweetened, or more to taste)
1-2 tablespoons Frangelico (Italian hazelnut liquor)
2-3 tablespoons Nutella (OR 2-3 oz chocolate, finely chopped)
1 lb strawberries, hulled and halved (I think sliced in half would be best, though as you can see I tried it with whole strawberries first and then I sliced them thinly)

Bake the crust fully. When you remove the crust from the oven and it is still warm, spread the Nutella or chopped chocolate (whichever one you are using) on the bottom. If you are using chocolate, the chocolate will melt - this is a good thing. Set the crust aside to cool to room temperature.

Next, whip the cream with sugar to soft peaks (there are varying philosophies on how to do this, but I usually start on medium-high speed and once there are some air bubbles, I add the sugar and continue whipping on medium-high). Fold in the Frangelico, one tablespoon at a time, depending on how boozy you want it to be. Add the mascarpone cheese and continue whipping on medium until the mascarpone is incorporated and the cream is thick but not completely stiff.

Spread the cream inside the crust and top with strawberries. I also sprinkled some grated chocolate on top.

Continued after the jump...

Saturday, February 14, 2009

Poppyseed Bagels

I've always had dual feelings about Valentine's Day. On one hand, it's a totally made-up holiday that's been Hallmark-ed out of all reason and proportion, with bad chocolates and roses at $10/stem (last night, we saw a man buying a ginormous red heart balloon with TINKERBELL on it... oh, honey, no, just no). Also, I hate people telling me what to do, so the idea of a "mandated romance" day revolts all of my higher sensibilities.

On the other hand, I LOVE VALENTINE'S DAY! I've always loved it and always will. What can I say, I'm a sucker for hugs, kisses and "I love you"s. If you stop and think about it, it's actually pretty awesome to have a day dedicated to telling your family, friends and significant other that you love them -- just because. Sure, you should tell them this the other 364 days of the year too, but I really enjoy the extra reminder. I always have a smile on my face on this day.

Once upon a time, long before I met A., I was scared of falling in love. It seemed like such a strange, alien experience to put so much of yourself into someone else's not so gentle hands. It sounded kind of wacky and I didn't think I was ever going to take the plunge. Then... well, I met A., and like a second later, I was jumping off the cliff without the safety harness. Geez. What was that saying about "the harder they fall"?

That's kind of how I felt about yeast (smooth transition, eh?). Like love, the whole process sounded kind of wacky, and in my almost 30 years, I've avoided yeast and yeast breads like the plague. I decided that for Valentine's Day, it was time to change all that, to break through my inhibitions, to boldly go, etc etc, you get the idea. Guess what? IT WAS TOTALLY AWESOME.

I made bagels because I've had a lot of bad bread, but I've almost never had a bad bagel, so with warped logic, I figured it was something even I couldn't mess up. Plus, I'm Jewish, bagels are (sort of) Jewish... Ok, there was a lot of prayer involved. After I made them, I was mystified about my (now previous) fear of yeast - it was so easy! And so delicious! Why haven't I done this before? And more importantly, when can I do this again? The bagels were exactly how I wanted them to be - plump with soft, pillowy insides and a bit of a crunch on the crust. I sprinkled them with poppy seeds, but next time... oh, next time... I see sun-dried tomatoes and onions, and maybe even my personal dream - cinnamon raisin. The recipe comes from Ari's blog Baking and Books, so head over there and read all her wonderful tips for complete bagel mastery.

Poppy Seed Bagels
Reprinted with permission from Secrets of a Jewish Baker: Recipes for 125 Breads from Around the World, by George Greenstein.
(makes 12 bagels)

2 cups warm water
1 heaping teaspoon active dry yeast
3 tablespoons malt syrup or sugar (I used sugar)
1 tablespoon vegetable oil
6 to 8 cups bread flour (all-purpose worked for me)
1 tablespoon salt
Poppy seeds for topping

In a large bowl, sprinkle the yeast over the warm water and allow a few minutes to soften. Add 2 tablespoons of the malt syrup or sugar, the oil, 6 cups of the flour, and the salt. Mix thoroughly until the dough forms up and comes away from the sides of the bowl.

Turn out onto a floured work surface and knead, adding small amounts of flour 1/4 cup at a time as necessary. Bagel dough should be stiff. Work in as much extra flour as you can comfortably knead. The dough will soften slightly as the gluten develops. Knead until smooth and elastic (12 to 15 minutes).

Rising: Roll the dough into a ball, place in a large oiled bowl (grease the bowl with 1 tsp of oil), and turn to coat. Cover loosely with saran wrap and let rise fully in a warm, dark place (I put mine in a 100F oven to proof because it was freezing in my house), until an impression made with your finger remains and does not sink into the dough. About 1 hour. (Mine rose for 1 1/2 hours).

Shaping: Punch down, cut into thirds, and roll each piece into a rope between your palms. Cut each rope into 4 equal pieces. Roll each piece into a rope 2 inches longer than the width of your hand. Flip the rope around your fingers to form a ring, with the ends overlapping about 1/2 inch. Seal the ends by rolling your palms on the work surface. If the dough slides and resists rolling, dab on a drop of water with your fingers. Evenly space the bagels on 2 nonstick baking pans or very lightly oiled baking sheets (Greenstein applies a thin film of oil with his fingers, I used parchment paper instead). Cover and let stand until puffy, 10 to 20 minutes.

Boiling: Bagels are boiled before they are baked. While they are proofing, fill a 4-quart pan two-thirds full with water, add the 1 remaining tablespoon of malt syrup or sugar, and bring to a boil. Ready your toppings.

Carefully lower 2 or 3 bagels at a time into the boiling water and wait until they rise to the top. If they float, cook for about 1 minute on each side, turning once. If they have proofed too long, they will float instead of sinking, but this won’t affect the final product.

Carefully lift out each bagel with a slotted spoon or skimmer. Drain momentarily, then evenly space 6 bagels on each baking sheet and sprinkle with toppings. You may prefer to leave some plain. Save about 3 cups of the boiling water, see below.

Baking: Preheat the oven to 500 degrees F. Bake with steam by placing an oven safe dish half-filled with the reserved water on the bottom rack of the oven. Place the baking sheets on the middle or top rack, then bake, turning once when the tops begin to brown, until well browned on both sides. About 15 to 20 minutes.

To make these bagels with a stand mixer: In the mixing bowl, dissolve the yeast in the warm water and allow a few minutes to soften. add 2 tablespoons of the malt syrup or sugar, the oil, 6 cups of the flour, and the salt. Using the flat attachment pulse with the on/off switch until the flour is incorporated enough that it won’t be thrown out of the bowl, then mix at first speed until the dough comes away from the sides of the bowl. More flour can be added 1/4 cup at a time.

Remove the flat attachment, scrape down the sides of the bowl and attach the dough hook. Run at first speed until the dough is smooth and elastic, about 12 to 15 minutes. Bagel dough should be stiff. Add flour cautiously, and do not exceed the capacity of the machine. Because the dough is so stiff, it is especially important not to leave the mixer running while unattended. The dough will soften slightly as the gluten develops. Proceed as instructed in the rising, shaping, boiling and baking sections above.

Continued after the jump...

Wednesday, February 11, 2009

Baby spinach, eggplant, asparagus and roasted peppers salad

I've started writing this entry three times and three times I have erased what I've written. I'm sorry, there's a soccer game on that I'm dying to go watch -- the English boys are playing the Spanish boys in a World Cup friendly, and if you've ever seen pictures of either team, you will know that the only thing that would elevate a match like this is seeing some Italians in the stands (this is the point where most of the male readers sigh and roll their eyes -- don't worry, guys, I like the sport for itself; I just like it better when Iker Casillas is on the field).

So, in short, this salad - make it now. It's perfect for the winter. There are textures here, and flavors and colors that are subtle and exciting at the same time, and most importantly, it tastes so much like comfort food that you will want to forget that it's chock full of healthy things and curl up on your couch with the salad bowl, whispering sweet nothings into it's... er... ear (?). First, you start with some chopped baby spinach, a tough leaf that can stand up next to the sauteed garlic and eggplant and asparagus that you're going to pair it up with. Then, you carefully slice tender roasted peppers, toast some pine nuts, throw in a handful of feta cheese and spice the whole thing up with a basic vinaigrette that's enlivened by a touch of creamy horseradish and a spritz of lemon juice. It's not a recipe so much as a base for your winter cravings. It's light but filling, and the flavors, though complex, support each other instead of shoving and pulling each other's shirts, like some unruly footballers I know (you know who you are, boys, I've got my eye on you).

Baby spinach, eggplant, asparagus and roasted peppers salad
(serves 2)
2 cups baby spinach, roughly chopped
1 medium sized eggplant, cubed
3/4 sticks of asparagus, cut into 1 inch pieces
1 red pepper, roasted (or if you are lazy like me, you buy yours at Trader Joe's)
A small handful of pine nuts, toasted
A small handful of feta cheese, crumbled
2 cloves of garlic, crushed
1 tablespoon of chopped cilantro
Zest of 1/2 lemon
Salt and pepper to taste

For the vinaigrette:
1 tablespoon extra virgin olive oil
1 tablespoon balsamic vinegar
1 teaspoon creamy horseradish
Juice of 1/2 lemon
Salt and pepper to taste

Roughly chop the spinach and put into the salad bowl. Heat about a tablespoon of olive oil in a skillet on medium heat and saute the cubed eggplant for about 5 minutes, until it just starts to soften. Toss in the asparagus, garlic and cilantro and saute for another 2/3 minutes until warm and fragrant. Sprinkle lemon zest on top and saute for an additional minute. The asparagus should still be slightly crispy, but the eggplant should be very soft.

Take off the heat and add to the salad bowl. Slice the roasted pepper thinly and also add to the salad. Toss in the toasted pine nuts and feta.

Make the vinaigrette by whisking all the ingredients together until incorporated. Toss and season the salad.

Continued after the jump...

Monday, February 9, 2009

Chocolate Mascarpone Brownies


When I go to Europe, I often hear American food described derisively as "burgers and fries," and gourmands kind of wrinkle their noses at it as if omg! burgers! who eats that?! (I bet they secretly do). To me, however, American food is the stuff of summer BBQs, the sunshine and warmth of sunsets on a back patio, the comfort of family and friends - in a word, it's timeless. Certainly, American food is not so delicate as French food and not so exotic as Korean, for example, but there is so much flavor there that I return to it over and over again when I have the luxury to cook to please only myself.


Which brings me to this cold spell Los Angeles is having - rain pattering on the roof, rolling gray clouds and temperatures below 60 (that's COLD for around here!). At times like these, I want something that will be the taste-equivalent of a fleece blanket, and I want it fast. Wherein come these brownies. People: I am not a chocolate person, but these are divine. Meltingly soft when warm and dense and fudgy when cold, intensely chocolaty at every temperature, it was actually torture to package them away for early Valentine's Day gifts. I really hope giving away chocolate puts out some cosmic karmic good vibes, because whew, I suffered when they left my hands, I really did.


First, you start with a lot of chocolate, cocoa powder, sugar, eggs and butter, and then, because clearly, that's just not enough, you add in some creamy mascarpone cheese and a bit of flour to hold it all together, and THEN (yes, you heard me right, there's more), you make a chocolate ganache that covers the brownies with a shiny blanket of awesomeness. Let me pause a moment to let that all sink in. Yeah. They were that good.

Chocolate Mascarpone Brownies

Brownies:
1 cup unsalted butter
3 ounces best quality semisweet chocolate (I use 70%), finely chopped
1 cup sugar
1/2 cup cocoa powder
1/2 cup mascarpone cheese, softened
3 large eggs, at room temperature
2 tsp vanilla extract
1/2 cup all purpose flour
1/4 tsp salt

Ganache:
6 ounces best quality semisweet chocolate, finely chopped
6 tablespoons heavy cream
3 tablespoons unsalted butter

Preheat oven to 325F and butter an 8-inch square baking pan.

For the brownies: In a small saucepan (or in the microwave), melt the butter and bring it to just below a boil; put the chocolate in a mixing bowl and pour the hot butter over the chocolate. Let stand for 30 seconds and then whisk until smooth and chocolate has completely melted.

Sift in the sugar and cocoa powder and fold into the chocolate.

Beat in the mascarpone cheese, eggs and vanilla, mixing until smooth. In a small bowl, whisk together the flour and the salt and then gently fold them into the batter.

Pour the batter into the prepared pan and spread evenly. Bake for 45-50 minutes or until a tester comes out clean. Cool for 10-15 minutes while you make the ganache.

For the ganache: Place chopped chocolate in a mixing bowl; in a small saucepan, bring the cream and the butter to just below the boiling point, over medium heat. Pour this hot cream-butter mixture over the chocolate and let stand for 30 seconds, then stir until smooth; ganache is now ready to use and can be spread over the brownies.

Should you wish to wait a bit, make sure the ganache is warm when you spread over the brownies, as it does firm up which makes spreading hard to do.

Don't cut into the brownies until ganache has firmed up; I find it best to put the brownies into the fridge to speed this along; once the ganache is firm the brownies do not need to be kept in the fridge, though.

Continued after the jump...

Saturday, February 7, 2009

Dear Peg

Thank you so much for being such a loyal reader of this blog. This month marks a year since I started Confessions of a Tart, and the best present I can think of is knowing that through blogging, I have made the acquaintance of so many wonderful people who enrich my life by sharing with me their recipes, their support and their friendship. This home-made vanilla extract is for you (I hope you enjoy the extra spike of rum).

Much love and gratitude to you all for reading,
Irene

Continued after the jump...