Sunday, April 26, 2009

Guinness Cupcakes with Bailey's Buttercream Frosting

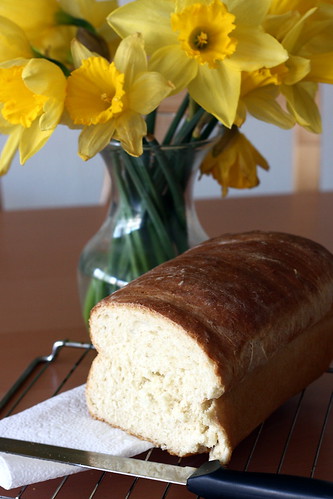
It was a beautiful weekend here in Los Angeles, and I hope this means that the sun is done playing hide and seek with us and is finally ready for its summer debut. You see, "seasons" is kind of a relative term here -- spring lasts about a minute and a half, teasing us with perfect 70 degree sunshiny days, pink tulips and the subtle, turn-and-you'll-miss-it smell of lilacs in bloom (by the way, the phrase "lilacs in bloom" might just be the most beautiful and romantic phrase in the world). And then, just as you're putting away the winter jackets (singular, in my case - don't hate me) and settling in to enjoy wearing cardigans again, out comes the heat in full force and you are suddenly compelled, by a force stronger than you can resist, to remodel the patio and drive to the beach to check in on the buff Malibu boys playing beach volleyball at all times of day and night. Oh, am I the only one who does that? ;)

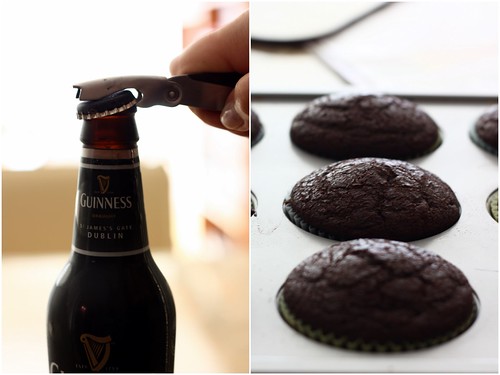
One thing that always brings me into the summer mood is beer. During the winter, I enjoy "sophisticated" cocktails with names that get you approving glances from the bartenders and make me feel like I know the secret handshake, but when it's hot outside, I'm a beer and cupcakes kind of girl and I don't care who knows it.

When I was at my first college party and picked up a bottle of Guinness, I got very disapproving glances from some of the boys. As you can imagine, these were all immediately crossed off my "list" (I would explain "the list," but I think my mother reads this blog and I don't want to get in trouble!). Later, I found out that it's kind of an unwritten rule that girls drink Coronas and light beers while guys chug the more "manly" bitters and stouts. Oh. Really. Good thing I've never been one to follow the rules, especially the unwritten ones!

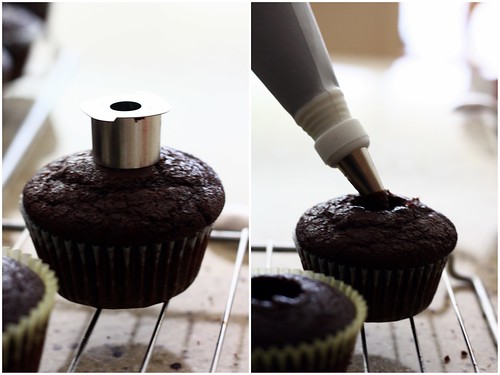
Since then, Guinness has been on my list of favorite beers. Many say it's an acquired taste, but Guinness and I were friends from the very first sip and our relationship has only grown over the years. So when I saw this recipe for Guinness cupcakes, I knew, I just knew that here was the next step in the evolution -- I had to make them. They sat in my mind for a month -- fermented, if you will -- until a friend's birthday finally tempted me to bring them out in their full glory.

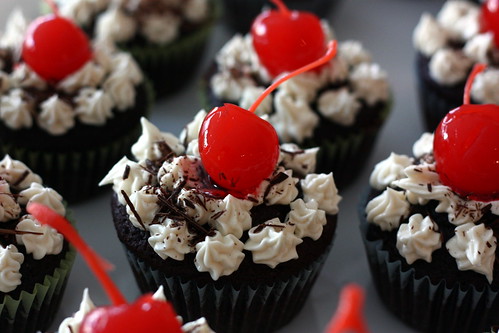
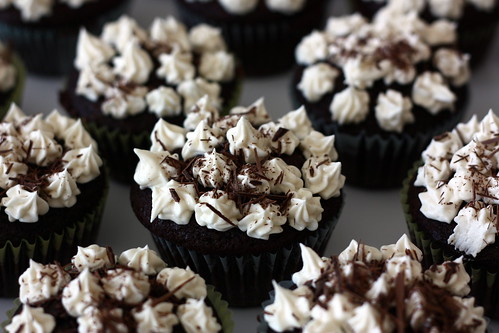
People, these might just be -- no, these ARE -- the best cupcakes to ever have come out of my kitchen and possibly the best cupcakes I've ever tasted. Deb is a genius. I have a massive girl crush on her and on these cupcakes (I hope her husband will forgive me). WOW. The combination of moist, lightly sweet chocolate cake in which you can only taste the best parts of Guinness, a chocolaty ganache filling and a buttercream frosting made with Bailey's Irish Cream is indescribable, unforgettable. It's something you have to make for yourself, like right now, and share it with others immediately. These cupcakes have to go out into the world. In the immortal words of a Seinfeld episode, they are real and they are spectacular!

Chocolate Whiskey and Beer Cupcakes
via the Smitten Kitchen

*My only changes were omitting the whiskey in the ganache (I didn't have any on hand) and using 2 tbsp Bailey's and 2 tbsp heavy cream in the frosting. I used about 2 1/2 cups of confectioner's sugar in the frosting and it worked out very well. Please click over to the Smitten Kitchen for Deb's great hints and instructions!

Chocolate Whiskey and Beer Cupcakes
Makes 20 to 24 cupcakes

For the Guinness Chocolate Cupcakes

1 cup stout (such as Guinness)
1 cup (2 sticks) unsalted butter
3/4 cup unsweetened cocoa powder (preferably Dutch-process)
2 cups all purpose flour
2 cups sugar
1 1/2 teaspoons baking soda
3/4 teaspoon salt
2 large eggs
2/3 cup sour cream

Ganache Filling
8 ounces bittersweet chocolate
2/3 cup heavy cream
2 tablespoons butter, room temperature
1 to 2 teaspoons Irish whiskey (optional)

Baileys Frosting (see Recipe Notes)
3 to 4 cups confections sugar
1 stick (1/2 cup or 4 ounces) unsalted butter, at room temperature
3 to 4 tablespoons Baileys (or milk, or heavy cream, or a combination thereof)

Make the cupcakes: Preheat oven to 350°F. Line 24 cupcake cups with liners.

Put the butter with the beer in a sauce pan over medium heat and bring to a simmer. Whisk in cocoa powder until smooth. Cool slightly.

In a large bowl, whisk the flour, sugar, baking soda and salt. In a mixer bowl, beat the eggas and the sour cream together. Add the beer/butter/cocoa mixture and beat to combine. Add the flour mixture and beat briefly just to combine. Using a rubbet spatula, fold the batter until completely combined, making sure to incorporate little pockets of flour on the bottom so that the batter is of equal consistency everywhere.

Fill the cupcake liners about 2/3 of the way if you want flatter cupcakes and 3/4 if you want domed. Bake for about 17 minutes, or until a toothpick or a slim knife inserted into the middle of a cupcake comes out clean. Cool completely to room temperature.

Make the filling: Chop the chocolate and transfer it to a heatproof bowl. Heat the cream until simmering and pour it over the chocolate. Let it sit for one minute and then stir until smooth. Add the butter and whiskey (if you’re using it) and stir until combined.

Fill the cupcakes: Let the ganache cool until thick but still soft enough to be piped. Using your 1-inch round cookie cutter or an apple corer, cut the centers out of the cooled cupcakes. I went about half to 2/3 of the way down and used a small knife to help me extract the centers. Put the ganache into a piping bag with a wide tip and fill the holes in each cupcake to the top.

Make the frosting: In a large mixer bowl, whip the butter for several minutes until very light and fluffly. Slowly add the powdered sugar, letting it incorporate, utnil the butter becomes thicker and stiff (you will know when this happens). Slowly drizzle the Bailey's (or milk or cream or a combination thereof) and whip until combined. Ice and decorate the cupcakes.

Deb says that you can make these in advance: "You can bake the cupcakes a week or two in advance and store them, well wrapped, in the freezer. You can also fill them before you freeze them. They also keep filled — or filled and frosted — in the fridge for a day. (Longer, they will start to get stale.)"

Continued after the jump...

Friday, April 24, 2009

Pomacello Shots

It's been that kind of a week. The kind of week when you feel like cracking open a beer every day and on Monday morning, you're already longing for Friday night. The kind of week when all you can do is throw up your hands, have a drink and remember that the universe has a strange way of making things work out.

At times like these, I like to close my eyes, rock back in my office chair and pretend that I'm by the pool at the Viceroy in Palm Springs, drinking one of their delicious pomegranate mojitos and enjoying the sunshine. Sometimes, I can almost smell the sunscreen, that's how good I get at imagining. So here's to Friday, here's to the weekend, and here's to delicious drinks that can take you back to those perfect moments in time, when the sun is shining, the breeze is gentle and the ice crackles softly in the cool depths of your glass.

1 part limoncello
2 parts pomegranate juice
a dash of lemon juice and lemon for garnish

Pour limoncello into tall shot glasses, to about 1/3 of the height of the glass. Shake the pomegranate juice (I use POM - they sent me a few free bottles and I'm addicted now... those crafty POMmers :) Seriously, though, I really liked it) in a mixer with crushed ice and pour over the limoncello. Squeeze a dash of lemon juice into each glass and garnish with pieces of lemon.

Continued after the jump...

Friday, April 17, 2009

Apple Cinnamon Crepes

I've always been convinced that life is made up of simple pleasures. A smile, a look. A sunny day. Flowers when you least expect them. And brunch. In fact, forget the flowers, just give me some Eggs Benedict, chocolate waffles, bread pudding and a mimosa or two, and you will have yourself a completely happy girl, willing to follow your every whim and fancy. What can I say, I'm easy to please!

Brunch is my favorite and happiest meal of the week. It's the only meal when there's no stress about what to make and almost no food is off limits because, hey, it's breakfast... and lunch... all in one! COOL. So, knowing this, you can imagine my reaction when I got an email from Cath of A Blithe Palate and Stephanie of Dispensing Happiness about testing out Gale Gand's new book, which is incidentally called -- you guessed it -- BRUNCH. I mean, I think I set a record for how quickly I hit the reply button!

For anyone who loves brunch, this book is a must have. This slim volume -- beautifully photographed, homey and pleasant to the touch -- has one hundred recipes, which is, well, a lot of Sundays (and Saturdays too, and who says I can't have brunch on Mondays?). I had the whole week of Passover to drool over the book and decide what to make first. I changed my mind about ten times. Do I go for the poached eggs over asparagus and Parmesan? Do I dare the Apple-Cinnamon Baked French Toast? Can I really stay away from the Beet & Artichoke Salad? It was hard, you guys, it really was, and in the end, I just let the book fall open on a random page, and the page said in big letters: CREPES. Sometimes, it's best to just let fate decide.

They were the easiest crepes I've ever made and also the tastiest (as confirmed by my mom, who is always an honest critic -- the woman told me I didn't pour her enough limoncello at 9am this morning, for goodness' sakes! ...but more on that later). Thank you to Cath and Stephanie for letting me participate in their amazing event and a great big thanks to Gale Gand for writing the book of my dreams -- the book about the simple and yet so complex pleasure of gathering around the table for brunch.

To find a recipe for these crepes, you will just have to check out Gale Gand's book at your local library or book store (or go here for a great basic recipe), but so as not to leave you completely high and dry, let me tell you about the amazing apple cinnamon filling I made to go with the crepes. The quantity of cinnamon and other spices is pretty much up to you, but be sure to use apples that don't break easily (like Gala or Golden Delicious) because you want to slice them fairly thinly but don't want them to break during cooking.

For about 4 people, you will need:

4 small baking apples (I use Gala or Golden Delicious)
2 tablespoons of unsalted butter
1-2 tablespoons of sugar (depending on how sweet or tart the apples are)
1/2 tsp of cinnamon
a dash of nutmeg

Peel and core the apples. Slice them thinly, but not so thinly that the pieces will break easily - about 1/4 inch thickness.

Melt the butter in a skillet on medium heat until it starts to foam and then saute the apples, turning them over a few times to coat with the butter, until the apples are soft and tender - about 10 minutes.

Stir in the sugar and the spices and take off the heat. Divide between four warm crepes and serve immediately with a scoop of ice cream and/or some sliced strawberries.

Basic crepes
Gourmet, January 2006
(makes 8-10)

1 cup plus 2 tablespoons whole milk
2 large eggs
1 cup all-purpose flour
2 tablespoons granulated sugar
3 tablespoons plus 1 teaspoon unsalted butter, melted and cooled slightly
1/4 teaspoon salt

Whisk milk, eggs, flour, granulated sugar, 2 tablespoons butter, and salt in a large mixing bowl until batter is mostly smooth but still has some lumps in it, about 1 minute. Let batter stand in the refrigerator for at least 1/2 hr or up to overnight (this prevents tough crêpes). Stir the batter before you are ready to cook the crêpes.

Preheat oven to 250°F.

Add 1/2 teaspoon butter to a crêpe pan (or a non-stick skillet) and brush to coat bottom. Heat over moderate heat until hot, then pour 1/4 cup batter into skillet, tilting to coat bottom evenly. Cook until underside is pale golden, 1 1/2 to 2 minutes, then jerk skillet to loosen crêpe and flip crêpe with a spatula. Cook until underside is pale golden, 30 seconds to 1 minute. Transfer crêpe with spatula to a work surface, turning over so that side cooked first is facedown. Transfer to a heatproof platter and keep warm in oven. Make the rest of the crêpes in same manner, transferring to oven. Fill with desired filling (Nutella & bananas, sauteed apples, strawberries, etc). You can also dust with confectioner's sugar before serving or serve with a scoop of ice cream or a dollop of whipped cream for extra indulgence.

Continued after the jump...

Thursday, April 16, 2009

Not Exactly A Recipe

It's so cool to get noticed, you guys. Seriously, it's just so cool. I love being noticed when I get an email from one of you saying "I love your blog, please keep writing." I love being noticed when I see that you have commented on a post of mine and that you guys come from 114 countries (!!!) and translate my writing into 60 languages. I love finding Confessions of a Tart linked in places I least expected and I love meeting you guys through your blogs and emails. It just makes my day, my week, my year.

A few days ago, this little here blog was featured on Look And Taste as part of their "Bloggers Around The World" series. I could not have been more excited! I've been browsing their recipes and tips for a while, so when I was asked to give a short interview, you bet I said "yes!" So if you have a free minute, mosey on over there and check out the website and all the wonderful bloggers they have featured and will continue featuring. And thank you for being here and sharing your stories with me!

Continued after the jump...

Sunday, April 12, 2009

Fresh Strawberry Tart

There are times when you need to throw subtlety out the window. There are times when all that matters is glamor inside and out - a little red dress instead of a black one, sparkly eye-shadow, high heels, a bit of lace peeking out and lots of lip gloss. You know what I'm talking about, I know you do. I'm talking about a strawberry tart.

Maybe it's all the sunshine and fresh air and maybe it's just me, but I felt daring this morning - daring and bold. My mind was occupied by one thought alone - juicy red strawberries resting on silky smooth pastry cream enclosed by a light shell of pate sable baked to the perfect shade of sweetness. There is joy in every part of this tart, a spring song waiting to be sung, a celebration. It's like that little red dress that fits you oh, so perfectly. It's pure indulgence, pure pleasure. And this is the kind of pleasure you can gift freely, which is really the best part.


Fresh strawberry tart
1 fully baked sweet tart shell
1 batch pastry cream
1 lb strawberries

Fill the tart shell with pastry cream. Hull and slice the strawberries, reserving one perfect strawberry, and arrange in a circle on top of the pastry cream. Put the one reserved strawberry in the middle.

Sweet Tart Dough
(Dorie Greenspan's Baking: From My Home To Yours)

1 1/2 cups all-purpose flour
1/2 cup confectioner's sugar
1/4 teaspoon salt
1 stick plus 1 tablespoon (9 tablespoons; 4 1/2 ounces) very cold (or frozen) unsalted butter, cut into small pieces
1 large egg yolk

1. Put the flour, sugar and salt in the bowl of a food processor and pulse a few times to combine. Scatter the pieces of butter over the dry ingredients and pulse until the butter is coarsely cut in—you should have pieces the size of oatmeal flakes and some the size of peas. Stir the yolk, just to break it up, and add it a little at a time, pulsing after each addition. When the egg is in, process in long pulses—about 10 seconds each—until the dough, which will look granular soon after the egg is added, forms clumps and curds. Just before you reach this stage, the sound of the machine working the dough will change—heads up. (Alternatively, put the ingredients into a large bowl and cut the butter into the flour with a pastry cutter and then mix in the egg with a fork). Turn the dough out onto a work surface and, very lightly and sparingly, knead the dough just to incorporate any dry ingredients that might have escaped mixing. [Irene's note: if the dough is too dry and does not come together, drizzle 1-2 tbsp of ice cold water, 1 tbsp at a time, just until you can pinch the dough together without it sticking to your fingers.]

2. To roll or press the dough into the pan: Butter a 9-inch fluted tart pan with a removable bottom.

* If you want to roll the dough, chill it for about 2 hours before rolling (unless you've used frozen butter and the dough comes out of the processor firm and cold, in which case you can roll it immediately). I find it easiest to roll this dough out between two sheets of plastic film – make sure to peel away the film frequently, so it doesn't get rolled into the dough.
* If you want to use the press-in method, you can work with the dough as soon as it's processed. Just press the dough evenly over the bottom and up the sides of the pan. Don't be too heavy-handed – press the crust in so that the edges of the pieces cling to one another, but don't press so hard that the crust loses its crumbly texture.

3. Prick the bottom with a fork four or five times. Freeze the crust for at least 30 minutes, preferably longer, before baking.

4. To fully bake the crust: Center a rack in the oven and preheat the oven to 375°F.

5. Butter the shiny side of a piece of aluminum foil (or use nonstick foil) and fit the foil, buttered side down, tightly against the crust. (Since you froze the crust, you can bake it without weights.) Put the tart pan on a baking sheet and bake the crust for 25 minutes. Carefully remove the foil. If the crust has puffed, press it down gently with the back of a spoon (or prick it with the tip of a small knife). Bake the crust for another 8 minutes or so, or until it is firm and golden brown, brown being the important word: a pale crust doesn't have a lot of flavor. Transfer the pan to a rack and cool the crust to room temperature.

Pastry Cream
(Tartine - awesome, awesome book)

2 cups whole milk
1/2 cup + 1 tbsp sugar
2 large eggs
4 tbsp unsalted butter
1/4 tsp salt
3 tbsp cornstarch
1 tsp vanilla extract

Pour the milk into a heavy saucepan. Add the salt, place over medium-high heat, and bring to just under a boil, stirring occasionally. Meanwhile, whisk together the cornstarch and sugar. Add the eggs and whisk until smooth (don't let the eggs and sugar stand together for too long or else the sugar will cook the eggs *so I've heard*).

When the milk is ready, slowly drizzle about 1/3 of the hot milk into the egg mixture, whisking continuously. Pour the egg-milk mixture back into the hot milk and continue whisking until the custard is as thick as lightly whipped cream, about 2 minutes. The mixture must come just to the boiling point (slow bubbles, not boiling vigorously, or you will curdle the eggs, yuk). Remove from heat and immediately pour through a sieve into a bowl. Stir in the vanilla extract. Let cool for 10 minutes, stirring occasionally. Cut the butter into 1 tbsp pieces and whisk into pastry cream 1 tbsp at a time until smooth.

Cover the bowl with plastic wrap, pressing directly onto the top of the cream to prevent a skin from forming and put in the refrigerator to cool.

Strawberry on Foodista

Continued after the jump...

Monday, April 6, 2009

Buttermilk Honey Loaf

It's two days before Passover, and what do I give you? I give you bread. A soft, supple, dangerously addictive buttermilk-honey bread. Yes, I am that cruel. But this bread is something you should tuck away and dream about during the week of matzoh ball soup and flourless chocolate cake because this bread is the bomb, delicious, awesome, fantastic, and other such appropriate adjectives that you can come up with.

If anyone had ever told me how easy and how satisfying it was to make sandwich bread at home, I would not have waited all this time to do it, and now that I've started, I can see that there's no going back. I want to make wheat bread and multi-grain bread. I want to make cinnamon raisin bread or date and walnut bread. I want to make -- oh, so many different things! And yet, I want to make this loaf again and again because there is a beautiful simplicity about it, a feeling of freshness and home that we all so desperately need right now.

One of my strongest memories of growing up in my little town in Communist Russia was going into the store to buy bread. There were baker's shelves - always about 3/4 empty - and each shelf had a little handle attached so that the customer can push the top of each loaf to test for softness and freshness. The bread was almost never soft and neither was it fresh and I always wondered, with the painful earnestness of an 8-year old, why that should be so. I knew nothing about economics and the way a pay scale produced incentives. I knew even less about the complexities of the class system and the ever-present bribe/barter mentality. I just knew, looking at my mom's face, that it shouldn't be like this. Perhaps this is why it's so rewarding for me to be able to rectify this for her, to make and give her a loaf of bread that is always soft and smells subtly of yeast and honey.


Buttermilk Honey Loaf
Cook's Illustrated, via Pittsburgh Needs Eated (I love this girl's photos)

Buttermilk American Loaf Bread
adapted from Cook's Illustrated

3 1/2 cups bread flour [I used King Arthur all-purpose flour. I know it impacted the texture, but the bread was still really delicious]
2 tsp table salt
1 cup buttermilk, cold
1/3 cup boiling water
2 tbsp unsalted butter, melted
3 tbsp honey
1 package (2 1/4 tsp) instant yeast

1. Adjust oven rack to low position and heat oven to 200 degrees. Once oven temperature reaches 200 degrees, maintain heat 10 minutes, then turn off oven heat.

2. Mix flour and salt in bowl of standing mixer fitted with dough hook. In 1-quart Pyrex liquid measuring cup, mix cold buttermilk and boiling water together (temperature should be about 110-degrees), add butter, honey, and yeast. Turn machine to low and slowly add liquid. When dough comes together, increase speed to medium and mix until dough is smooth and satiny, stopping machine two or three times to scrape dough from hook if necessary, about 10 minutes. Turn dough onto lightly floured work surface; knead to form smooth, round ball, about 15 seconds. [If making by hand, combine ingredients as directed, turn out onto lightly floured work surface and knead until smooth and satiny, about 10 minutes.]

3. Place dough in very lightly oiled bowl, rubbing dough around bowl to lightly coat. Cover bowl with plastic wrap; place in warm oven until dough doubles in size, 50 to 60 minutes.

4. Form dough into loaf by gently pressing the dough into a rectangle, one inch thick and no wider than the length of the loaf pan. Next, roll the dough firmly into a cylinder, pressing with your fingers to make sure the dough sticks to itself. Turn dough seam side up and pinch it closed. Place dough in greased 9-by-5-by-3-inch loaf pan and press gently so dough touches all four sides of pan.

5. Cover with plastic wrap; set aside in warm spot until dough almost doubles in size, 20 to 30 minutes. Heat oven to 350 degrees, placing empty oven-safe pan on bottom rack. Bring 2 cups water to boil.

6. Remove plastic wrap from loaf pan. Place pan in oven, immediately pouring heated water into an oven-safe pan [to create steam]; close oven door. Bake until instant-read thermometer inserted at angle from short end just above pan rim into center of loaf reads 195 degrees, about 40 to 50 minutes [or until the loaf is nicely browned and sounds hollow when you take it out and tap it on the bottom]. Remove bread from pan, transfer to a wire rack, and cool to room temperature.

Continued after the jump...

Thursday, April 2, 2009

Mascarpone Cherry Cheesecake

Believe it or not, I have a hard time verbalizing my feelings. This never fails to amuse my family and friends -- after all, I write a food blog and my day job also involves lots of writing, albeit not the emotional kind. And yet, for me, words never seem to be enough to say what I really feel, especially when the feelings run deep, as they usually do with me. I'd much, much rather bake a cheesecake -- and to really express my joy and good wishes for one very special lady, I baked a Mascarpone cherry cheesecake. After seeing the happiness on her face, I'm convinced that wordless communications are the best. Whatever else a cheesecake can possibly mean, it does say "I love you" like nothing else!

I knew when I woke up the morning before the party that I wanted a cherry cheesecake. I saw it clearly in my mind's eye, smelled the hint of lemon and vanilla and tasted its airy lightness on my tongue -- sweetness tempered by the slight tartness of ruby red cherries. It winked at me (in my mind's eye, still) and said, "Make me!" and I obliged. Who am I to say no to a cheesecake?

Mascarpone Cherry Cheesecake

For the crust
1 1/2 cup graham cracker crumbs
5 T butter, melted
1 T sugar

For the filling
(Gourmet, Dec. 2003)
20 oz cream cheese (2 1/2 eight-ounce packages), softened
8 oz mascarpone cheese at room temperature (about 1 cup)
3/4 cup sugar
3 large eggs
1 tsp vanilla
2 tsp fresh lemon juice
a dash of salt

For the topping
About 2 cups of frozen or jarred cherries (I use Morel cherries from Trader Joe's)
3/4 cup of water or juice from the jarred cherries
3 tsp cornstarch
sugar to taste
3/4 cup heavy whipping cream + 2 tsp sugar

Make crust:
Put oven rack in middle position and preheat oven to 350°F. Butter bottom and side of a 9-inch springform pan.

Whisk graham cracker crumbs and sugar in a small bowl and then stir in melted butter to moisten all the crumbs. Press the mixture onto the bottom and about half ways up the sides of the springform pan. Bake for 5-10 minutes. Cool.

Make filling:
Beat cream cheese, mascarpone, and sugar in a large bowl with an electric mixer at medium high speed until fluffy, 3 to 5 minutes. Add eggs 1 at a time, beating well after each addition. Add vanilla, lemon juice, and salt and mix at low speed until combined. Pour into cooled crust and bake until cake is set and puffed around edge, 45 to 60 minutes. Cool completely in the refrigerator, at least 2-3 hours.

Make topping:
Beat heavy cream with sugar to hard peaks. Set aside.

Whisk corn starch into the water/cherry juice until no clumps remain. Pour into small sauce pan and heat on medium-high until almost boiling. Add cherries, stir, adjust the sweetness by adding sugar if necessary, and heat for a few more minutes until the mixture thickens. Cool completely.

With a large star tip, pile whipped cream around the border of the cheesecake. Spoon cherries into the middle. Chill at least a few hours or overnight.

Continued after the jump...