Showing posts with label Bread. Show all posts

Saturday, July 31, 2010

Everyday Bread

Everyday bread

There is an undeniable mystique around bread baking. So many unfamiliar terms, so many techniques, starters, proportions, secrets that have been passed down through generations. It's intimidating, to say the least, and it kept me from baking bread until about a year ago.

Everyday bread

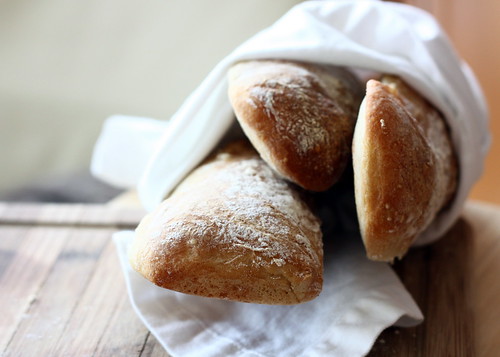
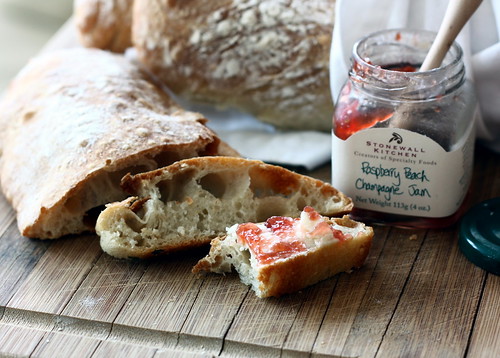
Thankfully, there are lots of places to start for a yeast noob like me. Kind of like this bread, which is pretty much full proof (or fool proof). My friend Gabe, who is Italian, brought this over to a BBQ recently and we couldn't get enough, and when I got the recipe, I was floored by how easy it was to make. I couldn't help making one little change, though - I brushed the bread with a mix of olive oil, garlic and herbs, which gave it a crispy, garlicky crust that's impossible to resist. This is truly a bread you can make every day - and should make every day because it's dang good.

Everyday bread
Everyday bread

Gabe's Everyday Bread

400 g all purpose flour***
1 tsp salt
240 g water at 115F
1 tsp active yeast
1 tablespoon honey

For topping:
2 tablespoons olive oil
2 cloves garlic, crushed
1 teaspoon dried Italian herb mix

***Flour: using the right flour for bread-making really does matter. I know, because I started off using cheaper flour and when I switched to a better brand, I could really taste the difference. So, even though I generally avoid giving brand recommendations, I'm going to break my own rule here and tell you that for bread, I almost always use the King Arthur brand of flour.

Whisk flour and salt in a mixer bowl. Heat water to 115F and add yeast and honey.

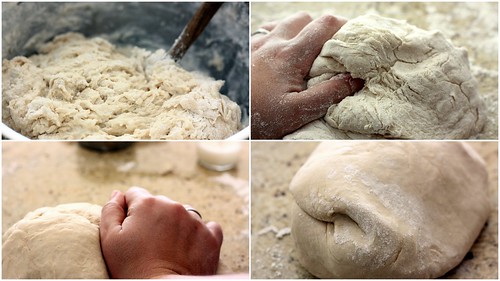
Pour the water mixture into the flour and knead with the dough hook for 5-10 minutes until the dough is smooth and elastic. It shouldn't be very sticky - if it is, knead in a bit more flour until the dough is still soft and only very slightly sticky.

Rub or spray a large bowl with olive oil and put the dough inside, turning it to coat with oil. Cover and let rise in a warm, draft free place until doubles in size (about an hour).

Preheat the oven to 450F.

Turn the dough out onto a floured counter and shape into a loaf (I made mine round).

Combine olive oil, crushed garlic and herbs, and brush the bread with about 3/4 of the mixture.

Place the loaf in a cast iron, a dutch oven or a baking sheet (I also put a layer of wax paper sprayed with olive oil under the bread) and bake for about 30 minutes. The crust should be a deep golden color and the bread should sound hollow when tapped from the side.

Immediately upon taking the bread out of the oven, brush again with the olive oil/garlic mixture and let cool to room temperature. Enjoy!

Continued after the jump...

Sunday, February 21, 2010

Challah

IMG_5999_1

What did I do this Saturday, you might ask? I took two naps and I baked the softest, sweetest, loveliest pull-apart challah I could have ever hoped for. As you can tell, I'm still a complete disaster at braiding it... In the throes of ambition, I tried a six-braided loaf, completely failed at it in the middle and made it a round one to hide the imperfections. Next time, I'll stick with three braids. Even I know my limitations! But the flavor, oh, and the texture - absolute perfection. Soft, warm, slightly sweet, with an eggy crust and crunchy poppy seeds on top... I love this bread, I really love it.

12-06-20

The recipe was recommended to me by the lovely Amy after my disappointment with Peter Reinhard's challah (by the way, I also discovered a later recipe of his that uses EIGHT egg yolks - ha!). It took me a while to try it, but now that I have, there's really no going back. The only tiny little qualm I have is that it's not yellow enough, so I might need an extra egg yolk in there, but it's such an easy and satisfying bread to make, and it looks so beautiful - all pale dimples and burnished gold curves - that I got over the color quickly enough. I have to portion it off to my family as quickly as possible because I can't seem to stop pulling off little sweet pieces to snack on.

Challah
Fine Cooking

2 tsp. instant yeast
16-3/4 oz. (3-1/2 cups) unbleached all-purpose flour; more as needed
1/4 cup warm water
3 large eggs
1/4 cup vegetable oil
1/4 cup honey (1/3 if you want a sweeter challah)
1-1/2 tsp. table salt
For the glaze:
1 egg, lightly beaten
Sesame or poppy seeds for sprinkling (optional)

In a large bowl, mix the yeast with 1/2 cup of the flour. Add the warm water, stir, and let this mixture, called a sponge, sit until it starts to puff up, 15-to 20-minutes. Add the eggs, oil, honey, and salt; stir until well combined. The sponge will remain lumpy—this is fine. Add the remaining flour and mix the dough in the bowl until all the ingredients are combined. Turn the dough out onto a work surface and knead until fairly smooth, about 2 minutes. The dough should feel very firm and will be hard to knead. If it’s soft and sticky, add more flour until it’s very firm [I ended up adding another 1/2 cup]. Transfer the dough to a large, clean container and cover it well. Let it rise until doubled in bulk and very soft to the touch, about 2 hours, depending on the room temperature. Line an insulated baking sheet with parchment or oiled foil. If you don’t have an insulated sheet, stack two sheets together (this keeps the bottom of the bread from overbrowning during baking).

To shape the dough
(see diagram here):

Turn the dough out onto a lightly floured work surface and sprinkle a little more flour over it. Spread and flatten the dough a bit, but don’t worry about punching it down. Cut it into six equal pieces. Set aside the dough pieces, cover them lightly with plastic, and brush all the flour off the work surface. Have a small bowl of water handy. Using no flour, roll a piece of dough with a rolling pin into a very thin sheet, between 1/8 and 1/4 inch thick (don’t worry about making a rectangle; an amoeba-type shape is fine). The dough may stick to the work surface; this is all right—just nudge it gently with a dough scraper. Tightly roll up the sheet like a carpet to form a strand. Roll the strand back and forth between your hands until it’s thin, very even, and 12 to 15 inches long. At the ends of the strand, angle the outer edge of your hands into the work surface as you’re rolling to make the ends pointy and the strand thicker in the middle (This will help you get a football-shaped loaf). The strand needs to grip the work surface slightly during this rolling; the “grab” will help as you roll. If the strand is too slick, very lightly dampen it with water to help it grip the work surface better. Repeat the rolling out, rolling up, and elongating steps with the remaining five pieces of dough, rolling them out to the same length. Lightly sprinkle all the strands with flour to prevent them from sticking to one another during proofing. Arrange the strands parallel to one another. At one end, gather and pinch the strands very tightly together. Weight the end with a heavy canister to keep the braid from moving and to leave your hands free, and braid closely, following the illustrations below. Lightly tap each end of the loaf with your palms to tuck it under the loaf.

Transfer the braid to the lined baking sheet and cover it loosely but thoroughly with plastic wrap. Let proof until doubled in bulk and the loaf remains indented when lightly pressed, about 2 hours, depending on room temperature. (If in doubt, let the dough proof more rather than less.)

To bake:

Position an oven rack in the lower third of the oven and heat the oven to 325°F. Just before baking, brush the dough with the beaten egg. Sprinkle with sesame seeds or poppy seeds, if using. With a thin wooden skewer, poke the bread deeply all over (the holes will prevent air pockets and help the bread keep its shape during baking) [Note: I did not do this and it turned out well]. Bake for 20 minutes. Rotate the challah 180 degrees and bake until the bread is a dark, burnished brown, about another 15 minutes [Note: mine baked for an extra 10 min on top of the 15]. (If the challah is browning too rapidly cover it loosely with foil and let it finish baking. Don’t remove the loaf too soon, as you’ll risk underbaking.) Let cool thoroughly on a rack.

Continued after the jump...

Thursday, November 19, 2009

Basic Sweet Yeast Dough

IMG_4425

I realized recently that the only place I've ever felt really at home was in Israel. Israel, with its amalgamation of cultures and flavors, with loud music and brash cabbies, with huddled market stalls and glowing Jerusalem stone, with complete strangers being all up in your business, with greenery where you least expect it and laughter that only underscores the strength of the spirit - it seems funny to think that a piece of me will always stay there, but it's the truth.

IMG_4240
Z_Dump for Photos1-2

Being Jewish was kind of a dirty word where I grew up in Ukraine, and having been isolated by the Communist regime from any vestiges of religion, being Jewish was confusing here in the US. American Jews were free to be Jewish and to be proud of it, and to me, a novice, it seemed like they all spoke some different, secret language to the translation of which I was not privy. In Israel, however, I could be myself. Ironically, I felt the least religious in this Jewish state - I didn't attend services nor did we differentiate between Jews and Arabs in our weekly dinners at the Haifa Uni dorms - but it was here that I found a strong and lasting connection to my roots. Because there was no pressure to be anything or belong to any group and because the hills, the stones and the air itself are saturated with history, I discovered what it really means to have my heritage, to own who I am and make it part of myself. It's a testament to the beauty of that country and to the strength of its people that I could learn what I did and take it, carrying it with me for the rest of my life like a gift.

IMG_4337

This recipe is a classic Jewish recipe. My grandmother makes something similar and her grandmother did too. The bread it produces is soft, moist and lightly sweet - the kind of dough you can use for almost anything, from pan dulce to challah to cinnamon buns to apple cakes like the one I baked. It made the house smell fantastic. When I bit into a piece, fresh out of the oven, I said "SHUT UP OMG" really loudly, even though I was completely alone in the house. It was that good.

Basic Yeast Sweet Dough
from sadly out of print, but wonderful The World of Jewish Desserts by Gil Marks

*1 (1/4-oz) package (2 1/4 teaspoons) active dry yeast, or 1 (0.6 oz) cake fresh yeast
*1 cup warm water (105 to 115 degrees for dry yeast; 80 to 85 degrees for fresh yeast), or 1/4 cup warm water and 3/4 cup warm milk, or 1 cup warm water mixed with 1/4 cup nonfat dry milk
*1/3 cup sugar
*1/3 cup vegetable oil, peanut oil or softened butter
*2 large eggs
*1 teaspoon salt
*About 4 cups high-gluten flour or unbleached all-purpose flour

For apple topping
5-7 medium baking apples (I used Gala), peeled, cored and sliced
2 tablespoons of butter, melted
1/3 cup sugar
2 teaspoons cinnamon

In a large bowl, dissolve the yeast in 1/4 cup warm water. Stir in 1 teaspoon sugar and let stand until foamy, 5-10 minutes (if your yeast isn't foaming, start all over with fresher yeast).

Add the remaining water (and/or milk), sugar, oil (or butter), eggs and salt and whisk to combine. With a wooden spoon, stir in 1 1/2 cups of flour and then continue stirring in flour, 1/2 cup at a time, until the dough forms into a ball and comes away from the sides of the bowl.

Turn the dough into a well floured surface and knead, adding more flour to prevent sticking (I think I added another 1/2 cup), until smooth and springy, about 5 minutes. The dough should be soft and satiny, but you don't want to knead too long as you don't want too much gluten to develop. You can use a machine to knead, but I really like to do it by hand.

Place the dough into a lightly oiled bowl and turn to coat. Cover and let rise in a warm, draft-free place until nearly double in bulk, 1 1/2 - 2 hrs (or cover with plastic wrap and refrigerate overnight). To test if the dough is sufficiently risen, press two fingers 1 inch deep into the center; if the indentations remain, the dough is ready.

Punch down the dough. Fold over in three like a letter, give it a half turn and fold over like a letter again - this redistributes the yeast and its food. Let stand for 10 minutes to relax the dough.

While the dough is relaxing, peel, core and slice the apples, melt the butter and combine the sugar and cinnamon. Butter or spray a 9"x13" pan or two 9" round pans.

Arrange the dough in the prepared pan(s), stretching gently so that it touches all the sides and is more or less uniform in height. Arrange the apples on top, brush with butter and sprinkle with cinnamon sugar. Cover and let rise until nearly double in bulk, about 50 minutes.

Preheat the oven to 375F (350F if using a glass pan). Bake on the middle rack for 30 minutes or until puffed and golden (this cake has quite an oven spring!). Cool in the pan for 10 minutes and then cool on the rack for 20 minutes (aha, good luck with that). I like this cake warm with a cup of coffee or tea.

This cake can be frozen for up to 2 weeks. Reheat unthawed on 350F for 20 minutes.

Continued after the jump...

Friday, November 13, 2009

Cinnamon Swirl Raisin Bread

Cinnamon Raisin Bread

A's grandma made cookies for every family holiday. It was kind of "her thing," the dessert she was known for in the family. They were something of a cross between an oatmeal raisin cookie and a brick, but no one ever complained because dipped in tea, they were divine, and the leftovers had a multitude of uses (hammering nails, scaring squirrels out of the lettuce beds... kidding, kidding!). The point is, she always brought the cookies, and somehow, we always looked forward to them. Such is the magic of grandmas, I think, that whatever they make becomes an indelible part of the family lore.

Cinnamon Raisin Bread

This will be a year without the requisite plate of cookies on the Thanksgiving table, and our hearts are very heavy. I think because of that, I've been craving the flavor of these cookies and eating everything in sight that even slightly reminds me of them. I made this bread having very few expectations and no idea how it would turn out beyond that it would have cinnamon and raisins in it, and I have to say that the flavor is simply wonderful. Like other Peter Reinhart's breads, the texture was more like that of a hearty bread rather than a decadent dessert, which is exactly what I was looking for, and the crunch that comes from brushing the top with melted butter and sprinkling it with cinnamon sugar is OUT OF THIS WORLD good. Like, wow. When this came out of the oven, all tall and golden, we couldn't wait for it to cool and cut thick slices of it to have with a cold glass of milk. Even though this bread is nothing like cookies, it carried the same feelings of home, of a sturdy family tradition that tastes like it's made with love. I really think A.'s grandma would have approved.

Cinnamon Swirl Raisin Bread
The Bread Baker's Apprentice
recipe can be found here
Makes two 1 1/2 pound loaves

For the bread
3 1/2 cups (16 oz) unbleached bread flour
4 teaspoons (.66 oz) granulated sugar
1 1/4 teaspoon (.31 oz) salt
2 teaspoons (.22 oz) instant yeast
1 1/4 tsp (.16 oz) ground cinnamon
1 large (1.65 oz) egg slightly beaten
2 tablespoons (1 oz) shortening, melted at room temp. (I used butter)
1/2 cup (4 oz) buttermilk or whole milk, at room temp.
3/4 cup (6 oz) water, at room temp.
1 1/2 cups (9 oz) raisins, rinsed and drained
1 cup (4 oz) chopped walnuts (optional - I omitted)

Cinnamon Sugar

1/2 cup granulated sugar
2 tbsp cinnamon

In a large bowl or a bowl of a stand mixer, whisk together the flour, sugar, salt, yeast and cinnamon. Add the egg, shortening/butter, buttermilk and water and stir together with a wooden spoon until the dough comes together in a ball. Adjust flour or water if the dough is too sticky or too dry/stiff.

Knead by hand for 10 minutes or with a stand mixer for 6-8 minutes on medium speed. The dough should be soft and pliable, tacky but not sticky. [My dough was very sticky, so if your dough is sticky, add more flour at this point.] Knead in the raisins and walnuts by hand to distribute evenly. The dough should pass the windowpane test and register 77 to 81F.

Lightly oil a large bowl and transfer the dough to the bowl, rolling it to cover lightly with oil. Cover the bowl with plastic wrap or a towel and let rest until the dough doubles in size, 1-2 hours (mine was ready in 1 hr).

Divide the dough in 2 equal pieces and lightly oil two standard size loaf pans. These are mine. Gently roll each piece of dough into a 5x8 rectangle. Whisk the 1/2 cup sugar and 2 tablespoons of cinnamon together and reserve about 2-3 tablespoons for the tops of the loaves. Sprinkle half of the remaining mixture on one rolled out piece of dough and sprinkle the other half on the other rolled out piece of dough.

Starting at the short end, roll each loaf tightly, pinching the ends together as you are rolling. The dough will expand in length as you are rolling. When finished, place the loaves seam side down into the loaf pans, spreading the dough gently so that it's touching all four sides of the pan. Mist the tops lightly with oil, cover loosely with plastic wrap or a towel and let proof at room temperature for 60-90 minutes, until the dough crests above the lips of the pans and is nearly doubled in size.

Preheat the oven to 350F with the oven rack in the middle shelf. Bake for 20 minutes, rotate the pans 180 degrees and bake for another 20-30 minutes until the tops are golden brown and the breads register 190F in the middle. They should make a hollow sound when thumped on the bottom.

Remove bread from the pans onto a cooling rack. Melt 1 tablespoon of butter, brush the tops of the loaves with butter and sprinkle with the reserved cinnamon sugar.

The instructions say to wait 1 hour before slicing or serving. I'm telling you now that, considering the way this bread looks and smells, it's not going to happen. I'd give it at least 10 minutes, though, just to make sure you don't burn your fingers while cutting the bread.

Continued after the jump...

Friday, August 7, 2009

Whole Wheat Pizza with Asparagus and Purple Potatoes

pizza 058

What if I told you that you could make a decent pizza dough in less than half an hour? What if I told you that it would contain whole wheat flour and still retain that soft, bready quality that we all love about pizza? What if I told you that you could do all this from scratch and barely break a sweat while sipping on a glass of wine and nibbling on some cheese? You would laugh at me, right?

pizza 010

And yet, such a thing does exist. I know, because I made it last night and it was delicious. You see, I've always wanted to make pizza at home, but when I come home at 7pm from a full day at work and A. is hovering around me hungrily, I just can't wait for two hours for the pizza dough to rise. I have a maximum of forty minutes to put dinner on the table before the natives start getting restless and for the sake of marital felicity, I try to keep within that time limit.

pizza 047

This pizza has everything I really love about pizza - a thin, hearty crust that's sturdy enough to hold toppings and that has just the right bit of oven spring, a little bit of cheese that gets melty and toasted in the oven and fresh, flavorful toppings. Admittedly, this is not a gourmand's pizza, a pizza to compose sonnets about and to cherish as a secret recipe, but it's a "let's pop open a few beers after a hard day of work" pizza or "my boys just played two hours of soccer and are hungry" pizza, or really, just an easy and hassle-free meal that's versatile and very, very satisfying.

pizza 061

Whole Wheat Pizza with Asparagus and Purple Potatoes

1 whole wheat pizza dough
1 cup shredded mozzarella cheese (or half mozzarella, half gruyere)
half a bunch of asparagus (7-8 stalks)
about a cup of sliced potatoes (parboiled for 5 minutes)
1 tbsp rosemary

Quick whole wheat pizza dough
from Andrea's Recipes
[Note: this makes a thinnish crust pizza. If you want a thicker crust pizza, you do have to let this rise for an hour, gently let the air out, then rest on the counter for 20 minutes before rolling out]

1 scant cup whole-wheat flour (I put 1 cup minus 1 teaspoon)
1 cup unbleached all-purpose flour
2-1/4 teaspoons instant yeast or 1 package quick-rising yeast
1 teaspoon salt (I used a little bit less)
½ teaspoon sugar
¾ cup hot water (approximately 115°F)
1 tablespoon extra-virgin olive oil
coarse cornmeal, for sprinkling on the peel

In a large bowl, combine whole-wheat flour, all-purpose flour, yeast, salt and sugar, and whisk together. Combine hot water and oil in a measuring cup and pour slowly into the dry ingredients, stirring with a wooden spoon until the mixture forms a slightly shaggy, sticky ball. The dough will be soft and warm. If it seems dry, add 1-2 tbsp of warm water and if it's too sticky, add 1-2 tbsp of flour.

Turn out onto a lightly floured counter and form into a ball, then knead for about five minutes until the dough is becoming smooth and elastic (it won't be completely smooth and elastic, but that's ok). Coat a sheet of plastic wrap with spray oil or cooking spray and cover the dough with it. Let the dough rest for 10-20 minutes before rolling.

Meanwhile, prep all your toppings, preheat the oven and prepare a pizza stone. I use a baking sheet lined with parchment paper on top of which I sprinkle some cornmeal.

Uncover the dough and lightly flour your surface and rolling pin. Flatten the dough with your palm and roll it out to the shape of your stone or baking sheet, rotating a quarter turn after every few rolls. Mine rolled out to about 1/4 inch thickness for a standard baking sheet and made a thinner crust pizza (but not completely thin crust). If you want a very thin crust pizza, divide the dough in half and make two.

Transfer to the pizza stone or baking sheet, sprinkle with cheese and then the toppings of your choice and set it in hot oven. Bake the way you usually bake pizza.

*Now, I know that the prevailing wisdom in pizza is to bake it at 500F for 10 minutes, but whether it's my technique or my oven, this never works for me. So, to get the soft crust and the crisp bottom that I love, I bake at 400F for 15-20 minutes and it works out well. You should bake the pizza the way you usually bake it.

pizza 069

Continued after the jump...

Saturday, July 18, 2009

Peter Reinhart's Challah

IMG_1911

Friends, I am in a quandary. I need your help. See, for years, I have been traumatized by challah. No, I don't mean that I've been chased around by the Jewish Sabbath bread a la "Attack of the Killer Tomatoes," or that challah haunts my nightmares, or anything like that. To be more precise, I've been traumatized by baking challah.

IMG_1897

My first challah experiment came from a book (we will leave it nameless here) that purported to give you an "authentic" challah recipe. This was the first bread that I had ever attempted to bake and I was a little (a lot) unsure of myself. To make a very long story very short, I forgot to add the eggs to the dough. Yeah, now you know the shameful skeleton in my closet. I forgot to put eggs into egg bread. I made the recipe again, with the wind taken considerably out of my sails, but I might as well have not made it at all because it tasted nothing like the challah I knew.

IMG_1917

Over the next eight years, I've shied away from challah, looking for that "perfect" recipe, not daring to try it again. Failure is not something I deal with well, as you can see. So when I saw Peter Reinhart's recipe, I thought, "bingo!" because, I mean, he's Peter Reinhart! Right? ... This story does not have a happy ending because, although the challah turned out very tasty indeed, it's still not the challah that I'm used to. It somehow wasn't eggy enough or sweet enough, or rich enough or something that's undetectable and yet you know it's there. It's a great bread and we've already gone through one of the two loaves, but... it's just not "the" challah.

IMG_1924

Is it my technique? Is it the recipe? Is it that I'm cursed with forever making the wrong challah? Please help. If you have any, and I mean any advice (techniques, your favorite recipes, sob stories), please share them with me. I'm ready to try again, but I need inspiration. You can find the recipe for Peter Reinhart's challah here (in the Google preview of his "Baker's Apprentice").

IMG_1929

Continued after the jump...

Wednesday, May 6, 2009

Mother's Day & Rustic Bread

Mother's Day Collage

[the rustic bread recipe is after the jump]

So somehow, I was talked into (or talked myself into) having 11 people for brunch on Sunday to celebrate Mother's Day. I don't know how these things happen, I really don't. One minute, I'm contemplating making French toast for brunch on Sunday, and the next, there are 11 more people joining me. Really, I can't be responsible for myself when I'm thinking of brunch, it's all the hazy sunshine mixed with a heavy dose of champagne that clouds my judgment.

Regardless, if there is a holiday that is worthy of a brunch, it is Mother's Day. You see, my mom, she is amazing. She is a super-woman. I don't know how she does it, I wish I could tell you her secret, but she is just so above and beyond, well, anyone else, that when in 6th grade we had to write an essay about the woman we most admired in life (and boy, there is a wealth of choices, isn't there!), I was like, "DUH" and put "my mom." I don't think I ever let her see the essay, though, because that would have been embarrassing, to be admiring your mom in your teenage years, you know?

If your mom is a fabulous, sparkling, diamonds and rubies kind of lady, it's hard to find things to impress her with. Luckily, I don't have to - because she also loves me like no one else, which means it's easy to make her happy. And yet, such is the nature of the mother-daughter relationship, that I still try, all the time, to make something new to dazzle her with. I've put together a few recipes for you guys that my mom has loved and I hope that whatever you do, whatever you make, you just let your mom know that you love her, because that really is the most important part of Mother's Day (and every day). Ugh, now I am being schmaltzy, but it's just that time and I can't help it. On to the food:

Strawberry Frangelico Tart (with mascarpone)
Fruit Tartelettes
Cream Puffs
Chocolate-Dipped Strawberries
Crème Brûlée
Strawberry Tart (without Frangelico, but with pastry cream)
Crepes With Sauted Apples (here is a recipe for the crepes)
Strawberry Scones
Guinness Chocolate Cupcakes

Rustic Bread

What will I be making for my mom on Mother's Day? For the others, there will be bagels and crab salad and a yet un-tested and un-photographed (but delicious sounding) baked French toast with sauted apples; but for my mom, there will be bread, because it is the thing that sustains us, just like our mothers. Cue the music, you guys, because when I go for the sentimentalism, I don't hold back! :)

Rustic Bread
Adapted from Jeffrey Hamelman via Break for Bread (a lovely blog, btw)
Makes 2 large loaves

This is a wonderful, dense country bread that's perfect for sandwiches (or for slathering with salted butter, as A. likes to eat it, dispensing with all the sandwich nonsense). It wasn't difficult to make at all and I encourage you to try. As you can tell, my bread-slashing skills leave a lot to be desired, so if anyone has any advice on how to go about slashing the loaves, I would greatly appreciate it!

Overall Formula:
Bread Flour: 1 lb, 9.6 oz (80%)
Whole-wheat flour: 6.4 oz (20%)
Water: 1 lb 6.1 oz (69%)
Salt: .6 oz (1.8%)
Yeast: .06 oz, instant (.6%)
Total Yield: 3 lb, 6.7 oz (171.4%)

Pre-Ferment
Bread flour: 1 lb (3 5/8 C)
Water: 9.6 oz (1 ¼ C)
Salt: .3 oz (½ T)
Yeast: 1/8 tsp, instant
Total: 1 lb, 10 oz

Final Dough
Bread Flour: 9.6 oz (2 ¼ C)
Whole wheat flour: 6.4 oz (1 ½ C)
Water: 12.5 oz (1 ½ C)
Salt: .3 oz (½ T)
Yeast: .06 oz instant (½ tsp)
Pre-ferment: 1 lb, 10 oz (all of above)
Total: 3 lb, 6.7 oz

1. PRE-FERMENT: Disperse the yeast in the water, add the flour and salt, and mix until just smooth. At 60 percent hydration, it will be stiff and dense, but add water if necessary to correct the hydration. Cover the bowl with plastic and let stand for 12 to 16 hours at about 70°F. When ripe, the pre-ferment will be domed and just beginning to recede in the center.


2. MIXING: Add all the ingredients to the mixing bowl except the pre-ferment. In a spiral mixer, mix on first speed for 3 minutes in order to incorporate the ingredients. As the dough is coming together, add the pre-ferment in chunks. If necessary, correct the hydration by adding water or flour in small amounts. Finish mixing on second speed for about 21⁄2 minutes. The dough should be supple and moderately loose, with moderate gluten development. Desired dough temperature: 75°F.


3. BULK FERMENTATION: 21⁄2 hours. [Irene's note: don't forget to fold! See step 4 below]


4. FOLDING: Fold the dough twice, once after 50 minutes of bulk fermentation and again 50 minutes later. [Irene's Note: I lifted the dough off the counter and let it stretch, and then folded in thirds like an envelope]


5. DIVIDING AND SHAPING: Divide the dough into 1.5-pound pieces. Preshape lightly into rounds and place on a lightly floured work surface, seams up. Cover the rounds with plastic. When the dough has relaxed sufficiently (10 to 20 minutes), shape into round or oval loaves, place them either into floured bannetons or between folds of floured baker’s linen, and cover with plastic. [Irene's note: I floured a stiff cotton apron that I have and folded it to make little wells for the bread, propping it up on either side with something to keep it from sliding apart]


6. FINAL FERMENTATION: Approximately 11⁄4 to 11⁄2 hours at 75°F.


7. BAKING: Invert the risen loaves onto the loading conveyor or peel. Slash the desired scoring pattern with a blade. Presteam the oven, load the bread, and steam again [Irene's note: I only did this once by putting an empty loaf pan on the bottom of the oven while it pre-heated, and then pouring a cup of boiling water into it right after I placed the loaves into the oven to create steam]. Bake at 450°F. Open the oven vents after the loaves show color, in order to finish the bake in a drying oven [Irene's note: I also didn't do this as my oven has no way to open and close the vents... it worked out just fine, I promise]. Loaves scaled at 1.5 pounds should bake for 35 to 38 minutes.

Continued after the jump...
Monday, April 6, 2009

Buttermilk Honey Loaf

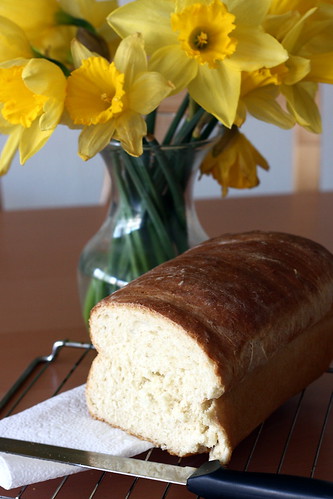
It's two days before Passover, and what do I give you? I give you bread. A soft, supple, dangerously addictive buttermilk-honey bread. Yes, I am that cruel. But this bread is something you should tuck away and dream about during the week of matzoh ball soup and flourless chocolate cake because this bread is the bomb, delicious, awesome, fantastic, and other such appropriate adjectives that you can come up with.

If anyone had ever told me how easy and how satisfying it was to make sandwich bread at home, I would not have waited all this time to do it, and now that I've started, I can see that there's no going back. I want to make wheat bread and multi-grain bread. I want to make cinnamon raisin bread or date and walnut bread. I want to make -- oh, so many different things! And yet, I want to make this loaf again and again because there is a beautiful simplicity about it, a feeling of freshness and home that we all so desperately need right now.

One of my strongest memories of growing up in my little town in Communist Russia was going into the store to buy bread. There were baker's shelves - always about 3/4 empty - and each shelf had a little handle attached so that the customer can push the top of each loaf to test for softness and freshness. The bread was almost never soft and neither was it fresh and I always wondered, with the painful earnestness of an 8-year old, why that should be so. I knew nothing about economics and the way a pay scale produced incentives. I knew even less about the complexities of the class system and the ever-present bribe/barter mentality. I just knew, looking at my mom's face, that it shouldn't be like this. Perhaps this is why it's so rewarding for me to be able to rectify this for her, to make and give her a loaf of bread that is always soft and smells subtly of yeast and honey.


Buttermilk Honey Loaf
Cook's Illustrated, via Pittsburgh Needs Eated (I love this girl's photos)

Buttermilk American Loaf Bread
adapted from Cook's Illustrated

3 1/2 cups bread flour [I used King Arthur all-purpose flour. I know it impacted the texture, but the bread was still really delicious]
2 tsp table salt
1 cup buttermilk, cold
1/3 cup boiling water
2 tbsp unsalted butter, melted
3 tbsp honey
1 package (2 1/4 tsp) instant yeast

1. Adjust oven rack to low position and heat oven to 200 degrees. Once oven temperature reaches 200 degrees, maintain heat 10 minutes, then turn off oven heat.

2. Mix flour and salt in bowl of standing mixer fitted with dough hook. In 1-quart Pyrex liquid measuring cup, mix cold buttermilk and boiling water together (temperature should be about 110-degrees), add butter, honey, and yeast. Turn machine to low and slowly add liquid. When dough comes together, increase speed to medium and mix until dough is smooth and satiny, stopping machine two or three times to scrape dough from hook if necessary, about 10 minutes. Turn dough onto lightly floured work surface; knead to form smooth, round ball, about 15 seconds. [If making by hand, combine ingredients as directed, turn out onto lightly floured work surface and knead until smooth and satiny, about 10 minutes.]

3. Place dough in very lightly oiled bowl, rubbing dough around bowl to lightly coat. Cover bowl with plastic wrap; place in warm oven until dough doubles in size, 50 to 60 minutes.

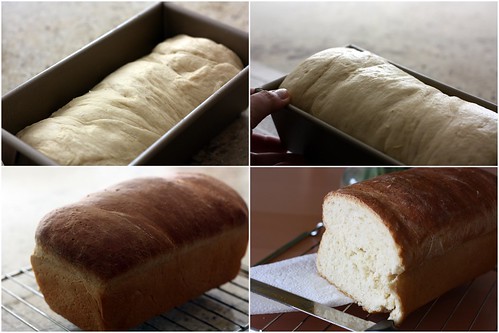
4. Form dough into loaf by gently pressing the dough into a rectangle, one inch thick and no wider than the length of the loaf pan. Next, roll the dough firmly into a cylinder, pressing with your fingers to make sure the dough sticks to itself. Turn dough seam side up and pinch it closed. Place dough in greased 9-by-5-by-3-inch loaf pan and press gently so dough touches all four sides of pan.

5. Cover with plastic wrap; set aside in warm spot until dough almost doubles in size, 20 to 30 minutes. Heat oven to 350 degrees, placing empty oven-safe pan on bottom rack. Bring 2 cups water to boil.

6. Remove plastic wrap from loaf pan. Place pan in oven, immediately pouring heated water into an oven-safe pan [to create steam]; close oven door. Bake until instant-read thermometer inserted at angle from short end just above pan rim into center of loaf reads 195 degrees, about 40 to 50 minutes [or until the loaf is nicely browned and sounds hollow when you take it out and tap it on the bottom]. Remove bread from pan, transfer to a wire rack, and cool to room temperature.

Continued after the jump...

Thursday, March 5, 2009

Pain à l’ancienne baguettes

There was a time when I thought that in order to have a great relationship, two people must have a lot in common with each other. I sought out guys who had the same interests as I did - who were passionate about art and music, who could quote Shakespeare and tell me about the Tokyo Imperial Palace, and who could talk about books and politics until the wee hours of the morning. And when I found them, I always wondered what was missing.

Then -- and ironically -- when A. and I were already engaged and I was having a panic attack and frantically thinking of running away to Rome a la Audrey Hepburn (I was very specific about Rome and there had to be a scooter), I had a "duh" moment. One of those moments when you realize something that, in retrospect, seems as obvious as the nose on your face, but at the time is a huge epiphany. I realized that our differences are what makes us such a strong couple. It just works for us, it's uniquely our own. It doesn't matter that I like French chanson and he likes Metallica, that I could spend a whole day walking around Paris and he prefers to lay on the beach in Hawaii or that he reads modern Japanese literature and I love Henry James. We have the important things -- the really important things -- in common, and we are better and happier as a team than we are on our own. And, as A. put it (gently and patiently enough to chill me out - in other words, using the tone of a SWAT team negotiator trying to disarm a crazy person with a time bomb), we have our love in common. What can I say, we have our romantic moments too.

As you can see, I didn't run away to Rome. And I can even accept our differences with a sense of humor now, like him eating the baguette warm from the oven, breaking the golden crust with a crunch heard in the next room, and me wanting to wait until it cools completely and slather it with butter and jam. God, I am so patient with his little quirks, no? ;)

This recipe comes by way of Jude at Apple Pie, Patis, & Pate - a blog that I've been reading with great pleasure. Thanks to him, I understand why these baguettes came out a bit flatter than I anticipated. Apparently, I used the wrong flour that was too soft to help the dough firm up properly. Since I'm so new to this whole baking-with-yeast thing, I didn't realize that my usual General Mills flour wasn't going to cut it. Next time, I'm definitely using King Arthur. Oh, and by the way, there will definitely be a next time. These baguettes were wonderful. The crust was a lovely deep shade, and crunchy too, hiding chewy soft insides with those beautiful irregular air pockets we all know and love. The labor was pretty minimal (except the soft flour and sticky dough, ugh) and I cannot wait to make it again. Thanks, Jude, for the recipe and for being so kind to answer my panicky emails with questions (omg, my dough is sticky, help! what do you mean, the flour is "too soft"??? aaaah!).

Pain à l’ancienne Baguettes


makes four 12- to 16-inch baguettes

Ingredients:
unbleached all-purpose flour: 4 cups/17.6 oz/500 g
water, ice cold: 1 cup + 6 tbsp/11.5 oz/325 g

water: 3 tbsp + 1 tsp/1.8 oz/50 g
salt: 1.5 tsp/.3 oz/9 g
instant yeast: 1.5 tsp/.2 oz/5g

Notes:

* Best to use King Arthur all-purpose flour or another flour with a higher protein content than regular supermarket all-purpose flour.
* Peter Reinhart’s pain à l’ancienne in The Bread Baker’s Apprentice is based on a method very similar to this recipe. In Reinhart’s version, the salt and yeast are added before refrigeration.

Directions:

Mix together the flour and the ice-cold water until a shaggy ball of dough is formed.

Knead 4 to 6 minutes, until the flour is thoroughly hydrated and a smooth ball of dough is formed.

Cover with plastic wrap or store in an airtight container. Refrigerate for at least 8 hours and up to 2 days. The bread will be sweeter the longer the dough rests (this process of resting the dough before adding yeast is called autolyse).

Add the additional water, salt, and instant yeast to the cold dough. Knead until the water is completely absorbed, about 6 to 10 minutes. The dough will be very sticky.

The dough will initially have the consistency of chewing gum and will not readily absorb the additional water.

Ferment #1 90 minutes at room temperature

Using gravity and a bench scraper to help you, lift the dough to stretch it into a long rectangle and put it back on the counter with the short side facing you. The fold it into thirds vertically, like an envelope, and then fold again horizontally.

Ferment #2 90 minutes at room temperature

Stretch and fold again.

Ferment #3 2 to 3 hours at room temperature, or until almost doubled
in size

Preheat Oven 460ºF / 240ºC

Divide 4 equal pieces using a lightly moistened bench scraper

Preshape: On a lightly floured surface, gently shape each piece
into loose ovals by tucking the sides underneath the
pieces of dough. Handle as gently as possible to avoid
degassing.

Pain à l'ancienne French Baguettes Shaping

Rest: 10 minutes

Shape: Stretch gently into strips, about 12 to 16 inches long.

Steam: 1 cup of boiling water poured in a heavy steam pan
(preferably cast iron)

Bake: Bake for 8 to 9 minutes at 460ºF / 240ºC. Rotate the
loaves and bake for another 10 to 15 minutes, until the
crust is deeply browned. The thickest part of the
baguette will register 205ºF / 91ºC when done.

Cool: At least 30 minutes

Continued after the jump...

Saturday, February 14, 2009

Poppyseed Bagels

I've always had dual feelings about Valentine's Day. On one hand, it's a totally made-up holiday that's been Hallmark-ed out of all reason and proportion, with bad chocolates and roses at $10/stem (last night, we saw a man buying a ginormous red heart balloon with TINKERBELL on it... oh, honey, no, just no). Also, I hate people telling me what to do, so the idea of a "mandated romance" day revolts all of my higher sensibilities.

On the other hand, I LOVE VALENTINE'S DAY! I've always loved it and always will. What can I say, I'm a sucker for hugs, kisses and "I love you"s. If you stop and think about it, it's actually pretty awesome to have a day dedicated to telling your family, friends and significant other that you love them -- just because. Sure, you should tell them this the other 364 days of the year too, but I really enjoy the extra reminder. I always have a smile on my face on this day.

Once upon a time, long before I met A., I was scared of falling in love. It seemed like such a strange, alien experience to put so much of yourself into someone else's not so gentle hands. It sounded kind of wacky and I didn't think I was ever going to take the plunge. Then... well, I met A., and like a second later, I was jumping off the cliff without the safety harness. Geez. What was that saying about "the harder they fall"?

That's kind of how I felt about yeast (smooth transition, eh?). Like love, the whole process sounded kind of wacky, and in my almost 30 years, I've avoided yeast and yeast breads like the plague. I decided that for Valentine's Day, it was time to change all that, to break through my inhibitions, to boldly go, etc etc, you get the idea. Guess what? IT WAS TOTALLY AWESOME.

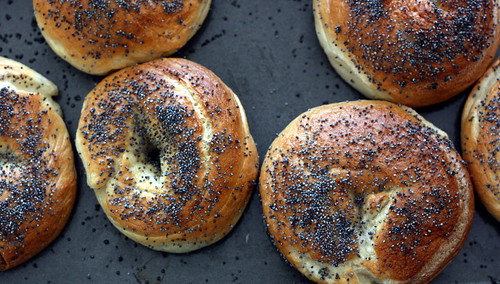
I made bagels because I've had a lot of bad bread, but I've almost never had a bad bagel, so with warped logic, I figured it was something even I couldn't mess up. Plus, I'm Jewish, bagels are (sort of) Jewish... Ok, there was a lot of prayer involved. After I made them, I was mystified about my (now previous) fear of yeast - it was so easy! And so delicious! Why haven't I done this before? And more importantly, when can I do this again? The bagels were exactly how I wanted them to be - plump with soft, pillowy insides and a bit of a crunch on the crust. I sprinkled them with poppy seeds, but next time... oh, next time... I see sun-dried tomatoes and onions, and maybe even my personal dream - cinnamon raisin. The recipe comes from Ari's blog Baking and Books, so head over there and read all her wonderful tips for complete bagel mastery.

Poppy Seed Bagels
Reprinted with permission from Secrets of a Jewish Baker: Recipes for 125 Breads from Around the World, by George Greenstein.
(makes 12 bagels)

2 cups warm water
1 heaping teaspoon active dry yeast
3 tablespoons malt syrup or sugar (I used sugar)
1 tablespoon vegetable oil
6 to 8 cups bread flour (all-purpose worked for me)
1 tablespoon salt
Poppy seeds for topping

In a large bowl, sprinkle the yeast over the warm water and allow a few minutes to soften. Add 2 tablespoons of the malt syrup or sugar, the oil, 6 cups of the flour, and the salt. Mix thoroughly until the dough forms up and comes away from the sides of the bowl.

Turn out onto a floured work surface and knead, adding small amounts of flour 1/4 cup at a time as necessary. Bagel dough should be stiff. Work in as much extra flour as you can comfortably knead. The dough will soften slightly as the gluten develops. Knead until smooth and elastic (12 to 15 minutes).

Rising: Roll the dough into a ball, place in a large oiled bowl (grease the bowl with 1 tsp of oil), and turn to coat. Cover loosely with saran wrap and let rise fully in a warm, dark place (I put mine in a 100F oven to proof because it was freezing in my house), until an impression made with your finger remains and does not sink into the dough. About 1 hour. (Mine rose for 1 1/2 hours).

Shaping: Punch down, cut into thirds, and roll each piece into a rope between your palms. Cut each rope into 4 equal pieces. Roll each piece into a rope 2 inches longer than the width of your hand. Flip the rope around your fingers to form a ring, with the ends overlapping about 1/2 inch. Seal the ends by rolling your palms on the work surface. If the dough slides and resists rolling, dab on a drop of water with your fingers. Evenly space the bagels on 2 nonstick baking pans or very lightly oiled baking sheets (Greenstein applies a thin film of oil with his fingers, I used parchment paper instead). Cover and let stand until puffy, 10 to 20 minutes.

Boiling: Bagels are boiled before they are baked. While they are proofing, fill a 4-quart pan two-thirds full with water, add the 1 remaining tablespoon of malt syrup or sugar, and bring to a boil. Ready your toppings.

Carefully lower 2 or 3 bagels at a time into the boiling water and wait until they rise to the top. If they float, cook for about 1 minute on each side, turning once. If they have proofed too long, they will float instead of sinking, but this won’t affect the final product.

Carefully lift out each bagel with a slotted spoon or skimmer. Drain momentarily, then evenly space 6 bagels on each baking sheet and sprinkle with toppings. You may prefer to leave some plain. Save about 3 cups of the boiling water, see below.

Baking: Preheat the oven to 500 degrees F. Bake with steam by placing an oven safe dish half-filled with the reserved water on the bottom rack of the oven. Place the baking sheets on the middle or top rack, then bake, turning once when the tops begin to brown, until well browned on both sides. About 15 to 20 minutes.

To make these bagels with a stand mixer: In the mixing bowl, dissolve the yeast in the warm water and allow a few minutes to soften. add 2 tablespoons of the malt syrup or sugar, the oil, 6 cups of the flour, and the salt. Using the flat attachment pulse with the on/off switch until the flour is incorporated enough that it won’t be thrown out of the bowl, then mix at first speed until the dough comes away from the sides of the bowl. More flour can be added 1/4 cup at a time.

Remove the flat attachment, scrape down the sides of the bowl and attach the dough hook. Run at first speed until the dough is smooth and elastic, about 12 to 15 minutes. Bagel dough should be stiff. Add flour cautiously, and do not exceed the capacity of the machine. Because the dough is so stiff, it is especially important not to leave the mixer running while unattended. The dough will soften slightly as the gluten develops. Proceed as instructed in the rising, shaping, boiling and baking sections above.

Continued after the jump...