Showing posts with label Cookies. Show all posts

Wednesday, January 20, 2010

Brown Sugar Almond Shortbread

IMG_5312

The cookie season is quite over, but my oven doesn't know that because I can't seem to let go of these wonderful cookies. You'd think that there aren't very many ways to play with such a humble cookie as shortbread - you would be very wrong, and Dorie, whose recipe this is, hits the jackpot as usual.

IMG_5338
IMG_5363

The substitution of brown sugar for regular sugar gives these cookies an extra layer of depth, a kind of subtle scent and sweetness that enhances the extra crunch created by the addition of ground nuts. Mmm... crumbly, buttery, delicious shortbread with layers of underlying flavor. Can you tell I'm slightly in love with this recipe? Not only did I include it in my gift boxes this holiday season, I've made it several times after and I've bored my friends to tears by waxing poetic about the sheer genius of this cookie. Unfortunately, I have a feeling they only listened to me because I kept up a constant supply of shortbread! :)

IMG_5380

Brown Sugar Almond Shortbread
Adapted slightly from Baking, Dorie Greenspan

*A few notes: (1) The original recipe called for ground pecans, but as I had none at the time, I substituted ground almonds instead - it worked really well, but I'm dying to make these with pecans; and (2) The recipe calls for an 18-20 minute baking time - I found that this was way too long and the cookies browned too much and lost flavor. I baked mine for about 12-13 minutes, just until crunchy and pale golden.


1 1/2 cups all-purpose flour
1/4 cup cornstarch
1/4 teaspoon salt
Pinch of ground cloves
2 sticks (8 ounces) unsalted butter, at room temperature
3/4 cup (packed) light brown sugar
1/2 cup finely ground almonds
Confectioners’ sugar, for dusting (optional)

Sift together the flour, cornstarch, salt and cloves.

Working with a stand mixer, preferably fitted with a paddle attachment, or with a hand mixer in a large bowl, beat the butter and brown sugar together on medium speed for about 3 minutes, until the mixture is very smooth. Reduce the mixer speed to low and add the dry ingredients, mixing only until they disappear into the dough. Don’t work the dough much once the flour is incorporated. Add the almond and give the mixer a couple of turns, just to get the nuts into the dough.

Using a rubber spatula, transfer the soft, sticky dough to a gallon-size zipper-lock plastic bag. Put the bag on a flat surface, leaving the top open, and roll the dough into a 9×10⁻¹/2-inch rectangle that’s 1/4-inch thick. As you roll, turn the bag occasionally and lift the plastic from the dough so it doesn’t cause creases. When you get the right size and thickness, seal the bag, pressing out as much air as possible, and refrigerate dough for at least 2 hours, or for up to 2 days.

Position the racks to divide the oven into thirds and preheat the oven to 350 degrees. Line two baking sheets wiht parchment or silicone mats.

Put the plastic bag on a cutting board and slit it open. Turn the firm dough out onto the board (discard the bag) and, using a ruler as a guide and a sharp knife, cut the dough into 1-1/2 inch squares. Transfer the squares to the baking sheets and carefully prick each one twice with a fork, gently pushing the tines through the cookies until they hit the sheet. [I would also freeze each sheet for about 15 minutes before baking to stop the cookies from spreading. I did that with mine and they hardly spread].

Bake for 18-20 minutes [my time was 12-13 minutes], rotating the sheets from top to bottom and front to back at the midway point. The shortbreads will be very pale – they shouldn’t take on much color. Transfer the cookies to a rack.

If you’d like, dust the cookies with confectioners’ sugar while they are still hot. Cool the cookies to room temperature before serving.

Yield: 32 cookies

Continued after the jump...

Sunday, December 27, 2009

Cinnamon Walnut Rugelach

IMG_5160

Have you ever worked with cream cheese dough? If not, count yourself lucky, and if yes, you will understand when I say that cream cheese dough is a huge pain to work with and should only be attempted when you're home alone (so at least no one can hear you swearing like a sailor and throwing floured utensils at the wall).

12-06-13

I gotta be honest with you, this dough almost broke me. It was so soft, so sticky (even after proper chilling), so unwilling to do what I wanted it to do, that I almost gave up. My kitchen looked like a bag of flour exploded all over it and soft, sticky bits of dough snuck into every little crevice. I was so frustrated, I almost tossed dough, flour and all into the trash. Hoo boy, am I glad that I didn't!

12-06-12

Because, as it turns out, the best things in life are worth the effort, and these little rugelach definitely fall into that category. It's something of an epiphany when you first bite into this pastry that puffs up and is soft and delicate and crunchy at the same time, the sweetness of the filling perfectly balancing the tang of the cream cheese in the dough. It's addictive. If you can eat less than five, I take my hat off to you, because no one with whom I shared these could hold themselves back.

If you decide to make these, arm yourself with a lot of patience, a lot of flour and a good bench scraper. Flour the heck out of your surface, flour the heck out of your dough and flour the heck out of your rolling pin. Keep the dough cold and the cursing to a minimum. And trust me, it's all going to be worth it. This - this is what bliss tastes like with a cup of coffee.

IMG_5190

Walnut and Cinnamon Rugelach
slightly adapted from Desserts from Chanterelle

(I added some chocolate to these, and though it tasted fantastic, the chocolate melted out of the filling and created a dark brown crust on the bottom of the cookies, making them look like they burned a little. In other words, I do not recommend this addition.)

Dough
8 tablespoons butter, at room temperature
4 ounces cream cheese, at room temperature
1 cup flour, plus more for rolling dough
1/4 tsp salt
1 teaspoon sugar (I increased to 2 tablespoons)

Filling
1 cup (4 ounces) finely chopped walnuts
1/2 teaspoon cinnamon
1/2 cup (2 ounces) currants (I omitted)
1/4 cup granulated sugar
1/8-1/4 cup turbinado sugar, for topping

1 egg, for egg wash

Yields 32-36 cookies

Make the dough - using a stand mixer with a paddle attachment, beat the butter and cream cheese on medium speed until light and fluffy (5-8 min). Decrease speed to slow and add the dry ingredients, beating until thoroughly combined. Rev up the mixer to medium for 15 seconds. Divide the dough in half and wrap each half in plastic, pressing to shape it into a disc about 1 inch thick and refrigerate for 2 hours or overnight.

Make the filling - in a bowl, toss the sugar, chopped walnuts, currants if using and 1/4 cup of sugar.

Roll the dough - a.k.a. the tricky part:

Flour the heck out of your rolling surface and your rolling pin. Working with one batch of dough at a time (leave the second in the refrigerator while rolling the first), roll the dough into a 6 1/2 x 16 inch rectangle. Roll quickly, lifting the dough with a bench scraper as you are rolling and re-flouring underneath. Use a bench scraper or a pizza cutter to trim the dough into the desired dimensions.

Brush off excess flour and then brush the dough with some egg wash and spread half the walnut-cinnamon filling on top, leaving a 1-inch wide strip of dough clean on the long side (the 16" side). Starting with the edge opposite the clean one (the other 16" side), tightly roll the dough into one 16" long roll. When you reach the strip of dough without topping, apply a little pressure to seal the seam and roll it so the seam is on the bottom.

At this point, I would recommend to cut the dough in half (yielding two 8" rolls), wrap each roll in plastic wrap and refrigerate for 30 min-1hr. Repeat with the other half of the dough. [The logs can be stored in the refrigerator for 24 hrs or in the freezer for 1 week].

Baking - preheat the oven to 350F. Glaze each log with the remaining egg wash and sprinkle the top generously with turbinado sugar. Slice into 1 inch cross-sections and place on a cookie sheet, 1 inch apart. Bake for 15-18 minutes, or until golden on top. Rotate the cookie sheet half-ways through the baking time to ensure even baking.

Continued after the jump...

Friday, October 23, 2009

Pumpkin-Cranberry Biscotti

IMG_3825

Books are kind of like people, don't you think? You can tell right away if you're going to be friends with one or if you'll have a brief conversation and go your separate ways. So it was with this book - as soon as I picked it up,* I could tell that it was going to be one of my favorites. By the end, I felt like I had met Frank and Jerome and had sat with them in the kitchen of their New York cafe as they took out trays upon trays of delicious tarts, biscotti and Madeleines. I've made many recipes from this book, always with great ease and great success, encouraged by the warm tone and the friendly, quick humor on every page.

Pumpkin Biscotti

The recipes in this book are thoughtful, inventive and yet inviting and unpretentious. In fact, you get the feeling that the authors put together a list of their very favorite things to make at home and opened it to the rest of us. These pumpkin biscotti are no exception - they are simply wonderful - wonderful! If you like pumpkin desserts (and oh, I do), you will LOVE these, I promise. Crunchy, spicy, packed with golden raisins, cranberries and toasted pecans, oh goodness, I can't even really express how happy these made me. And the generous proportions of this recipe ensure that your family and friends will be very happy as well, should you choose to share (which, by the way, you totally should - these biscotti will make you many, many new friends!). Happy fall, everyone!

IMG_3821
IMG_3697

*Disclaimer because some people might misunderstand: I bought this book at a bookstore, just like everyone else. I was not asked nor paid to do a review of this book, but I wanted to share it with you because it has become one of my favorite books to reach for lately.

Pumpkin Cranberry Biscotti Recipe
Once Upon a Tart
Note: I used 1 tsp cinnamon, 1/2 tsp nutmeg, 1/4 tsp ground cloves
Note 2: This recipe requires a little more effort than the traditional biscotti, but I'm telling you, it's so totally worth it.
(Makes about 25 biscotti - I got a bit more)

4 1/2 cups flour (495g)
1/2 cup (1 stick) butter, melted and cooled to room temperature (120g)
3 large eggs, at room temperature, separated
1 1/3 cups granulated sugar (230g)
3/4 cup pumpkin puree, packed tightly (183g)
1/4 teaspoon vanilla extract
3/4 teaspoon cinnamon
1/4 teaspoon nutmeg
1/8 teaspoon ground cloves
1/4 teaspoon ground ginger
1 teaspoon baking powder
1/8 teaspoon salt
1 cup pecans, lightly toasted and chopped (150g)
1/2 cup fresh cranberries (75g)
1/3 cup golden raisins (50g)
4 tbsp of turbinado sugar (my addition, optional)

Position one of your oven racks in the center. Preheat oven to 350 degrees F. Line two baking sheets with parchment paper.

In a medium bowl, whisk together the flour, spices, baking powder and salt.

In the bowl of a stand mixer, beat the egg whites on high speed until they form stiff peaks. With the mixer still on high, beat in about half the sugar until the egg whites are glossy. Transfer them to another bowl.

In the same bowl of the stand mixer, beat the egg yolks and the remaining half of the sugar on high speed until the eggs are pale and frothy and the sugar dissolves. Stir in pumpkin puree and vanilla to blend.

Gently fold in the egg whites into the egg yolk mixture. Also gently, stir in the melted (and cooled) butter, nuts, cranberries and raisins.

Gradually stir in the dry ingredients into the wet ingredients until the dough comes together into a sticky ball. For into two logs (flour your hands because the dough will be sticky) about 3" x 10". If you wet your fingers a little, you'll be able to smooth out the surface of the dough should you so wish to. Sprinkle each log with about two tablespoons of turbinado sugar, if using.

Bake for about 50 minutes, until the tops are golden brown and feel firm to the touch. Cool on wire racks for at least 30 minutes (this is important - if you don't cool the biscotti, they will crumble like crazy). Place the logs on a cutting board and cut into 1/2 inch slices with a long and sharp serrated knife. Do not use a sawing motion, but make decisive downward strokes.

Line the slices on the baking sheet and bake for another 25-30 minutes, until they are crisp and golden brown throughout. Allow to cool completely before eating (this is kind of hard to do, with the amazing smell and all, but believe me, they do taste better that way).

Continued after the jump...

Saturday, September 26, 2009

Viennese Shortbread Cookies & Salzburg

IMG_3177_crop

I realized, more than a year after my trip, that I still haven't told you about Salzburg. It was one of those places, like Buenos Aires or Santorini, that I've always wanted to visit just because I had the inescapable feeling that I would find a little magic among its old, winding streets. Everyone told us not to go; they said there was "nothing to do there" (how I hate that trite, useless phrase!). We went anyway, and we fell in love.

Salzburg 2008 029_cropped

It's hard to describe all the charm, all the gentle loveliness of Salzburg. Beyond the Mozart chocolates and the bright, colorful bustle of its plazas and markets, we found that magic I always knew was there. We found it everywhere, just underneath the surface - in the call of a half-familiar song that always seemed just around the corner, the ancient fortress watching over the stately buildings, the quick splash of the fountains and the flowers in unexpected places.

Salzburg 2008-1_cropped
Salzburg 2008-9_cropped

The past rulers of Salzburg seemed like people after my own heart. They encouraged commerce; built a fortress which could hold and protect all the people in a pinch; one of their palaces has sparkly chandeliers and delicious nooks and crannies, and the other, just down the street, a most magnificent garden with flower-lined paths and mysterious, shaded corners. There was a torture tower where, so it is claimed, no one was ever tortured, and though I am not naive enough to believe that all was happy all the time, I'd like to think that bad times passed by quickly in this beautiful, charmed place.

Salzburg 2008_cropped
Mirabel gardens 10_cropped
Salzburg 2008-3_cropped

There are many stories my sister and I took away from our time in Salzburg. Disproportionately many, really, when you consider the short time we spent there. It started from the very beginning, as if the city was trying to show up all those nay-sayers who tried to prevent us from coming here. We were wandering around the 1000-year old fortress that stands on a hill above Salzburg - a mini city in itself - when we heard chanting voices. Naturally, we followed the sound, we could not resist. It was the first of many times when we would follow the sound of music in Salzburg and discover something completely unexpected. We came to a low door with red and blue stained glass. We opened it a tiny chink. It was really like a scene out of a movie - a small stone chamber with an altar and about twenty or thirty men, kneeling and chanting a prayer we did not recognize. We snuck away quietly, and then watched the men - in business suits and with briefcases - emerge from the room and leave their separate ways. Was it a meeting of a secret society? A cult? Mysterious choir practice? We never found out; in fact, we never asked. It was part of the magic that we should continue guessing.

Salzburg 2008-4_cropped
Salzburg 2008-6_cropped

The one thing you cannot escape while in Salzburg (and why would you want to?) is chocolate. There is chocolate everywhere, dark and light, wrapped in the most enticing array of Christmas-colored wrappers; chocolate bars and chocolate liqueurs, chocolate truffles, tarts and macarons; and of course, we brought some back with us (though *ehem* not all of it actually made it back... sorry, mom). There was a whole aisle of chocolate at the supermarket - a whole aisle! - my sister had to stage an intervention to drag me away. And everywhere we went after Salzburg, my carefully-wrapped chocolate liqueurs were unwrapped, inspected, and put back into my suitcase most reluctantly. I believe that if they hadn't been exactly compliant with airplane policies, there would have been at least a few slightly squiffy Air France employees bumping into each other at the Charles de Gaulle airport.

Salzburg 2008_1 022_cropped
Salzburg 2008-7_cropped

For people who like to "do" things, I suppose I should tell you to make your travel plans in a different place because we didn't climb any mountains or do any special activities while there (unless one considers shopping and eating chocolate an acceptable form of special activity, in which case, hey, you found your spot). We sat on benches underneath overhanging flowers, ate ridiculously good pizza, chocolate and cookies, took long walks down streets that ended in small churches and listened to a piano player play Brahms' Hungarian dances in the main plaza. We lost our hearts to this city, absolutely and without reservations, because we found music there, just when we needed it most.

Salzburg 2008-5_cropped
Salzburg 2008-8_cropped

*And the winner of the giveaway is:* if you've stuck with this long post this far, you're probably wondering who won the book featured two posts ago. The random number generator picked no. 6, and I was very excited to learn that it is my very good friend, Brentwood Kitchen Shopper! She loves food and I just know she is going to love this book! Congrats, BK!

Viennese Lemon Cookies

Why Viennese, you ask, if this post is about Salzburg? Well - we ate cookies just like that while there - tender shortbread piped into shapes with a star tip and sprinkled with powdered sugar. Their elegant simplicity reminded me so much of the city that I wanted to share them with you. The recipe comes from the always beautiful blog Fragrante Delicia, and the only thing I would change next time is to swap the whole wheat flour for all purpose flour because I think shortbread should be as sinful as possible. I substituted orange zest for lemon zest because I had oranges on hand.

Viennese Shortbread Cookies
via Leonor at Flagrante Delicia

makes 12 [I got about 16]:

50 g powdered sugar
125 g butter, room temperature
1 g salt
Zest of 1/4 lemon [I used orange]
20 g egg white
150 g wheat flour [or all purpose flour]
Powdered sugar to sprinkle

Cream the butter and sugar together. Add lemon zest and salt and beat for another minute to incorporate. Add the egg whites and whip for a minute or two, until the egg whites are fully incorporated. Gently mix in the flour.

Fit a pastry bag with a star nozzle and, over a siplat or a lined baking sheet, pipe "W"s or "S"s, about 2 inch height. Refrigerate for at least an hour.

Preheat the oven to 350F and bake for 8-10 minutes, or until cookies are golden around the edges [it took me a little longer, about 15 minutes). Cool and sprinkle with icing sugar. Best served the same day as made, but will keep in an airtight container for at least a few days.

Continued after the jump...

Saturday, March 28, 2009

Honey Madeleines

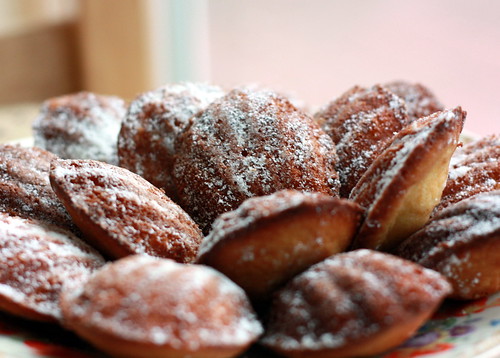
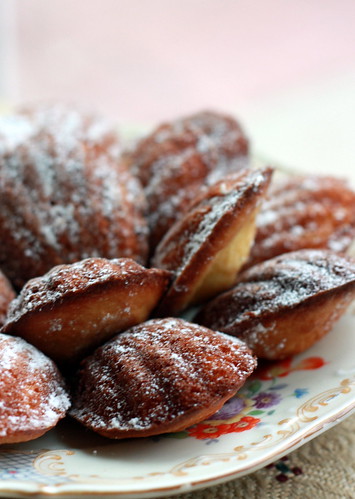
Let's be honest: we all need a perfect Madeleine recipe. You know me, the one with the tiny kitchen where a muffin tin has at least four different uses -- I'm the last person who will tell you that you need this specific kind of brand/ingredient/cake-pan. And yet, I am telling you now -- you need a Madeleine pan and you need this recipe for honey Madeleines. Why? Because it's perfect.

Spring brings that out in me, the appreciation of simplicity, of new beginnings. It's in the air, the way the little buds all open up at the same time and this tree outside my window, this tree that was bare yesterday, suddenly shimmers with a pale green mist. Sure, I could bake, say, a brandied-cherry mascarpone cheesecake (interested?) or mix some Poma-limon-tinis for brunch, but truth be told, all I want is a cup of tea, a stack of these tender little cakes and the smells of spring. What can I tell you, I'm just that kind of a girl.

You might remember that way back when, I tried Dorie's Madeleines and I wasn't thrilled. Having made them again, I can definitely say that my technique was off at that time, so it's partly my fault, but out of the two recipes, this one comes out as a clear winner. It was soft, it was fluffy, it was a little crunchy on the outside with tender air pockets inside. Lightly sweet with an underlying taste and smell of honey, these little cakes are just begging to be glazed or simply dusted with a festive coat of confectioner's sugar. They will lift you out of your winter funk -- and that's not a promise I make lightly.

Honey Madeleines
Once Upon A Tart
(makes 12 full sized Madeleines or 24 minis)

[Note: I love this book and this recipe, but their instructions for Madeleines are kind of scant and assume a greater level of familiarity with Madeleines than I previously had, so I roamed the internet for tips and have compiled an all-you-need-to-know Madeleine tutorial. I'd like to say I learned all this by example and by trial and error, but really, it was mostly by error. :)]

3/4 cup all purpose flour
4 tbsp butter (plus more for buttering pan)
2 eggs, room temperature
1/3 cup granulated sugar
1 tbsp brown sugar
1 tbsp honey (I prefer to use dark, fragrant honey)
1 tsp vanilla or almond extract
1 tsp baking powder
pinch of salt

In a small saucepan or microwave, melt the 4 tbsp of butter (some people like to brown it, but I haven't tried that yet). Stir in honey and extract. Let cool to room temperature.

While the butter/honey/extract is cooling, whisk the flour, baking powder and salt together in a small bowl. For full disclosure, I have to tell you that for the best, the tenderest cookies, what you really need to do is sift the dry ingredients together, and possibly sift them twice (but if you are short on time or patience, or you are me, whisking is just fine).

Break the two eggs into a large bowl and add the sugars. Now, this part is really important - whip the eggs on a high speed for at least 3 minutes -- possibly as much as 5 -- until they are thick and light in color, and fall in a dense ribbon when you lift your beater out of the bowl. This is what gives Madeleines their airy texture, so don't skimp on the whipping.

With a rubber spatula, gently fold the dry ingredients into the eggs, being really careful not to deflate the eggs and mixing only until the flour disappears. Then, being just as careful, fold in the cooled butter/honey/extract mixture. I do this by pouring it down the side of the bowl and then swirling it around with the spatula until the texture is uniform.

Press a piece of plastic wrap against the surface to prevent a skin from forming and refrigerate for 30 minutes.

Turn the oven to 400F and brush your Madeleine pan with softened or melted butter. Brush it well - the worst is to be stuck prying your beautiful little cakes from the pan because you didn't butter it enough. Fill the molds about 3/4 of the way - don't worry, they will spread and rise as they bake. Bake until the Madeleines rise and the edges are browned. In practice, it's usually about 10-12 minutes for full sized cakes or 8-10 for minis. Please watch carefully because even 30 seconds extra makes a difference with these.

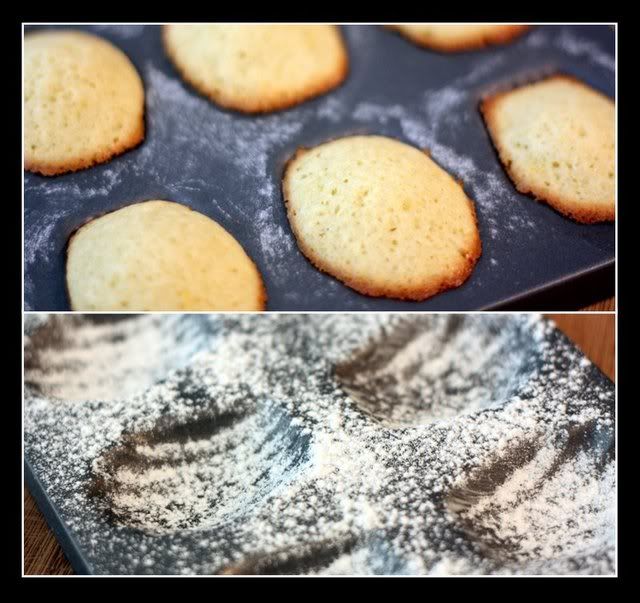
Take out the pan and tap it lightly on the counter to unmold the cakes and then carefully pry them out of the molds (I use a dull butter knife to help me there), arrange on plate and dust with confectioner's sugar. Usually, Madeleines should be eaten the same day they are made, but these were still totally awesome the next day.

To hump or not to hump, that is the question?

In my search for baking tips, I came across what I like to call as "The Great Madeleine Debate." By this, I mean the hump vs. no hump question. Some Madeleine purists insist that the perfect Madeleines need to have a distinct hump when coming out of the oven, and as such, this is the only kind they will allow to cross their venerated lips. The other purists counter with, "Aha, but even PARISIANS -- the ultimate authority on pastries in general and Madeleines in particular -- don't like their Madeleines to hump, and humping is not ladylike anyway, so there." They then get into a Madeleine-throwing fight and many cookies are sacrificed in the ensuing battle.

To me, all this "much ado about nothing" (I'm feeling very Shakespearean today) seems kind of silly (sorry, Madeleine purists). I mean, these are little cakes, not camels, right, so why would we insist on a hump? In short, my view is: as long as they taste great, I give them a pass, hump or no hump.

Continued after the jump...

Sunday, February 22, 2009

Chocolate biscotti

On days like this, when the clouds are thick, dark and saturated with rain, when the plants look droopy and the streets are almost empty and silent, I forget that it's sunny somewhere else in the world. I forget that soon, the seasons will change again and I won't need that extra shot of espresso to feel good because the air will carry the smells of spring. On days like this, I embrace my mood and I bake chocolate biscotti.

Since I've previously had success with Dorie Greenspan's almond cornmeal biscotti, I decided to give her chocolate biscotti recipe a try. The flavor was great - dark, dense, chocolaty with smoky notes of espresso and a crunch of almonds (although I think hazelnuts would have worked better, but I didn't have them around). Alas, they were crumbly - very very crumbly. What did I do wrong? The recipe said that the tops will crack a bit, and not only did the tops crack quite a lot, but I had such trouble slicing them after the first bake AND after the second bake, that at least a few had to be sent to that great biscotti gig in the sky (aka, A.'s afternoon tea). Also, and this is a minor complaint since they did taste great, these biscotti weren't very pretty. Does anyone have a chocolate biscotti recipe that works better than this one? Help!


Chocolate Biscotti
(Dorie Greenspan, Baking)

Ingredients

2 cups all-purpose flour
1/2 cup unsweetened cocoa powder
2 tbsp instant coffee or instant espresso powder
3/4 tsp baking soda
1/2 tsp baking powder
1 tsp salt
6 tbsp unsalted butter, room temperature
1 cup sugar (I always use a bit less, more like 3/4)
2 large eggs, lightly beaten
1 tsp vanilla extract
1/2 cup chopped almonds (or hazelnuts - next time)
4 oz bittersweet chocolate, coarsely chopped

Directions

Preheat oven to 350 degrees. Line a baking sheet with parchment or a silicone baking mat.

Sift together the flour, cocoa, coffee powder, baking soda, baking powder, and salt.

With a mixer, cream the butter and sugar on medium speed for about 2 minutes until light. Scrape down the sides of the bowl and add the eggs and vanilla; beat for another 2 minutes. Decrease the speed to low and mix in the dry ingredients in 3 additions, mixing only until a dough forms. Scrape down the sides of the bowl and mix in the chopped nuts and chocolate.

Turn the dough out onto a work surface and knead a few times just to incorporate any dry ingredients that didn't get mixed in before. Divide into two portions; on the baking sheet, shape each portion into a 12 x 2 inch log. Dust the tops with a little sugar (to make them look pretty, I'm assuming). Bake for 25 minutes.

Remove the sheet from the oven and let it cool on a rack for 20 minutes. Then, with a very sharp, serrated knife, slice the logs into about 3/4 - 1 inch slices and leave the slices standing up on the baking sheet (some people lay them down, but I like both sides to get crispy). Return to the oven for another 10-15 minutes of baking.

Transfer biscotti to a rack to cool.

Continued after the jump...

Thursday, December 25, 2008

Anita's Chocolate Crinkle Cookies


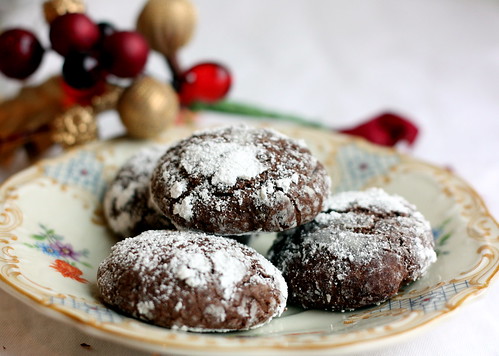
I've always had this idea that life takes you where it wants you to go. Not that you can be passive -- you get opportunities and you work like crazy to pick them up, and you get knocked down and you have to discover your own way out -- but you find yourself along a certain road and, whether you know it or not, it is a good one in the end. I found myself walking down that road, but as I walk (run, huff, crawl) along, I keep looking over at the green grass on both sides and wondering... should I have taken the other path? Should I have made that left at Albuquerque (as Bugs Bunny would say)? I love so many things that are not my job -- I love painting, baking, writing, traveling, taking photographs, and maybe all of them together. Why am I not doing those things for a living?

The other day, one of my neighbors brought me an article cut out of a newspaper, about a woman who used to be a lawyer and then quit and went to culinary school and opened her own baking business. It stayed in my mind for quite a long time, sitting, simmering. What an attractive idea, full of adventure and new challenges... It was still in my mind when I took a whole Sunday to bake 20 boxes of 3 different kinds of cookies and 10 boxes of biscotti. On Monday, I had a whole new appreciation for my job. Do I still love baking? Oh yes, absolutely (and it all turned out deliciously, and the office was full of people smiling at me and waving vigorously from afar). But now I understand its place in my life much better than I used to, and I understand why the path along which I am walking is the right one for me... for now!


Chocolate Crinkles

from Anita Chu's "Field Guide to Cookies"

6 oz semisweet chocolate, chopped
1/4 cup plus 2 Tbs unsalted butter, softened
1/2 cup sugar
2 eggs
1 tsp vanilla extract
1 1/2 cups all purpose flour
2 Tbs cocoa powder
3/4 tsp baking powder
1/4 tsp salt
confectioners sugar for rolling

Melt chocolate and butter over a double boiler. Remove from heat and set aside.

In the meantime, whip the eggs with the sugar until thick and pale. Add the vanilla extract and the melted chocolate and mix.

Sift flour, cocoa powder, salt and baking powder into a bowl and add this to the chocolate mixture. Mix until combined.

Place this bowl in the refrigerator for about 2 hours until the dough hardens enough to scoop out.

Preheat oven to 325F. Scoop one inch balls. Roll these in powdered sugar and place them on sheetpans lined with parchment paper. Flatten the tops of the cookies a bit with your fingers and bake until set for about 12 minutes.

Continued after the jump...

Wednesday, December 24, 2008

Lenox Almond Biscotti


Ever since I first made these, they have been my go-to biscotti recipe. I love the texture -- a light sweetness that has a pleasant crunch of cornmeal to make it unique. I love the fact that these can be adapted every which way (I made them with chocolate chips and cranberries once, and dipped them in dark chocolate another time), and I love that they are distinctly home-made, compared to the hard, brittle things that Starbucks likes to call biscotti. Also, and perhaps most importantly, these are eminently givable and eminently lovable.


These were a TWD challenge a while back and some people had issues with them spreading too much. All I can tell you is that I followed the instructions pretty closely and have never had problems (Dorie says to make the dough into two logs, about 2x12 inches, and it has worked wonderfully for me). The only thing I really add to the recipe is to put the rack in the upper third of the oven and add about 5 minutes to the first baking (until the logs start turning golden and the edges look crispy). Oh, and I tone down the almond extract to 1 tsp instead of 1.5 -- I don't like a very strong almond smell. Also, it's really important to let these rest the full half hour between bakings; otherwise, they will crumble, even with the sharpest knife. When you make the cut, make it decisively (versus cutting in a sawing motion). Easy recipe, lovely results.

Lenox Almond Biscotti
from Dorie Greenspan's Baking From my Home to Yours

1 1/2 cups all-purpose flour
1 1/2 teaspoons baking powder
1/4 teaspoon salt
1/2 cup yellow cornmeal
1 stick (8 tablespoons) unsalted butter, at room temperature
1 cup sugar
2 large eggs
1 1/2 teaspoons pure almond extract
3/4 cup sliced almonds, blanched or unblanched

GETTING READY: Center a rack in the oven and preheat the oven to 350 degrees F. Line a baking sheet with parchment or a silicone mat.

Whisk the flour, baking powder and salt together. Add the cornmeal and whisk again to blend.

Working with a stand mixer, preferably fitted with a paddle attachment, or with a hand mixer in a large bowl, beat the butter and sugar together at medium speed for 3 minutes, until very smooth. Add the eggs and continue to beat, scraping down the bowl as needed, for another 2 minutes, or until the mixture is light, smooth and creamy. Beat in the almond extract. Reduce the mixer speed to low and add the dry ingredients, mixing only until they are incorporated. You'll have a soft, stick-to-your-fingers dough that will ball up around the paddle or beaters. Scrape down the paddle and bowl, toss in the almonds and mix just to blend.

Scrape half the dough onto one side of the baking sheet. Using your fingers and a rubber spatula or scraper, work the dough into a log about 12 inches long and 1 1¿2 inches wide. The log will be more rectangular than domed, and bumpy, rough and uneven. Form a second log with the remaining dough on the other side of the baking sheet.

Bake for 15 minutes, or until the logs are lightly golden but still soft and springy to the touch. Transfer the baking sheet to a rack and cool the logs on the baking sheet for 30 minutes.

If you turned off the oven, bring it back up to 350 degrees F.

Using a wide metal spatula, transfer the logs to a cutting board and, with a long serrated knife, trim the ends and cut the logs into 3/4-inch-thick slices. Return the slices to the baking sheet — this time standing them up like a marching band — and slide the sheet back into the oven.

Bake the biscotti for another 15 minutes, or until they are golden and firm. Transfer them to racks and cool to room temperature.

Continued after the jump...

Saturday, November 1, 2008

World Peace Cookies


It is a truth universally acknowledged that cookies make people happy (sorry, Jane Austen, I just had to crib that line). It's so true, though -- have you ever been unhappy while eating a cookie? No, I think not, my friends. Cookies are like a shot of tequila, only without the headache. I have a friend whose grandmother told me that every time she travels, she bakes cookies. She says that it immediately breaks the ice and makes people smile -- especially harried, stressed out people who only expect complaints and demands from passengers. I love that sentiment and I do find that food is the greatest communal experience through which we bond with others (ok, maybe not *the* greatest, but you know what I mean!). These cookies hit the spot completely. They are as intensely chocolate as they look, and the bit of salt gives it a grown up, sophisticated flavor. All I can say is, bake them, share them, enjoy the smiles.


World Peace Cookies

(Dorie Greenspan - makes 36 cookies)

1 1/4 cups all-purpose flour
1/3 cup unsweetened cocoa powder
1/2 teaspoon baking soda
1 stick plus 3 tablespoons (11 tablespoons) unsalted butter, at room temperature
2/3 cup (packed) light brown sugar
1/4 cup sugar
1/2 teaspoon fleur de sel or 1/4 teaspoon fine sea salt
1 teaspoon pure vanilla extract
5 ounces bittersweet chocolate, chopped into chips, or a generous 3/4 cup store-bought mini chocolate chips

1. Sift the flour, cocoa and baking soda together.

2. Working with a stand mixer, preferably fitted with a paddle attachment, or with a hand mixer in a large bowl, beat the butter on medium speed until soft and creamy. Add both sugars, the salt and vanilla extract and beat for 2 minutes more.

3. Turn off the mixer. Pour in the dry ingredients, drape a kitchen towel over the stand mixer to protect yourself and your kitchen from flying flour and pulse the mixer at low speed about 5 times, a second or two each time. Take a peek — if there is still a lot of flour on the surface of the dough, pulse a couple of times more; if not, remove the towel. Continuing at low speed, mix for about 30 seconds more, just until the flour disappears into the dough — for the best texture, work the dough as little as possible once the flour is added, and don't be concerned if the dough looks a little crumbly. Toss in the chocolate pieces and mix only to incorporate.

4. Turn the dough out onto a work surface, gather it together and divide it in half. Working with one half at a time, shape the dough into logs that are 1 1/2 inches in diameter. Wrap the logs in plastic wrap and refrigerate them for at least 3 hours. (The dough can be refrigerated for up to 3 days or frozen for up to 2 months. If you've frozen the dough, you needn't defrost it before baking — just slice the logs into cookies and bake the cookies 1 minute longer.)

Getting Ready to Bake:

5. Center a rack in the oven and preheat the oven to 325 degrees F. Line two baking sheets with parchment or silicone mats.

6. Using a sharp thin knife, slice the logs into rounds that are 1/2 inch thick. (The rounds are likely to crack as you're cutting them — don't be concerned, just squeeze the bits back onto each cookie.) Arrange the rounds on the baking sheets, leaving about 1 inch between them.

7. Bake the cookies one sheet at a time for 12 minutes — they won't look done, nor will they be firm, but that's just the way they should be. Transfer the baking sheet to a cooling rack and let the cookies rest until they are only just warm, at which point you can serve them or let them reach room temperature.

Continued after the jump...

Saturday, October 11, 2008

Traditional Madeleines

I knew that walking into Sur La Table would be trouble -- it always is. I managed to skirt past the people browsing the section with a big red "SALE" sign; I put down the cutest little paella pan; I did not succumb to the call of the tart rings. In my tiny kitchen, every new item has to be absolutely necessary and do double or even triple duty, but there was something about that mini Madeleine pan that I just could not resist. Like a screen siren of days long gone, it called to me with its lush curves and sexy lines. I was a lost woman.

Eager to try out my new purchase, I made the first recipe from my "baking bible" -- the Dorie Greenspan "Baking" cookbook. The dough behaved beautifully and was easy to make, and my little honeys baked up with a most characteristic "hump." I was not so sold on the taste, however, as I thought the crumb was a little too dense (maybe it was my technique, as it was my first time ever making Madeleines). The flavor was wonderful, though-- vanilla sweetness and just enough of a hint of lemon. All in all, let us simply say that my quest for the perfect Madeleine is just beginning.


Traditional Madeleines
(Dorie Greenspan)
Makes 12 cookies or 24 minis
2/3 cup all-purpose flour
3/4 tsp baking powder
pinch of salt
1/2 cup sugar
Grated zest of 1 lemon
2 large eggs, room temperature
2 tsp pure vanilla extract
3/4 stick (6 T) unsalted butter, melted and cooled
Confectioners' sugar for dusting

Whisk together the flour, baking powder and salt.

Working in a mixer bowl or in a large bowl, rub the sugar and lemon zest together with your fingertips until the sugar is moist and fragrant. Add the eggs and beat eggs and sugar on medium speed until pale, thick and light, 2-3 min. Beat in the vanilla. With a rubber spatula, very gently fold in the dry ingredients, followed by the melted butter. Press a piece of plastic wrap against the surface of the batter and refrigerate for at least 3 hrs, or for up to 2 days.

Preheat the oven to 400F and center a rack in the oven. Butter and flour the Madeleine pan or spray non-stick pan with cooking spray. Spoon the batter into molds, filling each one almost to the top -- don't spread the batter. Bake large Madeleines 11-13 minutes and minis 8-10 minutes, or until the top is golden and springs back when touched. Remove the pan and release the Madeleines from the molds by rapping the edge of the pan against the counter. Gently pry any recalcitrant cookies from the pan using your fingers or a butter knife. Cool to room temperature.

Note: these are MUCH better the day they are baked, so I would suggest refrigerating the dough overnight and baking in the morning!

Continued after the jump...

Linzer Sables

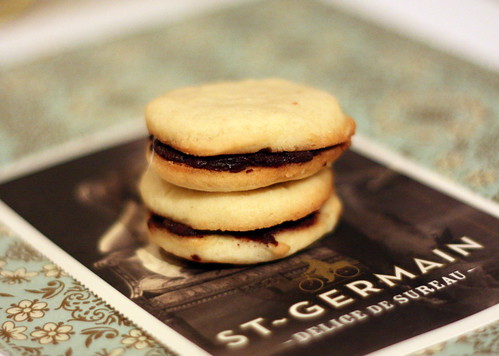
In my baking career (purely amateur, you understand), I've made cakes and pies and tarts and scones, lemon bars and cheesecakes and custards and breads. I can probably make a tart crust with my eyes closed. Yet, I have made cookies only that one lonely time. As soon as I told you guys then that I didn't like cookies, some innate contrarian spirit made me go out there and try to bake a few. Now, these are not save the world cookies, just simple sablees with a little twist of ground almonds and cinnamon and chocolate (simple twist, did she say?), but as silly as it sounds, I really enjoyed baking these and thought I should share the experience. Oh, and I enjoyed eating them as well, and so did everyone else. Simply put, these cookies deserve to be eaten, and that's all any cookie can really wish for in its short, sweet life. :)


Linzer Sables
(adapted from Dorie Greenspan)

*Note 1* I made these with almonds and sandwiched with chocolate, but Dorie suggests that you can make them with hazelnuts, almonds or walnuts and sandwich with either chocolate or jam.
*Note 2* The recipe says that it makes 50 cookies (or 25 sandwich cookies), but I got about 1.5 times that -- maybe I roll out my dough a little thinner?
*Note 3 and final* To cut out the eyelet, use the end of a piping tip.

1 cup finely ground almonds
2 cups all purpose flour
1.5 tsp ground cinnamon
1/4 tsp salt
1 large egg
2 tsp water
1 stick (8 T) unsalted butter, at room temperature
1/2 cup sugar

For the ganache: 4 oz bittersweet chocolate, 1/4 cup cream, 1 tbsp butter at room temperature

Whisk together the ground nuts, flour, cinnamon and salt. Using a fork, stir the egg and water together in a small bowl.

Beat the butter and sugar together at medium speed until smooth, about 3 minutes; add the egg mixture and beat for 1 minute more. Reduce the speed to low and beat in the dry ingredients, mixing only until they disappear into the dough (don't overwork the dough). If there are dry ingredients left in the bowl, mix them in with your hands.

Divide the dough in half. Working with one half at a time, put the dough between two large sheets of wax paper. Flatten the dough into a disk and roll it out until it's about 1/4 inch thick. Do the same with the other half. Making sure the dough is flat, transfer it to the freezer for 45 minutes (or refrigerate for 2 hrs).

Preheat the oven to 375F and line two baking sheets with parchment or silicone mats. Take out one piece of dough, and, peeling off the top piece of wax paper, cut out cookies of desired shape. If you want a peekaboo cutout, use the end of a piping tip to cut out little holes in the middle of half the cookies. Transfer the cookies to a baking sheet, leaving a little space between the cookies. If the dough has become too warm at this point, freeze it for 5 minutes more before transferring the cookies to a baking sheet. Use the scraps to roll more dough, freeze until firm and make more cookies.
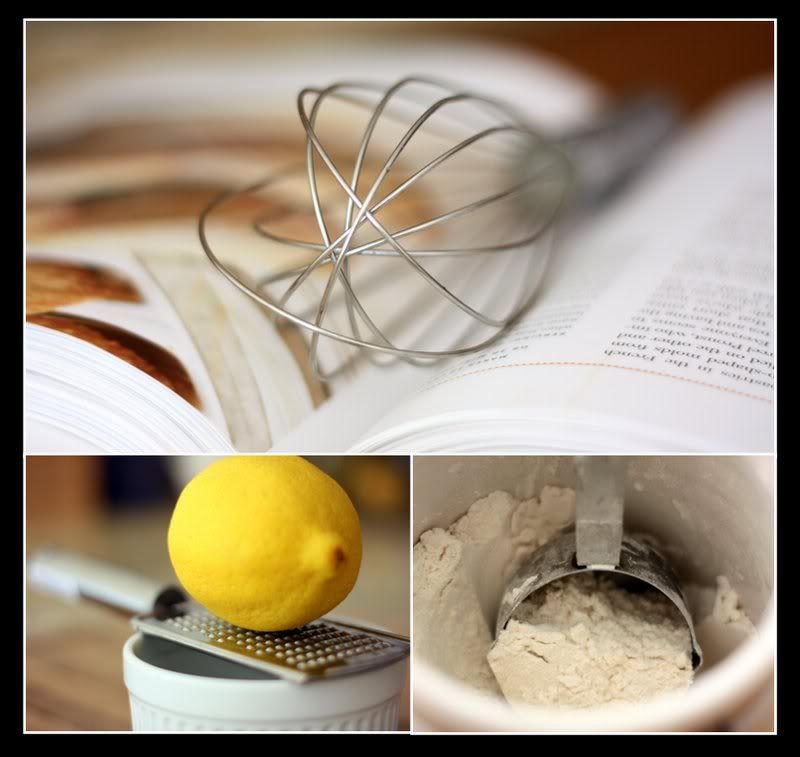
Bake the cookies one sheet at a time for 11 to 13 minutes, or until cookies are lightly golden, dry and just firm to the touch. Cool at room temperature. Repeat with the second disk of dough, making sure to cool the baking sheets between batches.

Sandwich cookies: Make the ganache by chopping the chocolate into a small bowl. Heat the cream to a boil and pour over the chocolate, letting it stand for a few minutes. Then, whisk until smooth and glossy, and stir in 1 tbsp of room-temperature unsalted butter. Let the ganache cool a bit. Then, place about 1/2 tsp of the ganache in the center of half of the cookies and sandwich with the remaining cookies.

If using jam, bring 1/2 cup jam (raspberry or apricot recommended) and 1 tsp of water to a boil. Let the jam cool slightly and place 1/2 tsp of jam in the center of each cookie, sandwiching with the remaining cookies.

Before serving, dust cookies lightly with confectioners sugar.

Continued after the jump...

Tuesday, September 16, 2008

Chocolate Covered Sables (French Butter Cookies)


I hope you will not hate me when I tell you that I don't like cookies. I know, I know, what a weirdo. But it's true, I've always been like this, since I was a kid. There was only one kind of cookie that I've ever liked, and that is shortbread, or as Americans call it, a butter cookie. I mean, I have good taste, right, what's not to like in a butter cookie?

So the other day, I was home alone and decided that I should make a batch of cookies for some of my co-workers. I haven't fed them recently, and I was getting a little worried about the decreasing size of their waistlines. I kid, I kid. It's just that some of them have been really nice to me lately, and I wanted to say thank you.


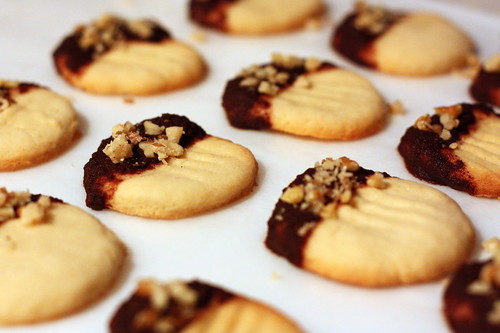
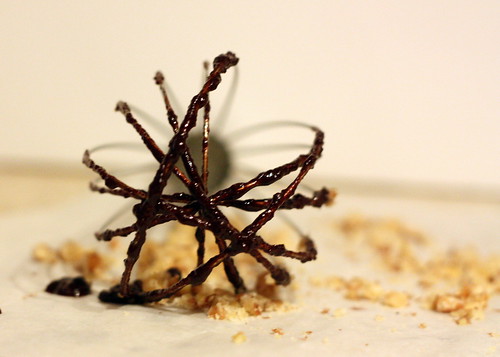
I was browsing the blog of someone whose creations consistently delight me, and I came across a recipe for a French butter cookie. I don't think I've ever tried one of those before, I thought. Check on the Irish shortbread cookie, check on the Scottish shortbread cookie, check on the American and the Russian versions, but startlingly, no French. Oh boy, did I remedy that little oversight. The cookie by itself is a great little snack, but I decided to dress it up in chocolate and crushed walnuts, and that's when it all really sang. And then I got a little cookie-happy and made this:


Here is the recipe for the cookies. So cute, no?

For the ganache, I whisked equal parts of dark chocolate and cream over a double boiler until smooth and shiny (mine didn't come out very shiny this time, but oh well), dipped the cookies into it, lined them up on a piece of wax paper and sprinkled with crushed walnuts. I then refrigerated for about an hour and separated the cookies by carefully sliding a knife under each cookie to release from the paper. They were really quick and easy to make and a huge hit at work! Thanks, Helen for the recipe!

Continued after the jump...