Showing posts with label Pies and Tarts. Show all posts

Wednesday, November 25, 2009

Chocolate Pear Tart

IMG_4769

Hey there, how's Thanksgiving prep going? Is that pumpkin pie getting a bit bored and lonely on the dessert list? Well, look no further for its companion because this Chocolate Pear Tart is going to blow your socks off. Holy heck, is this thing good! Ripe Bosc pears tenderly poached in sugar and vanilla and then nestled in an ungoodly amount of deep, dark chocolate. Are you drooling yet? If not, let's take a look at the close-up:

IMG_4767

And now say the words: Chocolate Pear Tart. Say them slowly, imagining the aroma that will fill your kitchen. Not bad, eh? Now, back to work! But don't panic, because even if something doesn't turn out *just so* (sacrebleu, what an idea!), this tart will make everything right again.

Food Photos1-35

Happy Thanksgiving, everyone! A. and I wish you all a wonderful, happy and warm holiday full of family, friends, laughter and love.


IMG_4844

Chocolate Pear Tart

This tart is from Once Upon A Tart, but I hacked it a little, using a different crust and twice as many pears. I know I keep repeating myself with this book, but it's just too darn good!

You can certainly use pears from a can or a jar, but, considering that it's so ridiculously easy to poach them yourself, why would you? There are all kinds of fancy pants ways you can poach your pears, and you should feel free to use whichever way you are comfortable with. The easiest is to do it with water and sugar, and I always like to add half a vanilla bean or a teaspoon of vanilla extract to the poaching liquid.

For the poached pears
4 ripe Bosc/D'Anjour/Bartlett pears (I used Bosc)
4-5 cups water
1 cup sugar
1/2 vanilla bean, seeds and pod, or 1 tsp vanilla extract

For the crust
(lightly adapted from Dorie Greenspan)
1 1/2 cups all purpose flour
1/2 cup confectioner's sugar
1/4 tsp salt
1 stick butter, very cold, cut into 16 pieces
1 cold egg, lightly beaten

For the custard (from Once Upon a Tart)
6 ounces good semisweet chocolate, chopped
3/4 cups heavy cream
1/4 cup sugar
1 egg
1 egg yolk
1 tsp vanilla extract

Apricot jam to glaze (optional)

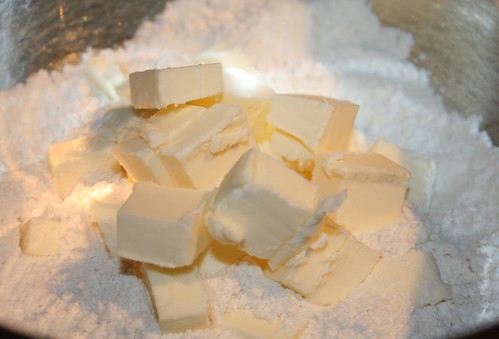
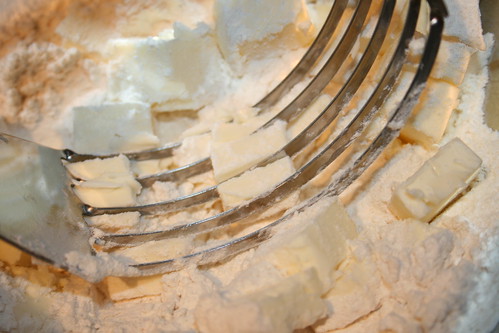
1. Make the crust. In a large bowl, whisk the flour, sugar and salt together. Scatter pieces of cold butter on top and cut in with a pastry cutter until the largest pieces are the size of peas and the mixture looks crumbly. Working quickly, drip the egg into the dough and toss with a fork until the dough sticks together when pinched. If the dough is too dry, add a tablespoon of iced water. Turn out onto a lightly floured counter and knead a few times, just to incorporate the dry ingredients.

2. Butter or spray a 10-inch tart pan. Lightly press the dough into the tart pan. The dough should cover all the sides but not lose its crumbly texture (in other words, don't work with it too much or the pieces of butter will melt). Place the tart pan in the freezer for 1/2 hour.

3. Next, peel, halve and core the pears. Bring 4-5 cups of water and 1 cup of sugar to a boil in a large saucepan and stir until the sugar is dissolved. Scrape the vanilla seeds from 1/2 of a vanilla bean into the water and put the pod in as well, or just put in the teaspoon of vanilla extract and stir to combine. Gently place the pears in the water (add more water if needed to completely cover the pears), lower the heat, and cook at a low boil until the pears are just tender when pierced with a fork (but not mushy). For me, this was around the 10-15 minute mark. Drain the water and set the pears aside.

4. Whisk the egg and the egg yolk lightly in a medium-sized bowl. Add the vanilla and whisk to combine. In a double boiler (or a metal bowl set over an inch of gently simmering water so that the bowl bottom doesn't touch the water) melt the chocolate with the cream, stirring and folding with a heat-proof spatula to combine into a smooth and shiny ganache. Stir in the 1/4 cup sugar and cook a few minutes more, until the sugar has melted. Set aside to cool.

5. Remove the tart dough from the freezer and preheat the oven to 375F. Carefully transfer your pear halves to a cutting board and, holding each pear with one hand to keep it intact, carefully slice into thin slices. To fan out the pear slices, press the wide end of the pear gently towards the narrow end. Slide the knife under the fanned pears and arrange them in a circle inside the tart pan.

6. To make the custard, slowly dribble about 1/2 cup of the chocolate mixture into the eggs, whisking constantly. This warms the eggs, preventing them from cooking. Add the rest of the chocolate in a steady stream and stir to combine.

7. Pour the chocolate mixture into the tart pan, pouring as much as possible around the pears rather than on top of the pears. Bake for 50-55 minutes or until the chocolate custard is puffed and set (it will be firm to the touch and slightly cracked around the edges). Cool on a wire rack for 10 minutes.

8. Remove the tart from the tart pan and slide onto a plate. If desired, brush the pears with a little bit of melted apricot jam to glaze and then sprinkle with powdered sugar before serving. Serve warm with lightly-sweetened whipped cream.

Continued after the jump...

Monday, October 19, 2009

Apple Pie, Straight Up

IMG_3883

I've come to the conclusion that apple pie is all about subtlety. There's a basic ratio of apples to sugar to spices to crust, but these simple numbers tell you nothing at all of the flavors, smells and textures you can create with just a flick of a measuring cup. For this - my first apple pie - I wanted the flavors to be mine, just the way I like them. I wanted the crust to be flaky, tender and interesting. I wanted the apples to have that perfect balance of tart and sweet. I wanted the filling to be a little spicy, fork-tender and just a little gooey. Most of all, I wanted that smell, the apple pie, autumn leaves, refuge from the chill, begging for some ice cream smell that I dreamt would float out of the windows and make us so so happy.

Apple Pie-3
IMG_3744

Oh, I was so excited when I took this pie out of the oven. "Look," I said to A., "it looks and smells just like real apple pie!" He laughed, but he knew what I meant. Not having grown up in this country, it's always been a struggle to accept the best parts of American culture while keeping our own identity intact. Being able to re-create a dish that is so intrinsic to this part of the world (that over the years has become our very beloved home) while putting my own personal touches to it gave me a wonderful sense of completeness, of finally merging my two worlds into one (deliciously warm and spicy) whole.

IMG_3931
10-18-09_crop

Apple Pie

Crust (one double-crust pie)
3 cups all purpose flour
2 sticks (8 oz) butter, very cold
2 tablespoons granulated sugar
1 teaspoons salt
3 tablespoons ice water
1 tablespoon cider vinegar*
1/2 teaspoon cinnamon (optional)
1-2 tablespoons turbinado sugar for topping

*Helene, who is a reader and a wonderful baker, tipped me off that adding cider vinegar helps relax the dough for the rolling

Filling (for a deep dish pie)
1.5 lb Granny Smith apples (for tartness)
1.5 lb Golden Delicious apples (for sweetness)
1/2 cup granulated sugar
1/4 cup brown sugar (to make it a little gooey - if you don't like that, use all granulated sugar)
3-4 tablespoons all-purpose flour
1 tablespoon fresh lemon juice
1 teaspoon vanilla extract
1 teaspoon cinnamon
1/2 teaspoon nutmeg
dash of ground cloves
2 tbsp cold butter, cut into little pieces

Apple Pie-2

People - do not be afraid of a pie crust. It's really not that bad. There's no secret to it - just be prepared and work quickly. Here's what I want you to do:

1. Take out the butter and cut each stick into 16 little cubes. Put them in the freezer for at least 5 minutes.

2. Whisk the flour, sugar, salt and cinnamon together in a large bowl. Take a glass, fill it with water and put some ice in there to make it extra cold.

3. Take out and get ready your pastry cutter, rolling pin, a pastry scraper and a tablespoon for the ice water.

4. Drop the butter pieces into the big bowl with the flour, and working quickly, cut the butter into the flour until there are large pieces and small pieces. The smallest pieces should be about the size of a pea and the largest the size of a pecan.

5. Dribble about 3 tablespoons of ice water and 1 tablespoon of cider vinegar into the flour mixture and toss it gently with your fingers until the dough stays together when pinched (there will still be dry patches, that's ok). Add more water if you need to, in 1 tbsp increments. Do this quickly so the butter doesn't get a chance to melt. Pop the bowl into the freezer for 5 minutes and take a coffee break.

6. Dump the contents of your bowl onto a large counter, flour your rolling pin and pass it back and forth over the barely-together dough. What this does is flatten out the butter and coat it with the flour so that you ensure flakiness and tenderness. Using a pastry scraper, turn over the mixture so you get to roll the butter that's on the bottom as well as what was on top.

7. Gather the dough into a ball, divide in two, wrap in plastic wrap and refrigerate for at least an hour.

8. Make the filling - peel and core the apples and slice into 1/4 inch slices (I like my slices pretty thin so they become very tender and don't slide out). In a large bowl, toss with the sugars, spices, vanilla, lemon juice and flour. Turn to coat and let stand for 15 minutes, mixing several times to soften the apples. When you're ready to fill the pie, drain about half of the juices.

9. Preheat the oven to 425F, arrange a rack in the bottom third of the oven, butter a pie plate.

10. Take the dough out of the refrigerator, let it rest for 5-10 minutes to become pliable and roll out each piece between two sheets of plastic or parchment paper (I can't tell you how HUGE a fan I am of this method - no sticking, no mess, ahhh). After rolling, I like to put the crusts into the freezer for 2-3 minutes so that they are easier to transfer. Transfer one of the crusts to a buttered pie plate and prick it a few times with a fork.

11. Fill the pie with the apple filling (below), dot with the two tablespoons of cold butter and cover with the second crust. Crimp the edges together. Cut a few steam vents and sprinkle with turbinado sugar.

12. Bake on 425F for 30 minutes; then, slide a baking sheet under the pie pan to catch the juices, turn the heat down to 350F and bake for another 30-45 minutes until the crust has browned and the juices are bubbling (I found this method in Joy of Cooking and the combination of temperatures, as well as baking in the lower third of the oven, produces a perfectly baked, non-soggy crust).

Continued after the jump...

Tuesday, July 7, 2009

Sweet Cherry Pie

Cherry Pie

If there is another vehicle in the world as perfect for showcasing cherries as is a flaky, delicious pie crust, I dare you to find it and show it to me. Oh, sure, there are clafoutis and jams and cobblers and coffee cakes, but after making my first cherry pie (indeed, my first pie) this weekend, I am firmly convinced that all these other things are just filler in case there's no time to make pie.

Cherry Pie

I didn't grow up here and I didn't grow up with pie, but when I took the golden, flaky, bubbling, fragrant pie out of the oven, with the red droplets of cherry juice and sugar swirling on the hot baking sheet, I knew that I had missed out on something very important. If food can be poetry, this is it - a deceptively simple, charming, loving and brilliant ode to the American culture.

Cherry Pie

Since this was my first time making a pie crust, I had no idea what to expect. And, not having had home-made pies very often, I still have no idea whether I got it right. I think that I could have made my dough flakier by handling it less, and I'm sure my technique was totally off. I didn't think the lattice did a very good job of holding in all the filling, so next time, I'll just go with a simple double crust. I'm sure there were other shortfalls that would prevent this pie from winning a pie contest. And yet, I can tell you for sure that this pie was the bomb. For real. Go and make it, people. This is the BEST way to enjoy the cherry season other than just eating them straight.

Cherry Pie

Cherry Pie

Sweet Cherry Pie

Pie Crust - makes a double crust
(compiled from different recipes)
3 cups all purpose flour
2 1/2 sticks (10 oz) very cold or frozen unsalted butter
2 tablespoons sugar
1 teaspoon salt
3-5 tablespoons of iced water

Cherry Filling
(Joy of Cooking)
5 cups pitted cherries (about 2 1/2 lbs unpitted)
3/4 cup sugar for sweet cherries or 1 1/4 cup for sour cherries
3 to 3 1/2 tbsp. cornstarch or quick-cooking tapioca
2 tablespoons water
1 tablespoon fresh lemon juice
1/4 teaspoon almond extract (optional)

Make the crust: Whisk together the flour, sugar and salt in a large bowl. Quickly cut the cold butter into small pieces (I cut each stick into 16 pieces). Make sure to keep all ingredients cold, even if that means stopping and sticking things in the refrigerator for 5 minutes or so to cool off.

With a pastry cutter, cut the butter into the flour mixture until the largest piece of butter is no bigger than a pea. Sprinkle 2-3 tablespoons of water on top and mix gently with a fork. If pieces of the dough stick when you pinch it between your fingers, it's good - if not, add more iced water, one tablespoon at a time until the dough holds together. Turn it out onto a floured surface and knead briefly to incorporate the dry ingredients, if any. Divide in half and form each half into a disc. Wrap each disc in plastic wrap and refrigerate for 1 hour to overnight.

Remove from the refrigerator and leave on the counter for at least 10 minutes to allow the dough to come to room temperature. Butter or spray a pie pan. On a well-floured surface or between two sheets of plastic wrap, roll out two rounds, about 12 inches each. Fit one of the rounds into the pie pan and cut away excess dough, leaving a little on the edges for crimping. Refrigerate both the pie pan with the bottom crust and the rolled out top crust.

Make the filling: While the crusts are refrigerating, pit all the cherries and place them in a large bowl. Sprinkle the sugar and cornstarch over the cherries and then pour the water and lemon juice on top. If you wish, add the almond extract. Gently mix until no trace of sugar or cornstarch remains. Leave for 15 minutes and then drain the cherries of most of the liquid.

Assemble the pie: Pour the cherries and the remaining liquid into the prepared crust. Fit the second crust on top of the cherries and either prick it all over with a fork or cut several vents in it. Or, you can make a lattice by cutting the crust into thin strips and fitting the strips over the top crust in a lattice pattern (like so).*

Turn the oven to 425F and fit a rack to the lower third of the oven. Put the pie dish onto a baking sheet lined with foil or parchment paper (to catch the juices) and bake for 15-20 minutes. Then, turn down the heat to 350F and bake for a further 45-60 minutes or until the top is golden brown and the juices are bubbling. Cool on a rack for several hours and serve with ice cream.

*At this point, the pie can be frozen for up to several months (flash freeze and then wrap it very very well). To bake a frozen pie, turn the oven to 450F and bake the pie on the lower rack for 15-20 minutes, then turn down to 375F and bake it for a further 45-60 minutes or until the top is golden brown and the juices ar bubbling.

Continued after the jump...

Sunday, April 12, 2009

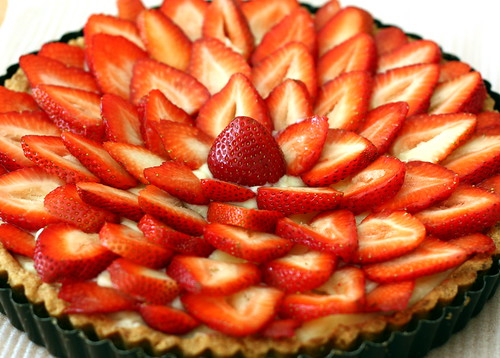
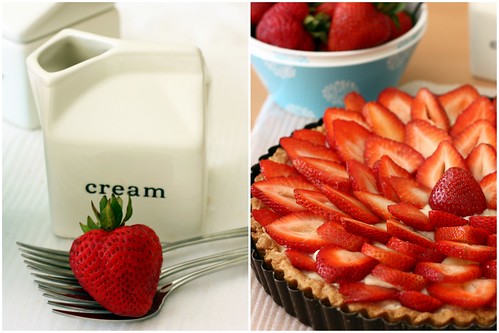
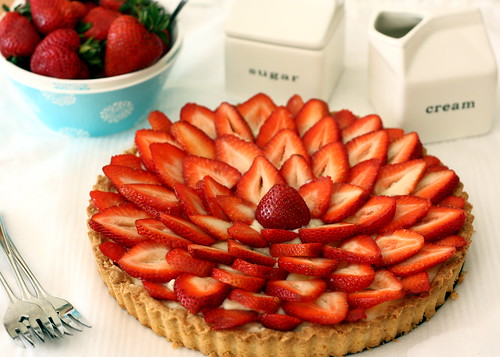
Fresh Strawberry Tart

There are times when you need to throw subtlety out the window. There are times when all that matters is glamor inside and out - a little red dress instead of a black one, sparkly eye-shadow, high heels, a bit of lace peeking out and lots of lip gloss. You know what I'm talking about, I know you do. I'm talking about a strawberry tart.

Maybe it's all the sunshine and fresh air and maybe it's just me, but I felt daring this morning - daring and bold. My mind was occupied by one thought alone - juicy red strawberries resting on silky smooth pastry cream enclosed by a light shell of pate sable baked to the perfect shade of sweetness. There is joy in every part of this tart, a spring song waiting to be sung, a celebration. It's like that little red dress that fits you oh, so perfectly. It's pure indulgence, pure pleasure. And this is the kind of pleasure you can gift freely, which is really the best part.


Fresh strawberry tart
1 fully baked sweet tart shell
1 batch pastry cream
1 lb strawberries

Fill the tart shell with pastry cream. Hull and slice the strawberries, reserving one perfect strawberry, and arrange in a circle on top of the pastry cream. Put the one reserved strawberry in the middle.

Sweet Tart Dough
(Dorie Greenspan's Baking: From My Home To Yours)

1 1/2 cups all-purpose flour
1/2 cup confectioner's sugar
1/4 teaspoon salt
1 stick plus 1 tablespoon (9 tablespoons; 4 1/2 ounces) very cold (or frozen) unsalted butter, cut into small pieces
1 large egg yolk

1. Put the flour, sugar and salt in the bowl of a food processor and pulse a few times to combine. Scatter the pieces of butter over the dry ingredients and pulse until the butter is coarsely cut in—you should have pieces the size of oatmeal flakes and some the size of peas. Stir the yolk, just to break it up, and add it a little at a time, pulsing after each addition. When the egg is in, process in long pulses—about 10 seconds each—until the dough, which will look granular soon after the egg is added, forms clumps and curds. Just before you reach this stage, the sound of the machine working the dough will change—heads up. (Alternatively, put the ingredients into a large bowl and cut the butter into the flour with a pastry cutter and then mix in the egg with a fork). Turn the dough out onto a work surface and, very lightly and sparingly, knead the dough just to incorporate any dry ingredients that might have escaped mixing. [Irene's note: if the dough is too dry and does not come together, drizzle 1-2 tbsp of ice cold water, 1 tbsp at a time, just until you can pinch the dough together without it sticking to your fingers.]

2. To roll or press the dough into the pan: Butter a 9-inch fluted tart pan with a removable bottom.

* If you want to roll the dough, chill it for about 2 hours before rolling (unless you've used frozen butter and the dough comes out of the processor firm and cold, in which case you can roll it immediately). I find it easiest to roll this dough out between two sheets of plastic film – make sure to peel away the film frequently, so it doesn't get rolled into the dough.
* If you want to use the press-in method, you can work with the dough as soon as it's processed. Just press the dough evenly over the bottom and up the sides of the pan. Don't be too heavy-handed – press the crust in so that the edges of the pieces cling to one another, but don't press so hard that the crust loses its crumbly texture.

3. Prick the bottom with a fork four or five times. Freeze the crust for at least 30 minutes, preferably longer, before baking.

4. To fully bake the crust: Center a rack in the oven and preheat the oven to 375°F.

5. Butter the shiny side of a piece of aluminum foil (or use nonstick foil) and fit the foil, buttered side down, tightly against the crust. (Since you froze the crust, you can bake it without weights.) Put the tart pan on a baking sheet and bake the crust for 25 minutes. Carefully remove the foil. If the crust has puffed, press it down gently with the back of a spoon (or prick it with the tip of a small knife). Bake the crust for another 8 minutes or so, or until it is firm and golden brown, brown being the important word: a pale crust doesn't have a lot of flavor. Transfer the pan to a rack and cool the crust to room temperature.

Pastry Cream
(Tartine - awesome, awesome book)

2 cups whole milk
1/2 cup + 1 tbsp sugar
2 large eggs
4 tbsp unsalted butter
1/4 tsp salt
3 tbsp cornstarch
1 tsp vanilla extract

Pour the milk into a heavy saucepan. Add the salt, place over medium-high heat, and bring to just under a boil, stirring occasionally. Meanwhile, whisk together the cornstarch and sugar. Add the eggs and whisk until smooth (don't let the eggs and sugar stand together for too long or else the sugar will cook the eggs *so I've heard*).

When the milk is ready, slowly drizzle about 1/3 of the hot milk into the egg mixture, whisking continuously. Pour the egg-milk mixture back into the hot milk and continue whisking until the custard is as thick as lightly whipped cream, about 2 minutes. The mixture must come just to the boiling point (slow bubbles, not boiling vigorously, or you will curdle the eggs, yuk). Remove from heat and immediately pour through a sieve into a bowl. Stir in the vanilla extract. Let cool for 10 minutes, stirring occasionally. Cut the butter into 1 tbsp pieces and whisk into pastry cream 1 tbsp at a time until smooth.

Cover the bowl with plastic wrap, pressing directly onto the top of the cream to prevent a skin from forming and put in the refrigerator to cool.

Strawberry on Foodista

Continued after the jump...

Tuesday, February 17, 2009

Strawberry Frangelico Tart

One of my favorite places in the world is Italy. When I was nine and my parents were making the staggering move from Russia to the United States, with two children and elderly parents in tow, we had to stay in Italy for six months to wait for our visa. At first, with the help of an American Jewish organization, we were housed in an old gray villa, where the paths crunched with gravel and the tall windows let in the cold spring wind. Eventually, though, we found a little house all of our own, in a town called Nettuno - a little seaside retreat an hour south of Rome. Nettuno was heaven for us kids. While our parents worked, we ran around the neighborhood, peering (discreetly, of course) into windows of strange shops, smelling the wonderful ciabatta bread which had a hard, crackly crust and soft insides. We watched the procession of colorful characters on the boardwalk and there always seemed to be something going on, music playing just around the corner and red, green, blue confetti flying through the air. That's how I remember Italy during that time, a whirl of confetti and the feel of warm bread breaking beneath my fingers.

Our neighbors - an Italian family - had a house which seemed to us (coming from a tiny apartment) the height of luxury. There were two little girls, too - Valentina and Federica. Valentina was the oldest - nine, just like me, and despite me not speaking any Italian and her not speaking any Russian, and neither of us really speaking more than four words of English, we got on swimmingly, and not a few months passed before we were tyrannizing our younger sisters and deciding matters of national importance, like who would play with which doll. Their parents made us our first ever pizza - a rectangular one, of course, with fresh tomatoes, mozzarella and basil layered on the thin crust, and my grandmother made them a cake that said 'grazie.' Their house was always full of people - friends, cousins, neighbors - and I think they didn't mind the addition of two timid girls who probably did unspeakable horrors to the beautiful Italian language. Whenever I get sad or lonely, I think about them and those beautiful months playing in the sunshine in Nettuno and drawing pictures that said 'ciao' when we only meant to say 'until we meet again.'

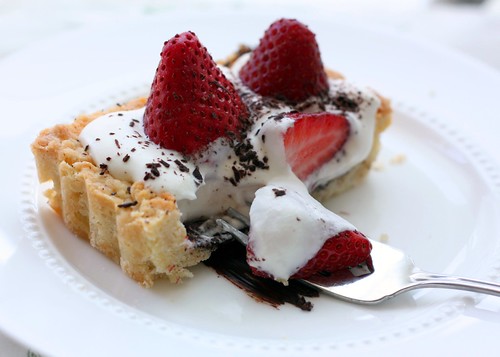
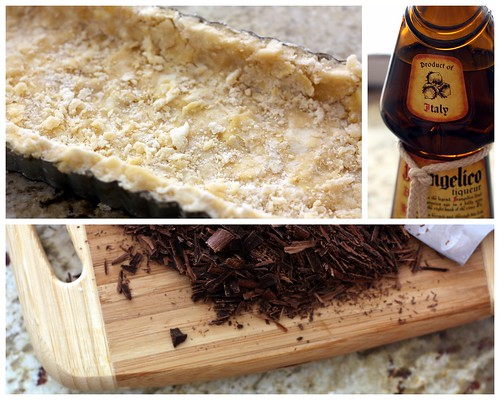
This strawberry tart with Frangelico somehow makes me feel closer to that time and I wanted to share it with you. It's also full of color and fragrance and uses two of my favorite Italian ingredients, mascarpone cheese and Frangelico (and, well, Nutella isn't so bad either). At a time when rain beats against my window, I want to wrap myself in my memories like in a warm blanket and bring back the smells of Italy.


Strawberry Frangelico Tart

One fully baked sweet tart shell

Filling:
3/4 cups heavy whipping cream, very cold
1/2 cup mascarpone cheese, softened and at room temperature
2 tablespoons sugar (for lightly sweetened, or more to taste)
1-2 tablespoons Frangelico (Italian hazelnut liquor)
2-3 tablespoons Nutella (OR 2-3 oz chocolate, finely chopped)
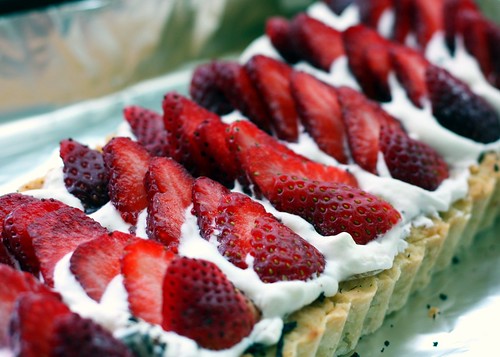
1 lb strawberries, hulled and halved (I think sliced in half would be best, though as you can see I tried it with whole strawberries first and then I sliced them thinly)

Bake the crust fully. When you remove the crust from the oven and it is still warm, spread the Nutella or chopped chocolate (whichever one you are using) on the bottom. If you are using chocolate, the chocolate will melt - this is a good thing. Set the crust aside to cool to room temperature.

Next, whip the cream with sugar to soft peaks (there are varying philosophies on how to do this, but I usually start on medium-high speed and once there are some air bubbles, I add the sugar and continue whipping on medium-high). Fold in the Frangelico, one tablespoon at a time, depending on how boozy you want it to be. Add the mascarpone cheese and continue whipping on medium until the mascarpone is incorporated and the cream is thick but not completely stiff.

Spread the cream inside the crust and top with strawberries. I also sprinkled some grated chocolate on top.

Continued after the jump...

Sunday, December 21, 2008

Honey, I Shrunk the Apple Tart

Sometimes, I get writer's block. Not so much for this blog, but for my other creative writing endeavors (no, don't ask, you would just laugh!). I sit and write, and then delete paragraphs and write again, and it just feels all wrong. I'm sure you know the feeling. And then, when I'm almost desperate with frustration, and I know what I want to say but the words just won't come, I take a crayon and color outside the lines -- I change up the perspective, I put myself in a different character's shoes, and voila, it begins to flow.

The same kind of thing happened with this tart. I made the full size version twice, and both times (though I got rave reviews on the taste), I just wasn't feeling it. Then... oh yes, you know what comes next... came these little 4" tarts. And people, I tell you, it was fabulous, and it sang to me as only a perfect dessert can sing. The crust is thin and crisp and the apples are tender and fragrant, and it's just the perfect size. I'm in love... with a tart.


The recipe (and mouthwatering photos) can be found at Smitten Kitchen.

The recipe yields four 4" tartelettes. For these, it's best to use smaller apples that will stay firm, like golden delicious. Once I made and chilled the dough, I divided it into four parts and rolled each piece out into a 6 inch circle between two sheets of wax paper. I put the rolled out dough into the freezer for a few minutes before transferring to the tartelette pans (this is a great trick that I learned from a pastry chef -- this way, you can transfer even the thinnest crust without ripping it).

Continued after the jump...

Saturday, November 8, 2008

Apple Tart Bread

It will come as no surprise that I find baking to be very therapeutic. Especially, when I bake in the morning and the light in my kitchen is bright and golden and the house is quiet, quiet except for the rustle of leaves outside or the quick spatter of someone's footsteps. I don't get to do this often (unfortunately, my full time job intrudes), but when I do, I treasure it. It's my time, as much mine as I can make it. The magic that happens here is mine alone and mine to share.

I hope you are not yet sick of apple cakes, because I am offering another one from this website that has quickly become one of my favorites since I discovered it a short time ago. What I really wanted to do was make an apple pie. However, I have sort of a phobia of apple pies and I have never baked one before, and that morning was not the one for experimenting. You see, even though I have spent most of my life in this country, my genes are European and I just don't know what a true American apple pie is supposed to taste like. I do not have that innate sense of rightness or that intuition that most people have when cooking a dish native to their ancestors' land. Some day, I will research and tackle this project (or just shoot from the hip and make the first recipe that sounds good to me), but the morning I baked this, I felt a tug of nostalgia and I wanted something that tastes familiar, something I could smell even before the first flour was sifted or the first apple was cut.

All I can say is that this cake is a delight and you must -- no, really, you must -- make it. It is everything that is rustic and yet elegant, complex and simple, tasting of mellow October sun and apple orchards heavy with ripened fruit. It's the kind of cake where you think "will all these apples really fit?" but fit they do, and gloriously so. I would make it again and for every occasion. Slicing the apples thinly gives it the softness and delicacy of French apple tarts, but the robust batter (which, by the way, tasted amazing) provides a nice, comforting heft. I am completely in love with this cake.

Apple cake 2

The Knead For Bread Apple Tart Bread

1 1/2 cups all purpose flour
1 1/2 teaspoons baking powder
pinch of salt
1/2 teaspoon cinnamon
2 large eggs
1/2 cup sugar
1/2 cup melted butter
1 teaspoon vanilla extract
3.5-4 large apples or 5 smaller ones
Confectioners' sugar for dusting

Peel and core your apples, and then slice them thinly. Prepare an 11 inch tart pan and turn the oven to 350F. If you don't want the apples to brown, you can squeeze some lemon juice over the apples (but there is no need here, as the apples will go into the batter anyway).

Sift the flour, baking powder, salt and cinnamon into a small bowl. Melt the butter and leave it to cool. In a large bowl combine the eggs and sugar. Using a mixer mix on high speed for three minutes. The mixture will become pale and thick.

Add in the slightly warm melted butter and vanilla extract. Mix until well blended. Add in the sliced apples and stir until the apples are coated. Add in the sifted dry ingredients and mix until the flour in incorporated.

Pour into the prepared tart pan and place into the preheated oven for 50-55 minutes. Remove from the oven and cool on a wire rack. Once cooled, dust with confectioners' sugar. I think this tastes the best when warm, and I would not be averse to trying it with some whipped cream next time.

Continued after the jump...

Tuesday, October 14, 2008

Alsatian Apple Tart


I know I talk a lot about my family on this blog. That's because they make up such a huge part of my life, and frankly, I wouldn't have it any other way. A. and I, my parents, several of my aunts and uncles, a few of my cousins and my grandparents, we all live within a square mile radius. Ours is a crazy family -- loud, in each other's business all the time, talking, eating, laughing, arguing, and eating some more. Sometimes, I want to move away to Iceland. Most days, however, I count my blessings because these are some of the best and most important people in the world to me, and I am very lucky to have them around (even though, oh boy, do we ever annoy the crap out of each other sometimes... and also, Iceland -- it's kinda far).


But this post, it's really about my grandmother. She's the matriarch, the Grandmother with the capital G. She's really not like other grandmas, oh no. From the outside, she looks like a sweet, little old Jewish lady, but inside, she's tough, clever, funny and she is very protective of us all. She doesn't like children and she doesn't like outsiders, but for us -- HER children, grandchildren and great-grandchildren, and appropriate significant others -- she's ready to slay dragons. She rules us all with an iron fist in the proverbial velvet glove, and almost nothing happens without "calling grandma" and getting her approval. My grandma raised two kids -- ALONE -- in post-WWII Russia. After her husband died, she did not remarry because she didn't want her children to have another father. She worked two jobs, one of them in a factory, and she raised two of the most brilliant, amazing women I know, my mom and my aunt. She kept her religion -- underground -- even though the Communist Party told her for her entire life that there is no God. And all this comes in an adorable little package that wears red lipstick and Elizabeth Taylor perfume. It's no wonder that she's something of a living legend in my family and that our love for her is boundless.


Every year, we meet at her house to break the fast after Yom Kippur, and my grandma makes a dizzying array of dishes. She never allows anyone to help her cook (she's notoriously and annoyingly secretive about her recipes) and she never asks anyone to bring anything. It's not because she's trying to be nice and spare you the work -- no, it's because she probably won't like your cooking. I told you, she's not like other grandmas! Imagine my surprise (well, to be accurate, I almost fell off my chair) when I got a telephone call from her asking me to bring "that apple tart you made a few weeks ago." I had to ask her to repeat it twice, just because I wanted to hear it again. It wasn't about vanity. I felt like she was choosing me to continue her traditions, like she was trusting me with something very important. I had made this apple tart before and had given her half, and I put my heart into making it this time. It's very simple, with an earthy, sweet flavor and a delicious aroma of vanilla and baked apples, and it goes really well with home-made whipped cream or vanilla ice-cream. I don't know what it was that my grandma liked so much about it, but that wasn't the point. She patted my hand proudly and beamed at me at the end of the meal, and I felt really, really good.


Alsatian Apple Tart
(adapted from Dorie Greenspan)

1 Sweet Tart Dough crust, partially baked (to partially bake, just omit the extra 10 minutes of baking described in step 5 after the link)

For the filling:
1 pound medium sized sweet apples
1 cup heavy cream
6 Tb. sugar
1 egg
1 egg yolk
2 Tbsp pear brandy (optional)

Preheat the oven to 374F. Peel, core and slice the apples thinly. Layer the apples in a circle on the bottom of the crust, filling in the middle. Make a second layer on top of the first layer. In a bowl that would be easy to pour out of, mix the eggs and sugar, add the cream and, if using, the brandy. Pour on top of the apples and bake at 375F for 50-55 minutes.

You can finish it off with some confectioners' sugar or glaze with apricot jelly. Because it was the Jewish New Year, I glazed the apples with a bit of honey for a sweet and joyful year. Many happy wishes to everyone!

*Note* Dorie's recipe says to use 3/4 cup of cream, but I found it not to be enough, so I use 1 cup. Also, the filling will puff up a bit, but don't worry, it will come back down when the tart is cooled. I like this at room temperature with slightly sweetened whipped cream.

Continued after the jump...

Saturday, September 13, 2008

Afternoon Tea, Part I - Fruit Tartlets


I am an unabashed Anglophile. This will come as no surprise to many, I'm sure, as I don't even pretend to hide it. I have to confess to loving England, London especially, British literature and history, TV shows and humor, cozy mysteries set in small English villages, all the lads on the Liverpool football team, and I even have a soft spot for London fog and rain because I once saw it from a floor-to-ceiling window overlooking Hyde Park, and it was an unforgettable experience. I love that one Londoner, in an irreverent and yet sweetly possessive manner, once described the Queen Mother to me as "an old biddy" who "likes her gin." I also love the fact that you can now get from London to Paris in under three hours, but that's a whole other story.


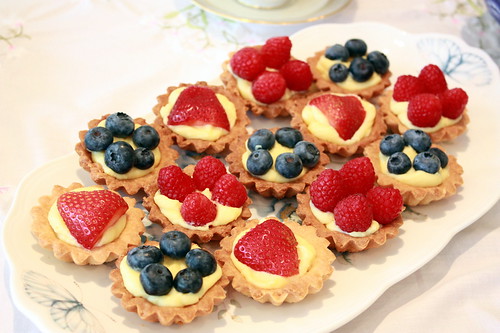
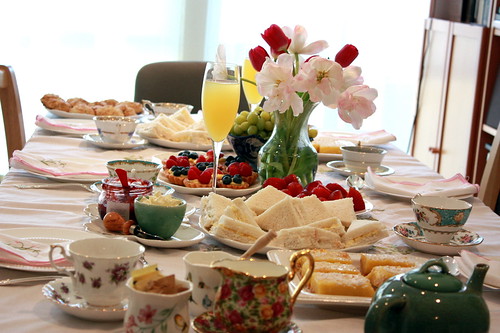
Most of all, I love afternoon tea. There is something magical about taking a break around 4 or 5 in the afternoon to drink fragrant tea and eat little bits of delicious things. It's fortifying, for the body as well as for the soul. Of course, working full time puts somewhat of a damper on the regular exercise of this charming habit, but when I do get to have afternoon tea, I like to make it a little special. Like, special with Mimosas. I'm pretty sure Mimosas are not authentic to afternoon tea, but ... what can I say? I had lemon bars, and oranges were feeling under-represented, so I had to allow them in, and then vodka just naturally followed. But, I digress. The star(s) of the show (besides the Mimosas) were these little tiny tartlets, inspired by tartlet molds I couldn't stop myself from buying at Sur La Table. So simple to make, and yet so delicious, their colorful presence at the table was much appreciated by everyone. If I hadn't hidden one or two for A. in advance, he wouldn't have gotten any. Speaking of A., an hour before the tea party, I overheard him on the phone with his friend: "My wife is having EIGHT WOMEN over for lunch and I HAVE TO GET OUT." He's lucky I'm the kind of wife who saves him food. Anyway! My point was that these babies are awesome and you will not regret making them for your next party, or just for yourself to enjoy on a quiet afternoon with a cup of tea.


The different components of these tarts can be made a day in advance and kept in an airtight container, to be put together at your leisure. I used raspberries, strawberries and blueberries, but pretty much any fruit will do. I also did not glaze them, but you can by melting a little apricot jelly in the microwave and brushing over the top of the fruit.

Sweet Tart Dough

(Dorie Greenspan)

1 1/2 cups all-purpose flour
1/2 cup confectioner's sugar
1/4 teaspoon salt
1 stick plus 1 tablespoon (9 tablespoons; 4 1/2 ounces) very cold (or frozen) unsalted butter, cut into small pieces
1 large egg yolk

1. Put the flour, sugar and salt in the bowl of a food processor and pulse a few times to combine. Scatter the pieces of butter over the dry ingredients and pulse until the butter is coarsely cut in—you should have pieces the size of oatmeal flakes and some the size of peas. Stir the yolk, just to break it up, and add it a little at a time, pulsing after each addition. When the egg is in, process in long pulses—about 10 seconds each—until the dough, which will look granular soon after the egg is added, forms clumps and curds. Just before you reach this stage, the sound of the machine working the dough will change—heads up. (Alternatively, put the ingredients into a large bowl and cut the butter into the flour with a pastry cutter and then mix in the egg with a fork). Turn the dough out onto a work surface and, very lightly and sparingly, knead the dough just to incorporate any dry ingredients that might have escaped mixing.

2. To roll or press the dough into the pan: Butter a 9-inch fluted tart pan with a removable bottom.

* If you want to roll the dough, chill it for about 2 hours before rolling (unless you've used frozen butter and the dough comes out of the processor firm and cold, in which case you can roll it immediately). I find it easiest to roll this dough out between two sheets of plastic film – make sure to peel away the film frequently, so it doesn't get rolled into the dough.
* If you want to use the press-in method, you can work with the dough as soon as it's processed. Just press the dough evenly over the bottom and up the sides of the pan. Don't be too heavy-handed – press the crust in so that the edges of the pieces cling to one another, but don't press so hard that the crust loses its crumbly texture.

3. Freeze the crust for at least 30 minutes, preferably longer, before baking.

4. To fully bake the crust: Center a rack in the oven and preheat the oven to 375°F.

5. Butter the shiny side of a piece of aluminum foil (or use nonstick foil) and fit the foil, buttered side down, tightly against the crust. (Since you froze the crust, you can bake it without weights.) Put the tart pan on a baking sheet and bake the crust for 25 minutes. Carefully remove the foil. If the crust has puffed, press it down gently with the back of a spoon (or prick it with the tip of a small knife). Bake the crust for another 8 minutes or so, or until it is firm and golden brown, brown being the important word: a pale crust doesn't have a lot of flavor. Transfer the pan to a rack and cool the crust to room temperature.

Pastry Cream

(adapted from Dorie Greenspan)

2 cups whole milk
1 tsp vanilla extract
6 large egg yolks
1/2 cup sugar
1/3 cup cornstarch, sifted
3 1/2 tablespoons (1 3/4 ounces) unsalted butter, softened and cut into 3 pats

1. Bring the milk a boil in a small saucepan over medium heat.

2. Whisk the yolks, sugar, and cornstarch together in a heavy-bottomed medium saucepan. Whisking constantly, drizzle one-quarter of the hot milk over the yolks. When the yolks are warm, whisk the remainder of the milk into the yolks in a steadier stream.

3. Put the pan over medium heat and, whisking vigorously, bring the mixture to the boil. Keep at the boil—still whisking energetically—for 1 to 2 minutes before pulling the pan from the heat and pressing the cream through a sieve into the small bowl. Stir in vanilla extract. Let the cream sit for 5 minutes, then whisk in the butter. Cover the cream with a piece of plastic wrap—press the wrap against the cream—and refrigerate until thoroughly chilled. You can speed up the chill by putting the bowl in a larger bowl filled with ice cubes and cold water. (Keeping: Covered tightly with plastic wrap, pastry cream can be refrigerated for 2 days. To smooth the chilled cream, whisk it for a few seconds.)

Continued after the jump...

Monday, April 7, 2008

Frutiest Fruit Tart


Spring is here! Yes, the morning mists are still cold and depressing, and the thermometer barely makes it past 60, but I can tell you absolutely and unequivocally that "it" has finally come, with all its unmistakable sounds and smells and the unrestrained joy of music. The bare branches of the tree outside of my window were covered with tender green buds one day, and the next, there was a virtual explosion of a thousand different shades of color so bright, your eyes hurt to look at it -- it seems like spring came overnight this year. I pity you, those unlucky cities where Spring is still flirting capriciously with good weather. In my city, the flirtation has developed into a full fledged romance, an affair of Humphrey Bogart and Lauren Bacall proportions that sweeps every old vestige of winter away like old cobwebs. In short, goodbye, my November guest. Take your clinging silver mist and retire for another year in dignified silence. This is a time for new tastes, new colors, new life.


To celebrate spring, I made my very first ever fruit tart. Now, you must know that fruit tarts are my all time favorite dessert. Especially wee little ones, that I just think are so cute and adorable, with the not-low-fat-fantabulous pastry cream, the crumbly sweet crust and the taste overdose of fresh fruit. And I live within minutes of a French bakery that makes ooh la la fruit tarts. So it is no surprise that I've been too intimidated to make my own. It's like a date with your favorite movie star -- if it goes badly, your fantasy will be ruined forever (Christian Bale, call me. I'll take my chances with the ruined fantasy). However, I am not one to shrink from my fears, and the arrival of my Dorie Greenspan cookbook gave me hitherto unknown courage and a foolhardy optimism in my abilities. I love Dorie, and not only because she shares a last name with Alan Greenspan.


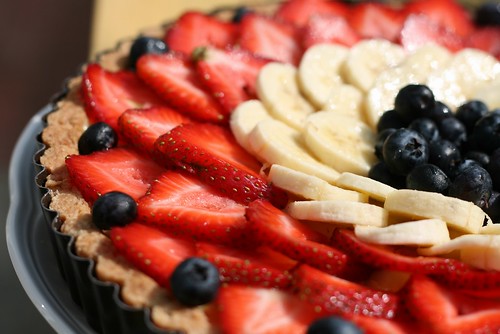
You may remember that last time I made pâte sucrée, it shrank on me like ... well, I'll let you pick your own analogy, but I'm sure you can imagine what I'm thinking. This time, I decided to entirely put my fate in Dorie's capable hands, and wow, let me tell you guys, it was a revelation. I followed the instructions to the T, using the "press in" method, and my crust DID NOT SHRINK. Yeah. Maybe it's the spring air that gave it staying power? Maybe it's my magic touch? (I suspect it's the freezing it for 1/2 hr, but please be kind and let me imagine the best). I also made her pastry cream and really, there is only one way to describe it, and the word is decadent. Juicy, crisp strawberries straight from the market, bananas salvaged from the refrigerator and tart blueberries finished off my creation. I gotta say, I was pretty proud of myself, and when we cut the tart, I was even prouder for it was amazing, although I think the credit goes all to Dorie's fantastic recipes. Hello and welcome to my bookshelf! I'll stop gushing now. Seriously, though - make the tart. It tastes like Spring is finally here, and that's the best I can say about any dessert.


I didn't futz with the recipes this time (I was too much in awe), but these have been reproduced a number of times on the web, and Dorie Greenspan likes people making her recipes, so I don't feel bad re-printing them here. Really, if you think about it, it's a service to humanity, because fruit tarts just make people happy. Don't let the length of the recipe fool you, it's really quick and easy. I made the pastry cream the night before (a breeze) and let it chill overnight.

Ingredients:
1 fully baked sweet tart crust (recipe below)
2 cups (approx.) pastry cream (recipe below)
8-10 oz strawberries, hulled and sliced
1 banana
6 oz blueberries

Bake the crust and let it cool to room temperature. Make the pastry cream and chill it (preferably the night before), and then spread chilled pastry cream inside the tart shell. Arrange fruit on top. Yeah, it's that easy.

Dorie Greenspan's Sweet Tart Crust
1 1/2 cups all-purpose flour
1/2 cup confectioner’s sugar
1/4 teaspoon salt
1 stick plus 1 tablespoon (9 tablespoons; 4 1/2 ounces) very cold (or frozen) unsalted butter, cut into small pieces
1 large egg yolk

1. Put the flour, sugar and salt in the bowl of a food processor and pulse a few times to combine. Scatter the pieces of butter over the dry ingredients and pulse until the butter is coarsely cut in—you should have pieces the size of oatmeal flakes and some the size of peas. Stir the yolk, just to break it up, and add it a little at a time, pulsing after each addition. When the egg is in, process in long pulses—about 10 seconds each—until the dough, which will look granular soon after the egg is added, forms clumps and curds. Just before you reach this stage, the sound of the machine working the dough will change—heads up. Turn the dough out onto a work surface and, very lightly and sparingly, knead the dough just to incorporate any dry ingredients that might have escaped mixing. Chill the dough, wrapped in plastic wrap, for about 2 hours before rolling.*

2. To roll the dough: Butter a 9-inch fluted tart pan with a removable bottom. Roll out chilled dough on floured sheet of parchment paper to 12-inch round, lifting and turning dough occasionally to free from paper. Using paper as aid, turn dough into 9-inch-diameter tart pan with removable bottom; peel off paper. Seal any cracks in dough. Trim overhang to 1/2 inch. Fold overhang in, making double-thick sides. Pierce crust all over with fork.

3. Freeze the crust for at least 30 minutes, preferably longer, before baking.

4. To fully bake the crust: Center a rack in the oven and preheat the oven to 375°F. Butter the shiny side of a piece of aluminum foil (or use nonstick foil) and fit the foil, buttered side down, tightly against the crust. (Since you froze the crust, you can bake it without weights.) Put the tart pan on a baking sheet and bake the crust for 25 minutes.

5. Carefully remove the foil. If the crust has puffed, press it down gently with the back of a spoon (or prick it with the tip of a small knife). Bake the crust about 10 minutes longer, or until it is firm and golden brown, brown being the important word: a pale crust doesn’t have a lot of flavor. Transfer the pan to a rack and cool the crust to room temperature.

Storing: The dough can be wrapped and kept in the refrigerator for up to 5 days or frozen for up to 2 months. While the fully baked crust can be packed airtight and frozen for up to 2 months, the flavor will be fresher bake it directly from the freezer, already rolled out–just add about 5 minutes to the baking time.

* Alternate press-in technique: If you want to use the press-in method, you can work with the dough as soon as it’s processed. Just press the dough evenly over the bottom and up the sides of the pan. Don’t be too heavy-handed–press the crust in so that the edges of the pieces cling to one another, but don’t press so hard that the crust loses its crumbly texture.

Dorie Greenspan's Pastry Cream
2 cups whole milk
6 large egg yolks (I'm going to use a few less next time to cut some calories)
1/2 cups sugar
1/3 cup cornstarch, sifted
1 1/2 teaspoons pure vanilla extract
3 1/2 tablespoons unsalted butter, cut into bits at room temperature

Bring the milk to a boil in a small saucepan.

Meanwhile, in a medium heavy-bottomed saucepan, whisk the egg yolks together with the sugar and cornstarch until thick and well blended. Still whisking, drizzle in about 1/4 cup of the hot milk– this will temper, or warm, the yolks so they won’t curdle. Whisking all the while, slowly pour in the remainder of the milk. Put the pan over medium heat and, whisking vigorously, constantly and thoroughly (making sure to get the edges of the pot), bring the mixture to a boil. Keep at a boil, still whisking, for 1 to 2 minutes, then remove the pan from the heat.

Whisk in the vanilla extract. Let sit for 5 minutes, then whisk in the bits of butter, stirring until they are full incorporated and the pastry cream is smooth and silky. Scrape the cream into a bowl. You can press a piece of plastic wrap against the surface of the cream to create an airtight seal and refrigerate the pastry cream until cold or, if you want to cool it quickly–as I always do–put the bowl into a larger bowl filled with ice cubes and cold water, and stir the pastry cream occasionally until it is thoroughly chilled, about 20 minutes.

Continued after the jump...

Wednesday, February 20, 2008

Lemon Meringue Tart


Lessons Learned From Baking Today's Lemon Meringue Tart (a.k.a. A Comedy Of Errors):

1. There comes a time in every baker's life when the thought of using TWO sticks of butter in one recipe for tart dough won't send you into a dark corner to cry in a fetal position. Sometimes, you need to recognize that such a time has not yet arrived and stop fighting mental battles with yourself that make you seem like the crazy lady on the corner because you mutter butter measurements under your breath half the day.

2. Never, ever say snottily that your pate sucree never shrinks. First off, half the people won't understand what the heck "pate sucree" is, and secondly, you will have offended some sort of baking gods because the very next time you try to make a tart, your pate sucree will indeed slide down the sides of your tart pan and smirk at you from those lows, just to spite you.

3. Lemons are tart. Very tart. Also, they tend to squirt straight at you if you aren't paying attention while hand-squeezing the juice.

4. While whipped egg-whites aren't tart, they too tend to squirt all over the place if you carelessly spoon them into a pastry bag and squeeze without making sure all the air has gone out of the bag first.

5. Don't overload your tart with the lemon curd and then give it a good shove into the oven so that the lemon curd spills and drips into the most hard to clean places (are we seeing a pattern here?)

6. Clean up is a b***h, especially when it involves lemon juice, lemon curd and sticky meringue in big dollops all over your kitchen.

7. If you can't make your egg whites stand up hard and tall, it's the fault of your technique and not of the egg whites (*snicker*).

8. Even after everything goes incredibly wrong almost every step of the way, it is still possible that in the end, it will turn out oh, so right (at least this time).

I'm not going to tell you how delicious this tart was (and I say was because I have a feeling its life-span is going to be shorter than a fruit fly's). No, I'm not even going to mention what the subtle crunch of the almonds in the crust and the silky smooth tartness of the lemon curd did for our taste buds. I won't describe the clouds and clouds of light, sweet meringue. You simply have to make it and see for yourself because some things in life just defy description.

Lemon Meringue Tart*

For the pate sucree:
1 cup all-purpose flour
1/4 cup finely ground almonds
4 1/2 tsp granulated sugar
1/4 tsp salt
1 stick (8 tbsp) cold butter, cut into small pieces
1 large egg yolk
2 tbsp ice water

For the lemon curd:
3/4 cup granulated sugar (less if you like more tartness)
2 tbs all-purpose flour
pinch of salt
3 eggs, at room temperature
1/2 cup fresh lemon juice
3 tbsp heavy cream

For the meringue:
4 egg whites, at room temperature
1/2 tsp cream of tartar
pinch of salt
1/2 tsp vanilla extract
1/2 cup granulated sugar

First make the crust. It's important here that all ingredients are kept as cold as possible so that the crust is nice and flaky, so if you aren't using something, put it in the refrigerator until you need it. Whisk flour, sugar and salt until combined. Cut the butter into the flour mixture with a pastry cutter until mixture resembles coarse meal.

Lightly beat the yolk with ice water, and add this in a steady stream to the dough, incorporating with a fork until dough just holds together. If the dough is too dry, add one teaspoon at a time more of iced water, sprinkling it in until the dough just holds together. Turn out onto a work surface, shape into a disk, wrap in plastic and refrigerate for at least an hour (or up to 2 days). After an hour, take the dough out and roll it on a floured surface to the desired shape, making it a little larger than your tart pan(s). This recipe yields 1 standard sized crust or 4 smaller crusts.


Butter the tart pan(s) and gently press the crust into them, sealing the cracks. If you are afraid of shrinkage (*snicker*), make sure the dough ends a little higher than your tart pan's edge. Bake at 350F for 20-22 min or until the crust is golden. Cool completely.

Make the lemon curd. In a bowl, whisk together the sugar, flour and salt. Add the eggs, lemon juice and cream and whisk until just blended. Carefully pour the mixture over the baked crust.


Make the meringue. In a very dry and clean bowl, beat the egg whites with the cream of tartar, salt and vanilla extract until soft peaks form. Add the sugar a little at a time, beating until it forms stiff, glossy peaks. Put big dollops over the tart making sure it covers the edge of the crust (so the crust doesn't burn, and also so you can cover up any shrinking that has gone on despite you very best efforts to prevent it, gah). Bake for about 20-25 minutes or until meringue is golden. The filling won't be completely set at this point - you will need to bring the tart to room temperature and then let it chill in the refrigerator for a couple of hours.


*For this tart, I adapted several different recipes from all over the place (Martha Stewart, Williams-Sonoma, my own imagination, etc.). The only thing I would do differently next time is to completely pre-bake the crust (I only partially baked it) and also to make the meringue a wee bit less sweet. The lemon curd here is tart and sweet (if you like you can reduce the amount of sugar in the lemon curd also), so I would have wanted the meringue to be more about softness and texture than sweetness. I wrote the instructions according to how I would do it next time, but if you like, you can add an extra 1/4 cup of sugar to the meringue to make it sweeter.

Continued after the jump...

Tuesday, February 12, 2008

Small Tarts Have Big Hearts: Bartlett Tartlettes

I didn't acquire my first cook-book until shortly after I started law school. I have my mother to thank for that - despite having a varied and tasty repertoire, she always cooks from her own imagination (um, thanks for not passing that very useful talent along, mom... but I love you anyway). In college, the dorms either didn't have kitchens at all (we all have very fond memories of making pasta on a little heating pad in our rooms) or had the sort of kitchens the ovens of which burned even chocolate chip cookies. So you can say that I didn't begin my love affair with cooking until I was living in my own apartment and well embroiled in the intricacies of torts and the rule against perpetuities (*shudder*). Coincidentally (or not), I met my husband -- then boyfriend -- at around the same time, so perhaps the two (cooking and having someone to cook for) went hand in hand.
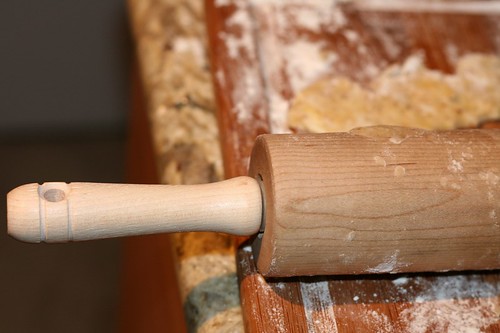
But back to my first cookbook. I remember picking it up, gently and hesitantly, in the bargain books section of Barnes and Noble. The title was simply "Baking," by Carole Clements. The book attracted me by being large, full of detailed instructions and color photographs, and by having recipes that used a basic, familiar list of ingredients (my rule back then was, if I can't pronounce it, I'm not going to cook it... ahh, how times have changed). The very first recipe I tried to make was the Peach Tart with Almond Cream. My friend and I got together one Saturday morning, put on our aprons and got ready to bake... only to discover that we didn't have: peaches, almonds, enough butter, a food processor (to grind the almonds), a rolling pin or a tart pan. Our first adventure in baking was getting off to a rocky and unpromising start. Needless to say, that particular tart didn't turn out so well. But, as they say, it was the beginning of a beautiful friendship.
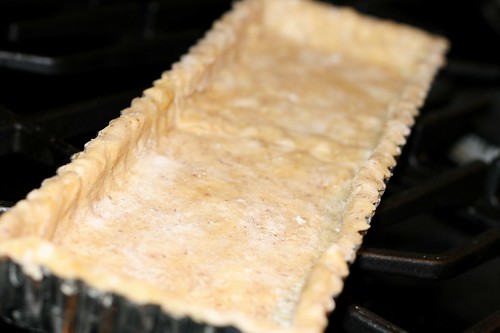
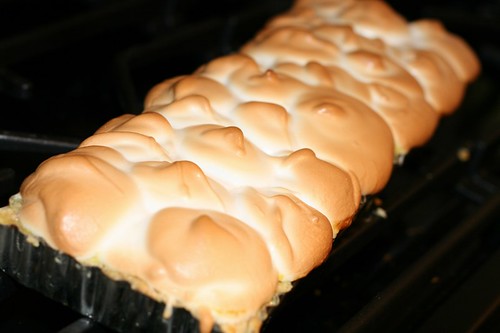
By a natural progression, when my recipe book became too stuffed with pieces of paper and tiny hand-written notes and butter crumbs, I started this blog. And yet, that first cook-book, like a first boyfriend, has kept a spot in my heart and on my bookshelf. Which is why, when I heard of the Small Tarts Have Big Hearts event hosted by two lovely ladies (and with a name like that, we here at Confessions of a Tart just had to participate!), I decided to finally do justice to that poor peach tart. However, fate has had the last laugh. I was walking past the anemic peaches in the fruit aisle when the faint delicate perfume of Bartlett pears enveloped me. It was decided -- the peach tart will have to wait until summer, and the Bartlett Tartlette was born!

Bartlett Tartlette
(adapted from "Baking" by Carole Clements)
For the crust:
1 1/4 cups flour
3/4 tsp salt
7 tablespoons cold unsalted butter, cut into 1/2 in. pieces
1 egg yolk
2 1/2 - 3 tbsp ice water
For the frangipane:
2-3 Bartlett pears
2/3 cup blanched almonds
2 tbsp flour
7 tbsp unsalted butter, at room temperature
1/2 cup plus 2 tbsp sugar
1 egg
1 egg yolk
1/2 tsp vanilla extract
For the pear syrup (optional):
pear skins
water
1/2 cup sugar

1. For the crust, sift flour and salt into a bowl. Cut the butter into it with a pastry cutter (I bought one of these recently and it changed my life, seriously) until the mixture resembles coarse crumbs and chunks of butter are no bigger than a pea. With a fork, stir in the egg yolk and just enough water to blend the dough. Gather into a ball, wrap in wax paper and refrigerate for at least 20 minutes.


2. Meanwhile, cut in half, skin and core the pears. If making the pear syrup, put the pear skins and cores in a small pot, pour water in until the whole thing is just covered, add 1/2 cup of sugar, bring to a boil and stir, and then reduce heat, cover and simmer for about 25-30 min to reduce to a thicker consistency. Strain and toss the pear skins/cores (or eat the skins, like I did - waste not, want not, right?). Put the pear halves in iced water so they don't brown.

3. While the syrup is doing whatever mysterious little thing it does, take out the dough and on a lightly floured surface, roll it out to whatever size tart pan (or tartlet pans) you are using. Butter the tart pan(s) and transfer the dough to it. Trim the edges, prick the bottom and refrigerate.

3. In a food processor, grind the almonds finely with the flour. Cream the butter and 1/2 cup of the sugar until light and fluffy. Gradually, beat in the egg and yolk. Stir in the almonds and vanilla.


4. Preheat the oven to 400F. Spread the frangipane in the pastry shell. Slice the pears thinly and arrange on top of the tart, fanning out the slices of each pear.

5. Bake until the pastry begins to brown, 10-15 minutes. Lower the heat to 350F and continue baking until frangipane sets, about 15-20 minutes more. Ten minutes before the end of cooking time, sprinkle with the remaining 2 tablespoons of sugar (total for either one big tart or all of your small tartlets). If you made the pear syrup, pour some over the tart(s) once you take them out of the oven.

Continued after the jump...